>
Showing posts with label Flat backed gems. Show all posts

Monday, February 04, 2019

Chevrons .....


Made a set of Inchies for a swap over on UK Stampers Forum .....

I used recycled cereal box packaging and punched out the 1 x 1 inch squares as a base. The background is made with Distress Oxides and I have stamped and coloured some Chevrons and heat embossed some arrows in white. I stamped the numbers in Versafine and edged with Chalk ink - adding a pink gem to finish.

If you fancy joining the Forum click HERE to go there ... it's free, friendly & fun ....

Sid xx

Pin It

Saturday, August 18, 2018

Be Bold .....


A 2.5 inch inspirational circular Fridge Magnet crafted from card. The outer circle is on Kraft card and is coloured with pink and purple dots. The inner circle is on a stamped background in purple and has been overlaid with an image of a dolls head and torso coloured with Alcohol Inks. The inspirational letter read 'BE BOLD' and the Fridge Magnet is embellished with multi-coloured glitter and pink gems. The circle has been edged in black !


The strong magnet on the back is thin and is made from Neodymium !

It is for sale in my Etsy Shop ..... click HERE to go have a look .....

Sid xx

Pin It

Thursday, August 17, 2017

Birdie Birthday .....


Made a birdie Birthday Card today .....

Started with a 6 x 6 inch white card blank and made a panel using Distress Inks & Distress Oxides with stamps, stencils and sprays.  This was trimmed and matted on printed paper.  The bird was diecut from some card decorated with printed papers and assembled on foam pads on a branch which was stamped in Versafine black ink on the panel. His beak was coloured black and a black gem added as an eye.

Another panel was stamped with the sentiment and again matted and placed as shown on foam pads.

Some orange flat backed gems were added to finish the card.

Sid xx

Pin It

Saturday, May 05, 2012

One a Day


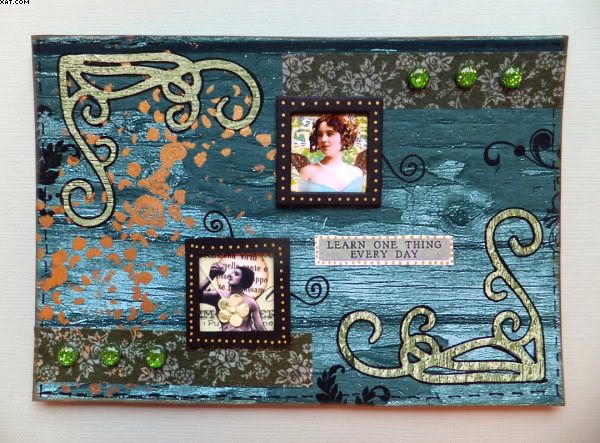
Here is a 3D postcard measuring 6 x 4 inches.  This one would be very challenged going through the post without losing some of its components in transit so this was done as part of a swap over on UK Stampers where we could send our dimensional postcards in an envelope or padded bag to preserve their art through the post.


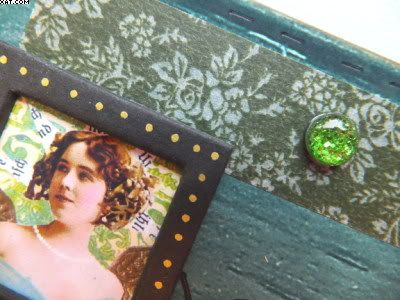
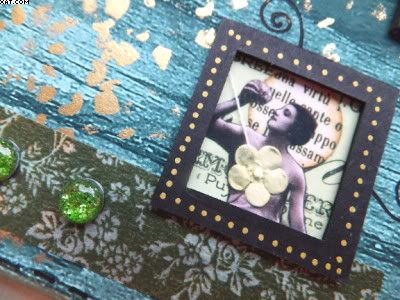
The background is of teal stained wood and is a digital print I have applied some Viva gold paint in splodges to the background also on the left.  This has been embellished with some black chipboard frames with inchies behind.  I have also done some flourish stamping in Memento tuxedo black.


The flourishes are die-cut using a Sizzix die and these have been edged with a black fineliner pen.  I have also used some moss green floral Washi tape, gold Posca pen and some gorgeous green flat backed cabochons.  Finishing touches were to add some Versamagic chalk ink in touch of pesto around the edge and some faux stitches.

Nice sentiment as we all learn at least one thing each day don't we ?

Sid xx

Pin It

Thursday, April 26, 2012

Flower Box


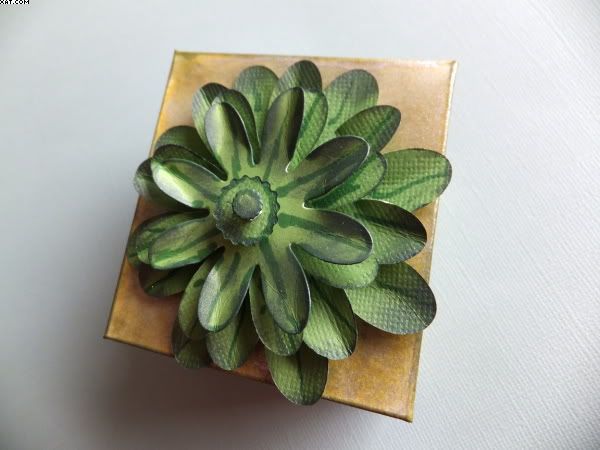
Here is a little box I made a while back during a green phase of mine.  The box is made from plain white card and is coloured with shabby shutters Distress Stains oversprayed with silver mica spray.  The sides are stamped with a swirl stamp and the same Distress Ink and embellished with flat backed gems in dark green and crystal. 


The top of the box was embellished with a series of die-cut flower layers cut from green card and coloured with markers and edged with darker green ink.  The layers were assembled with foam pads to add dimension.

Simple project and suitable as an entry into the Pan Pastels Challenge Blog which this time is 'add a flower'.

Sid xx

Pin It

Monday, April 16, 2012

Making Waves


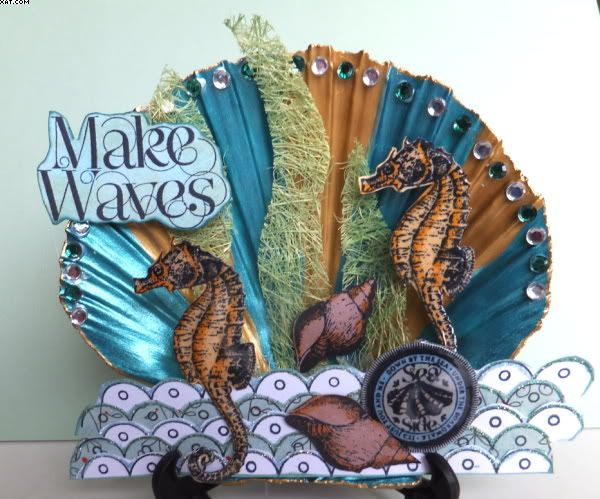
This has been in the making for a long, long time. The real scallop shell was decorated months ago and has sat around since then waiting for attention.  Because of the shells links with the sea I wanted to do some craft related to that environment so did this 3D scape.  All contained in its own shell home.

The shell was thoroughly washed and then painted with stripes in Viva precious metal colour in gold and turquoise.  It took a couple of coats to cover properly. The edges of the shell were then gone over with gold Krylon pen to neaten.  Some acrylic gems were adhered around the edge of the shell with more Glossy Accents and alternate gems coloured with the brush pen in green.


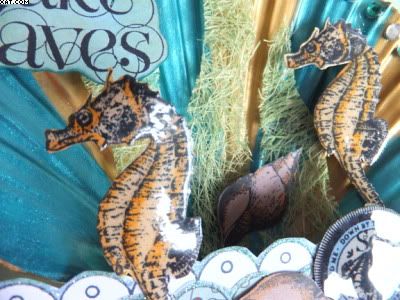
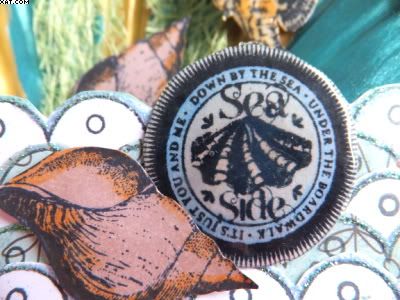
All stamped elements (apart from the waves) came from a plate of polymer stamps by Pink Paislee (Nantucket).  The shell, seahorse, word seal and words were all stamped on white card with Memento tuxedo black ink which were then coloured with Marvey alcohol brush pens before trimming out and edging with AI to cover white card edges.  A word seal and two seahorses were glazed with Glossy Accents.

The sea was made up from a border stamped multiple times on printed paper, trimmed and layered and edged with a Quickie glue pen and glittered with transparent blue water Art Glitter.


Some fused green sizal was cut into frond shapes before assembling and layering all elements as shown with hot melt glue to make a 3d seaside scene.

The shell has been supported for display using a plate holder.

It turned out just as I had envisaged it and it was great to use up that shell !!  You know what they say ......... 'Better Late Than Never'

It will also fit the challenge over on the Happy Daze Design Team blog this month which is 'April Showers' and the Simon Says Stamp & Show challenge which is 'Anything Goes'

Sid xx

Pin It

Thursday, September 15, 2011

All for You !!


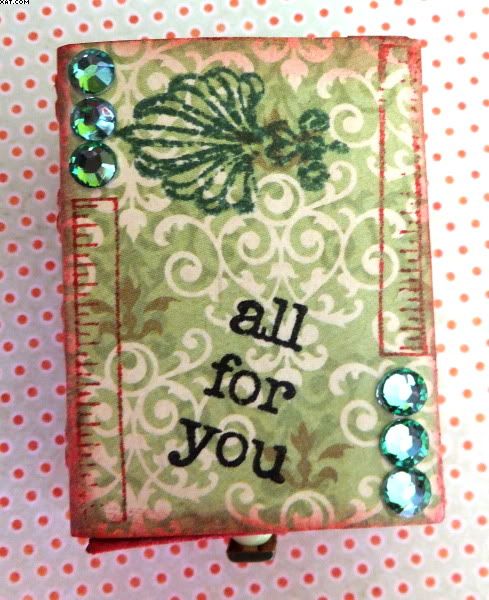
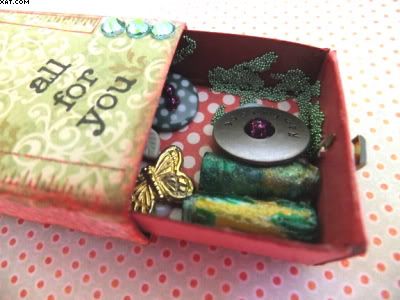
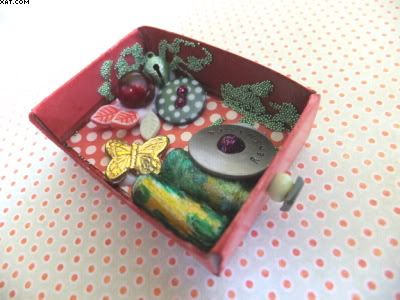
This little altered matchbox was done as part of a swap over on UK Stampers Forum.  The theme was freeform so I decided on a green and maroon colourway.  The contents of the box was decided upon 'on the hoof' and evolved as I looked at my stash of things to put in.


The box was first covered in a printed paper from Stella Rose - Mabel design adhered with tacky PVA glue.  Once applied I used stamps to add a mini ruler, a flourish and the words 'All for you' in fired brick, pine needles and Versafine onyz black.  All edges were finished with fired brick Distress Ink applied with cut'n'dry foam.  Some pale green flat backed gems were added to finish.

The inner matchbox tray was coloured on all sides with fired brick Distress Ink and the base of the tray lined with a spotty Mabel paper.


The handle on the front of the tray was made using a green square brad and a green seed bead used as a spacer.  The contents (homemade plastic beads, spotty button, red bead, leaves, gold metal butterfly, green jingle bell, pearl green micro beads and a metal washer with the word 'reminisce') were selected and stuck in place with Matte Medium and Glossy Accents.  Some maroon stickles were added to embellish.

Do hope the lady who receives it is pleased.

Sid xx

Pin It

Sunday, August 07, 2011

L'amour


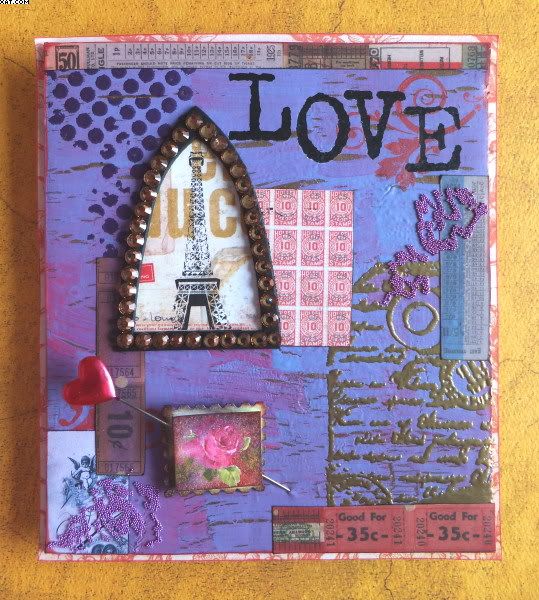
Not blogged for so long, just haven't had the time since coming back from holidays.  Managed some time today and made this self standing collage........... how satisfying that I have crafted after nearly 3 weeks !!

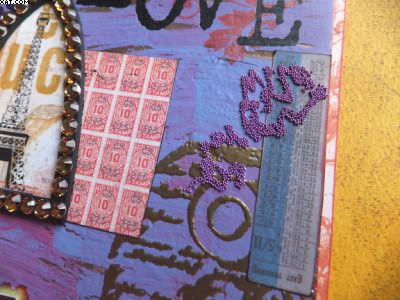
I had previously made the background from recycled corrugated card which I had given a crackle finish with a gold base coat. The general colourway was purple, red and gold as you can see.  The piece measures 6 x 5.5 inches and the background technique is described in this blogpost.


I then used a Tim Holtz background stamp of distressed dots stamped with Versamark ink and heat embossed with violet pearlescent embossing powder.  A polymer stamp of a tag was stamped in similar fashion but this time heat embossed with mirror gold EP.  I then stamped a couple of flourishes in red Versamagic ink.

I used a lot of elements cut from 6 x 6 - 7gypsies papers (Camden & Lille).  All elements were edged in black archival ink to give them definition.


The Eiffel tower frame was made from a black card arch frame ( Stewart Gill) backed with paper from  the Lille papers and embellished with amber flatbacked gems adhered with Glossy Accents.  The letters were applied as rub-ons (Making Memories)


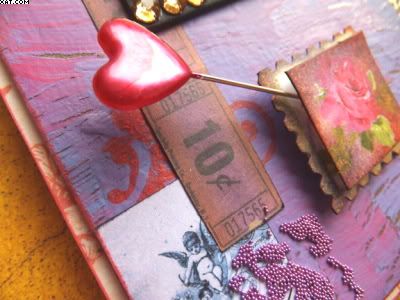
The remainder of the elements were stuck in place as shown.  The floral plate was stuck in place with a foam dot and pierced through with a heart-headed hatpin ( burying the sharp end in the corrugated background).

Some purple deco balls were added as shown with Glossy Accents.


The piece was then matted onto a piece of the Lille papers (they are double sided)  and the fold down stand (sizzix die cut out of cardboard) applied with glue to finish.

I like the colours of this piece and of course the bling too !

Sid xx

Pin It

Sunday, July 04, 2010

Paris Tag


This tag is number 24 in the Rolling Recipe Tag Challenge over on the new and upgraded UK Stampers Forum.  This weeks ingredients were:

1. Something shiny
2. Numbers
3. Paris


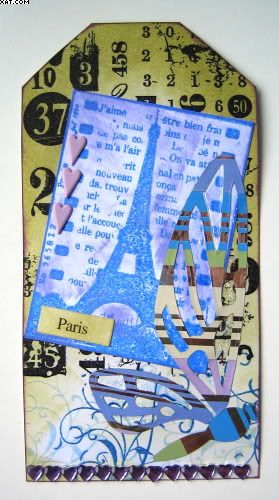
The tag was cut from white cardstock and a numbers background stamp (PaperArtsy) was inked with onyz black Versafine ink and stamped at the top of the tag.  I then took a swirls stamp (Trimcraft - My Minds Eye) and inked this with Memento ink in summer sky and danube blue and stamped randomly at the base.  The tag was then sponged with cut'n'dry foam and shabby shutters Distress ink.


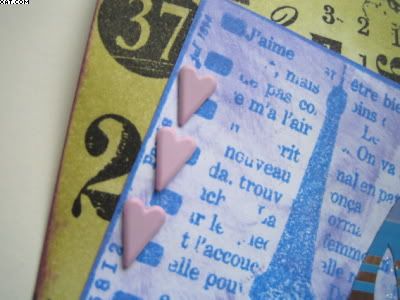
Next an Eiffel tower stamp from Paperartsy was inked with hydrangea blue Impress dye ink and the image stamped onto more white cardstock which was then cut out.  The image was coloured in the background with Versamagic pretty petunia chalk ink.  This plate was then stuck in place onto the tag as shown.

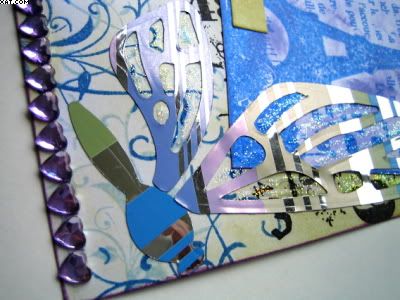
I had some sticky backed striped metalised border paper and I used this with the Big Shot and a Tim Holtz alterations fanciful flight die to cut out the body and two wings of the butterfly.  The backing was removed and the bits stuck in place.  The spaces in the wings were infilled with diamond Stickles glitter glue.


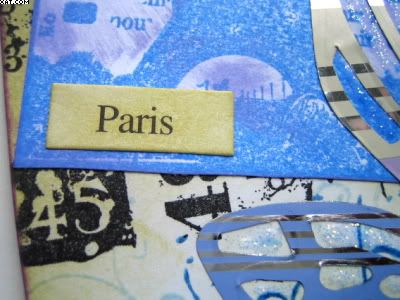
Final touches were added by applying three lilac heart brads, some flat backed lilac hearts at the bottom and the word 'Paris' which had been coloured with shabby shutters Distress Ink.

Sid xx

Pin It

Sunday, May 09, 2010

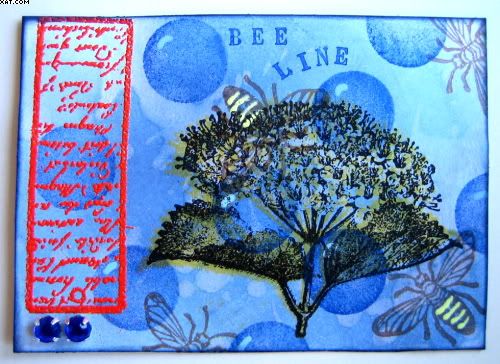
Bee Line ATC


Back to my beloved  blues on this buzzy ATC.  The background was made by applying Distress inks in chipped sapphire, tumbled glass & stormy sky with a piece of cut'n'dry foam onto white card.  This was then spattered with drops of water to mix and spread the background and was dried with a heat gun.

Next I used a solid circle foam stamp and Brilliance mediterranean blue ink and stamped several times over the background.  The bee was stamped with vintage sepia Versafine and the obdominal stripes coloured with yellow Souffle pen.  The hydrangea was inked first with dandelion Memento ink and then overstamped with onyx black Versafine.  The word plate was inked with Versamark and heat embossed with Blond Moments fresh satsuma iridescent embossing powder.  Some little reflections were added to the circles with blue Souffle pen (to give the impression of bubbles).  All stamps were from a clear set by Artemio (Belgium).

Two blue gems were adhered with glossy accents and the whole thing edged with iris blue Colorbox chalk ink.

Sid xx

Pin It

Sunday, April 25, 2010

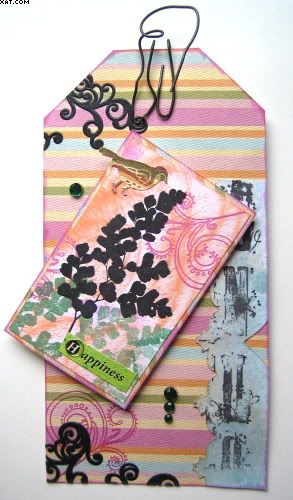
Rolling Recipe Tag 14


Here is the next tag in the series of Rolling Recipe Tags over on UK Stampers Forum.  This one is no. 14 and had to have:

*   Stripes
*   Gems
*   Leaves

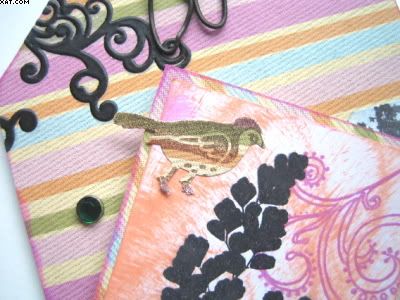
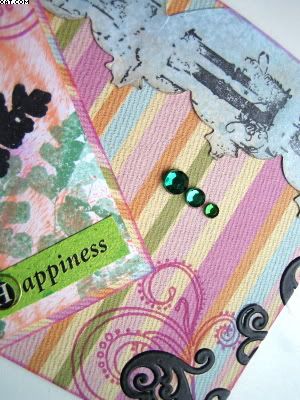
I started by cutting a blank white card tag and covered the front with some printed stripey paper.  The die cut strip down the right hand side is cut using the Big Shot and one of the Tim Holtz 'Alterations' dies, this one is ornate.  This was stamped with a TH letters stamp and sprayed with a home made mica spray in a duck egg blue tint.  This was then stuck in place and trimmed.


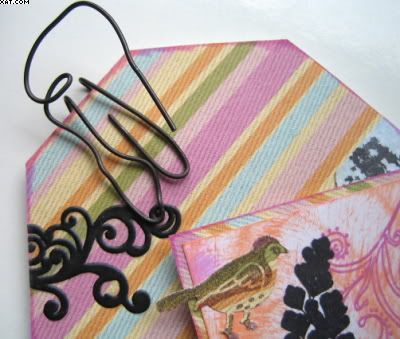
The plate was stamped on white card with a fern stamp (Paperartsy) several times with onyx black Versafine and with Memento cottage ivy ink. The background was coloured direct to paper with ColorBox chalk inks in tangerine, orchid pastel and amber clay  A swirl stamp (Wendie Rhodes) was also stamped with lilac posies Memento ink. A punched bird (Martha Stewart) was made using the stripey paper and applied before matting onto more of the stripey paper.  A small self adhesive sentiment was added.


The base tag was decorated with some vinyl swirls and the swirl stamp was stamped again in Memento ink as shown.


The plate was adhered on foam pads and some green gems added.  A piece of florists wire was then attached at the top of the tag to finish.

Sid xx

Pin It

Sunday, April 18, 2010

Rolling Recipe Tag 13


This weeks challenge was to make a tag with the following elements:

  1. A Face
  2. Leaves
  3. Gems
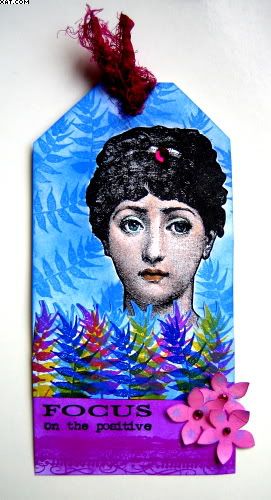
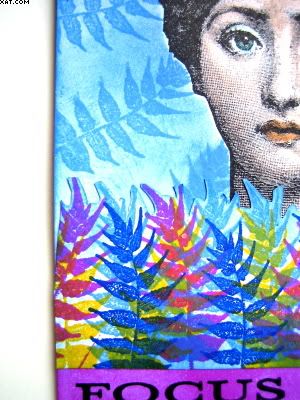
I decided to go a bit funky and use leaves but with not a tinge of green in them at all (no green ink was used but some green was made accidentally by overlaying different colours). This turned out to be a very bright little number indeed !


The base tag was cut from white card and the stamp of a ladies face (Cherry Pie) was stamped first with onyx black Versafine ink. I love this stamp ! The image was coloured lightly with Marvey Le Plume II pens.
A mask was made by stamping again on a post-it note and placed over the original image whilst lavender Impress dye ink was applied with cut'n'dry foam for the background. A leaf stamp (Crafty Individuals) was then inked with the same ink and stamped randomly over the image to decorate as shown.


The same stamp was then stamped repeatedly in lemon yellow, ultramarine, peony purple and lavender Impress ink to form the leafy layer and this was trimmed out.
The bottom half of the tag was then sponged with more Peony purple ink and a border stamp (Green Pepper Press) stamped in the same colour. The leafy section was then stuck into place with glue stick.


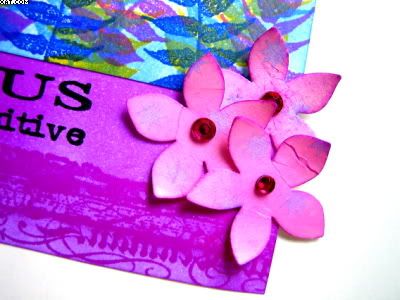
Next I cut out some flowers with a Martha Stewart punch out of an old M&S cake box and coloured this with more peony purple Impress before embellishing with purple self adhesive gems and sticking in place with glue dots. Another gem was applied in the ladies hair.

The word stamp (Cherry Pie) was stamped as shown with onyz black Versafine ink and an eyelet with some pink silk added with the crop-a-dile to finish.

Must say that I love the vibrancy of the Impress inks in this. Hope you like it.

Sid xx

Pin It

Sunday, April 11, 2010

Rolling Recipe Tag 12

Trying to play catch up with these tags, I left off at Tag 6 and so have another 5 to do to complete the set. This is Tag 12.

This weeks challenge was to make a tag with the following:

  1. Gems
  2. A stamped image of a face
  3. Eggs

I cut the basic tag from white cardstock and adhered a torn page from an old book at the bottom. I then applied pumice stone Distress Ink to the top of the tag and around the lower edges with cut'n'dry foam. I then stamped onto the background with a music stamp (?) in crushed olive Distress Ink.


I then used a leaf stamp from Paper Artsy and stamped this repeatedly in pumice stone & crushed olive Distress ink as shown. The main image of a face is also from Paper Artsy and this was stamped on white card in Versamark and heat embossed with detail black embossing powder before colouring in with distress inks and a waterbrush. This was trimmed out and applied with glue stick.

The eggs (Paper Artsy) were stamped on white card in onyx black Versafine and coloured in similar colours of distress ink as before. These were trimmed out and applied on a single large glue dot.

The scalloped edge was made using a Martha Stewart punch, white card and more crushed olive Distress Ink and was applied with glue stick at the bottom of the tag. I adhered 3 peridot flat backed gems to this strip. The word stamp (Paper Artsy) was stamped directly in onyx black Versafine as shown.

Finally a cream eyelet was applied with the crop-a-dile and some fibres tied through the hole. Now to start to catch up on the rest.

Love those new colours of Distress Inks by Tim Holtz & Ranger!

Sid xx

Pin It

Friday, December 18, 2009

Reindeer Tag


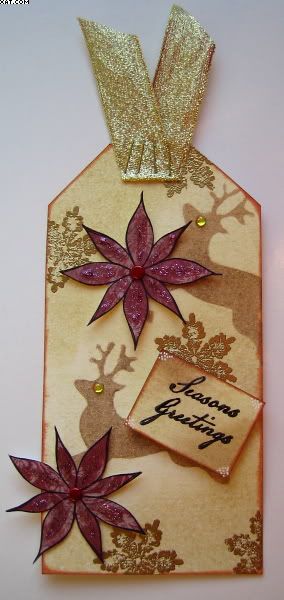
Just got a little time to spare this afternoon so decided to make another Xmas tag. I had a reindeer stencil and thought I would use this as a base design along with golden snowflakes. I used muted neutral colours to keep the whole tag soft but rich looking.

The white base card was cut to size. I then used scattered straw Distress ink and cut'n'dry foam to colour the background. I used a couple of coats and applied the second coat more heavily around the edges of the tag. I dried in between layers with a heat gun.

I then applied the reindeer stencil and used brushed corduroy Distress ink to colour the reindeer a nice brown. The card was then spritzed lightly with water in a mini mister and allowed to dry naturally. This provided a slight speckling over the applied inks.


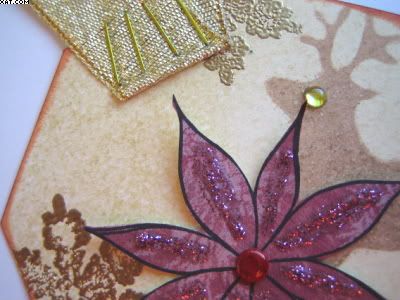
When totally dry I rubbed over the inked surface with an anti-static bag and stamped a snowflake stamp (?) inked with Versamark in and stamped randomly over the tag. This was then heat embossed with gold embossing powder. Next a poinsettia stamp from PaperArtsy was inked with black Stazon and stamped twice on printed dark pink background paper. The images were cut out and applied as shown with a dark pink brad. These were enhanced with pink Stickles glitter glue.


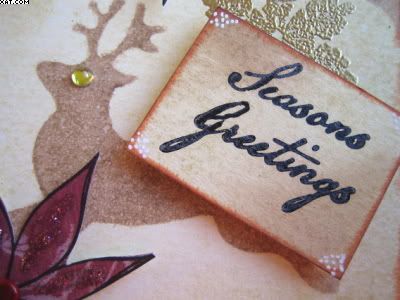
Finally the word plate was stamped in black Stazon and coloured with the same two Distress inks. Before applying this with foam pads it was edged with burnt sienna Chalk Ink along with the outside edge of the tag. I added a couple of yellow flat-backed mirror cabouchons as reindeer eyes with glossy accents and added a few spots of white with a pigment pen to the corners of the plate.

Finally a piece of gold woven ribbon was trimmed, folded over and applied with 4 gold staples. I thought the rosy colour of the poinsettia just offset the neutral tones of the background nicely.

Sid xx

Pin It

Saturday, August 08, 2009

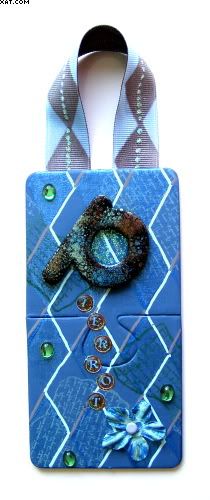
'Pierrot' decorated jigsaw pieces

I recently ran a swap on UK Stampers Forum where players were sent two large jigsaw pieces to decorate in any way they liked. On my entry I decided to do a hanger with the two pieces joined. I used mainly diamond shapes and called my piece 'Pierrot' thinking about the diamond design often associated with the clown costumes.

I began by painting the two pieces separately with a grey/blue acrylic paint and gave the pieces two coats. I then joined them together and put some backing paper on the back to hold them together whilst I decorated them.

I used a foam diamond design stamp from Making Memories and painted metallic blue paint onto it and stamped this onto the pieces and allowed to dry. Next I used a text plaque stamp from Cherry Pie and inked this in Versamagic Chalk inks in oasis green & sea breeze and stamped over the diamonds 4 times. I then used Gelly Roll Souffle pen to outline some of the diamonds (green & grey).


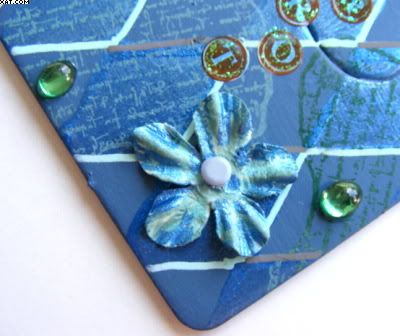
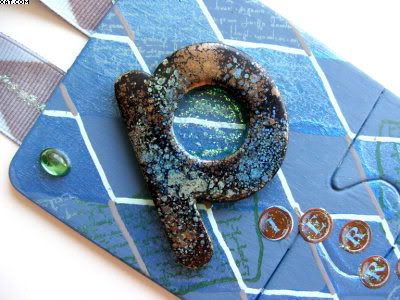
I made the letter 'p' ages ago and it is a wooden letter triple heat embossed with metallic pearl embossing powders in black, blue, green & gold. A paper flower was coloured with metallic blue paint and the chalk inks and applied with adhesive after using a pastel blue brad to decorate its centre. The 'p' was stuck in place and the other letters coloured with Copic marker and placed as shown. the centre of the p and the letters were given a light coat with Stickles glitter glue in crystal. Some green oval cabochons were applied as shown.


Finally a piece of grosgrain ribbon was stamped with a single diamond in vintage sepia Versafine and dots of Stickles applied along the centre of the diamonds. This was attached with glossy accents at the back as a hanger.

Hope whoever gets it, likes it.

Sid:-)

Pin It

Tuesday, June 30, 2009

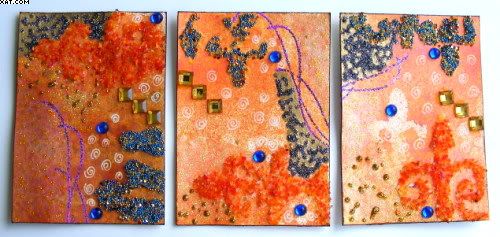
'Bling' ATC's

These ATC's have been done for a monthly swap over on UK Stampers Forum. This months is 'Bling' and I have decided to do a blend of blingy finishes instead of stamping.

I used Bedazzles, flatbacked gems and cabochons, Stewart Gill byzantia, Viva gold paint, Stickles, violet twinkle EP and Sakura white opaque pen to decorate with little swirls. The only stamp used was a swirl. The base was made from white card and coloured using a Tim Holtz stencil and homemade mica spray made with spiced marmalade distress reinker and cosmic shimmer iridescent pigment in cinquefoil red. This was mixed and applied with a mini-mister.

The ATC's were edged with dark brown chalk ink.

Hope you like them :-)

Pin It

Saturday, May 09, 2009

'J' is for Jewel Tag

This is the 'J' for Jewel tag I have done as part of a challenge on UK Stampers. The tag was cut from plain cream card. A Paperartsy crown stamp was stamped in Versamark and heat embossed with gold Embossing Powder. A swirl stamp was inked with Adirondack Ink in denim and latte and stamped as shown.

I wanted to have a cascade from the single flat backed gem that I added to one of the points in the crown flowing to the tails of the swirl which were embellished with more gems. Chalk inks were used for the background, direct to paper. The letters and words were cut from a magazine and the letter J is chipboard with blue glitter.

The tag was finished with a black eyelet and some blue organza ribbon tied through the hole.

Hope you like it :-)

Pin It

Monday, May 04, 2009

'Bling' Inchies

These are my 9 Inchies done for a swap. I used fantasy paper in various shades which I punched out in two sizes after stamping with a leaf stamp with Stazon Ink in Fuschia, Eden Green, Imperial Purple and Royal Blue. The centres were embellished with square acrylic gems and Stickles glitter glue. They were edged with mustard ink and backed with card to strengthen.

They are on their way to the swappers as I post this.

Hope you like them :-)

Pin It

Saturday, February 07, 2009

Oriental Altered Domino Frame


Here is an altered art project I recently completed for a Challenge over on UK Stampers. We had to use a domino or dominos in our work. I chose to go Oriental.

I used a 3 inch square glass frame I had purchased as the base which I decorated and embellished with the altered domino.

I used the following:

  • Glass photo frame
  • Card (metallic gold)
  • Satin Ribbon (3mm Dark Blue)
  • Small metal Chinese coin
  • Stazon Inkpad (Jet Black, Ultramarine)
  • Krylon Pen (24ct Gold)
  • Rubber Stamps ( Stick Background ?, Rubber Stampede-Koi, Kadomo-Bamboo)
  • Perfect Medium Inkpad
  • Decorative Chalks
  • Cotton Wool Buds
  • Flat backed gem (Pale Blue)
  • Klear Floor Polish
  • Glue Dots
  • Glossy Accents
Firstly I stamped the stick background with ultramarine Stazon onto the gold card and trimmed it to fit the aperture behind the glass of the frame. I took a small piece of the 3mm satin ribbon and threaded through the small Chinese coin before applying to the card with Glossy Accents. When dry this was then slipped into the frame where a photo would have gone.

I then used the bamboo stamp and applied Stazon gold direct to the stamp (working quickly) and stamped directly onto the front of the glass as shown, allowing to dry thoroughly. I cleaned the stamp with Stazon cleaner soon after to remove the gold from the rubber.

The domino was decorated on its reverse side as follows: The koi stamp was selectively inked with Jet black Stazon and carefully stamped directly onto the domino. This was allowed to dry and then the surface of the domino was well inked with Perfect Medium. The decorative chalks were applied using a cotton wool bud using a dabbing action and blended this way. The Perfect Medium acts as a glue to hold the chalks. When happy with the effect I placed a small amount of Klear floor polish into an spray bottle and sprayed the domino, bursting any bubbles with a fine pin. I sprayed three times allowing the surface to dry naturally between coats. This provides a shiny glazed seal over the chalk. The edges of the domino were coated with Krylon Gold to finish. The flat backed gem was applied over the eye of the fish with Glossy Accents.

The frame was finished by applying the domino to the frame front as shown with Glue Dots. I particularly like the muted watercolour effect that the chalks provide and the chalk is easy to remove with a paper tissue if you don't like what you have done (prior to glazing, of course).

Hope you like it :-)

Pin It

Sunday, January 25, 2009

Baby Boy Tag-in-a-Sleeve


My partners boss is about to go off on maternity leave to have her second child. She already knows that she will be having a boy so I decided to do a little Tag-in-a-Sleeve in advance of the big day ! I don't usually 'do' cute but hey-ho what the heck. Most of the materials are ready made also.

In my effort to be a bit greener, the sleeve was made from a cut down kitchen foil tube as described in an article in the February edition of Craft Stamper Magazine by Jo Capper-Sandon. She describes how to use what would be waste items in your craft projects.

I needed:

  • Cardboard tube from kitchen roll
  • Card Tag
  • Decorative printed papers in various blue designs
  • DCWV clear quote stickers 'boy'
  • Flourish Stamp (Ilusive Images)
  • Colorbox Chalk Ink (Blue Iris)
  • Stazon (Ultramarine)
  • Adhesive Gems (Blue)
  • PVA Glue
  • Ribbons & Fibres (Blue)
  • Cropadile or hole punch

The roll middle was first cut to the desired length and then flattened to form an open ended sleeve. PVA glue was applied to the inside 1/4 inch of one end of the tube and this was clipped together with a strong crocodile clip until perfectly dry.

Meanwhile I prepared the tag. I chose one of the blue papers and adhered this with PVA glue to one side of the tag and repeated this for the other side. I trimmed the edges around the base tag and re-punched the hole in the top of the tag with the crop-a-dile (easy work!).

Once completely dry I used the small flourish rubber stamp and stamped in Stazon on both sides of the tag as shown. I then applied a few selected clear quote stickers (trimmed to fit) to both sides of the tag in a pleasing arrangement. Burnishing the stickers with the handle of a pair of scissors to ensure no air bubbles were present under them. A blue self adhesive gem was applied to each side of the tag for a little dimension.

I then edged the tag with the blue iris chalk ink pad directly. The fibre and 3mm ribbons were chosen and applied in a simple slip knot through the hole in the tag as seen.

Once the glue on the sleeve had dried I covered the sleeve with decorative paper and ensured that all edges were folded in and well stuck down. I applied more chosen clear quote stickers and again edged the whole sleeve with the chalk ink. The tag was finally slipped into the sleeve to finish.

I think she will like it and I enjoyed making it too. Hope this is of interest :-)

Pin It
Related Posts Plugin for WordPress, Blogger...