>
Showing posts with label Die. Show all posts

Friday, April 28, 2017

Kraft Butterfly Thanks ......


More CAS butterflies from me today in this 'Thanks' card. Seem to be having a butterfly phase at the moment !

I started with a 5 x 5 inch square white card blank and then diecut a smaller square matt in Kraft with a stitched edge square die through the Sizzix Big Shot.

I then punched a 'flight' of butterflies in more Kraft card with a Martha Stewart punch and edged these in oasis green Versamagic Chalk ink . They were then stuck in place randomly and central onto the Kraft matt as shown.

I stamped the sentiment (Papertreyink) in Versafine onyx black ink onto white card, trimmed out and mounted again on pale blue cardstock before applying amongst the butterflies on foam pads.  The Kraft matt was then stuck onto the card base with more foam pads to finish the card.

Plain but effective I thought !

Sid xx

Pin It

Wednesday, November 30, 2016

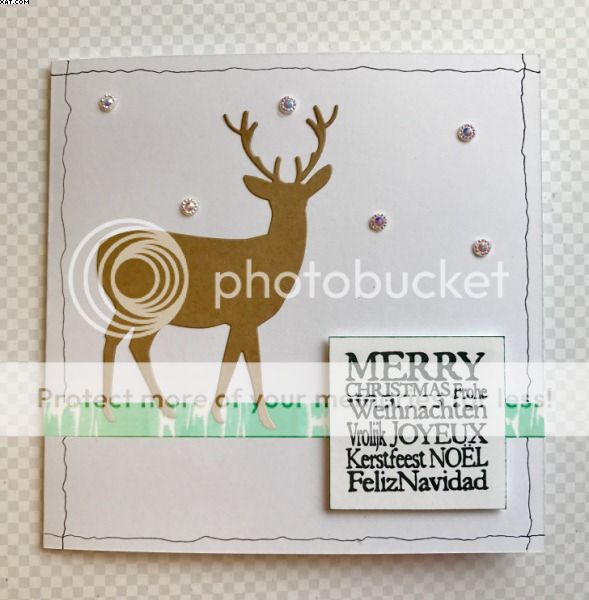
Deer, Deer !!


Another simple Christmas card as I ramp up the crafting process.  This year I am determined to make all my own cards ....... a feat never accomplished in other years.

I started with a 5.5 x 5.5 inch white card blank and applied a strip of Washi tape as shown (mainly to 'ground' the deer).

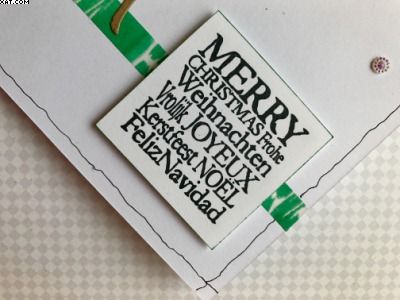
I next chose an old PaperArtsy greetings stamp and stamped this on a scrap of white card in Versafine black ink.  This was trimmed out and edged in more black ink and applied on foam pads.


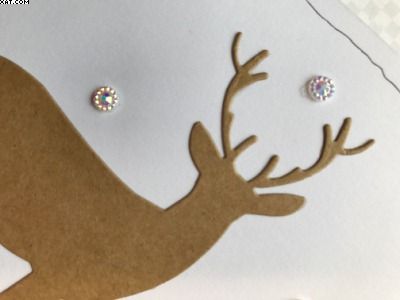
The deer was then diecut from Kraft card and stuck in place as shown.


I then edged the card with a hand drawn squiggly frame with a black Micron pen and applied some self adhesive crystals to finish.

Sid xx

Pin It

Thursday, December 03, 2015

Yes Deer ..........


Now we are in December, Christmas is upon us so I have made this simple card.  I started with a Kraft card blank and cut a mat out of plain white card.  I rounded the edges with a corner chomper.

The white card was then embossed with a 'snow' folder and stamped with the sentiment in Versafine black ink.  The embossed mat was stuck in place on the card.  I used Stickles glitter glue on the embossing.


I then diecut a series of winter animals out of red card and adhered these, as shown, to finish.

Sid xx

Pin It

Sunday, November 23, 2014

Enjoy the Moment !


Perhaps her moody face would not encourage you to 'Enjoy The Moment' but she is a Zetti stamp after all and you know what they are like.

The card was made from a 5 x 5 inch plain white card blank.  I have covered the card with a couple of pieces of printed paper.  The striped bit on the left has a flock finish.


Onto this I have stuck some paper which has been diecut with a frame in the middle, made from more patterned paper.


The central plate was stamped in black Memento ink and selectively coloured with Marvey alcohol ink pens.  Black faux gems were adhered to the corners of the frame and it was mounted on foam pads in the middle.

Last but not least was the sentiment which again was stamped in Memento ink on white card, edged and trimmed out before mounting on more foam pads.

Sid xx

Pin It

Wednesday, November 12, 2014

Keep in Touch .......


Here is a simple collaged card I have made.  I used a square Kraft card as the base and collaged on a few elements as shown.

I started with a square of printed text paper. The red chevron band was stamped in red dye ink and trimmed.  The stamped image is one from Zetti and she was stamped in Memento black ink and coloured with Copic alcohol ink markers with her eyes highlighted with a white Posca pen.  She was diecut into a circle and matted on another larger diecut circle in pink.


Finishing touches were to add a paper flower with a little pearl centre and the word plate which has been stamped, trimmed and mounted on foam pads.

Maybe she looks a bit stern but I do love the image !

Sid xx

Pin It

Friday, November 07, 2014

Bunny Love !!


This little card featuring a cute bunny and was made from a 5 x 7 inch white card blank.  I used a set of letter dies to cut out the word 'LOVE' as shown, carefully positioning the dies before cutting with some low tack masking tape.  Once done I lined the inside front of the card with some plain pink cardstock trimmed to size and this was adhered to show through the letters.


I then stamped a little bunny in black Memento ink and coloured this with Copic markers.  I applied some Glossy Accents to bunnies paws and once dry trimmed him out, sticking him in place through the letter O.


Finishing touch was to tie a piece of lovely checked ribbon around the card as shown and that's it !!

Sid xx

Pin It

Thursday, August 07, 2014

My Home Is .........


This card could be used as a 'New Home' card but is entered into the City Crafter Challenge Blog for week 223 - the subject this week is 'Home is Where The Heart is'.

I started with a 5 x 5 inch white card blank and cut a piece of paper slightly less than the base which was adhered to the background after edging with old paper Distress Ink.  By the way all papers used are from My Minds Eye!


I then used a Tim Holtz Sizzix alterations die and cut the houses which I separated only using a strip of three.  These were adhered as shown and the smoke, underline and windows were added using black Posca Pen.


The honeycomb design was cut out from another piece of paper and adhered as shown above the houses and three similar individual 'combs' were cut out, edged with Distress Ink and adhered over the originals on foam pads to add a bit of depth.


Finally I used a PaperArtsy stamp of three arches and stamped this on white card in Versafine onyx black ink, trimming out just the one arch which again was edged and coloured with more Distress ink.  This was adhered on foam pads as shown.

Love the earthy tones of the colours on this card.

Sid xx

Pin It

Saturday, June 02, 2012

Pretty Face


Here is a card I have made recently incorporating the colours of turquoise and orange.  The card measure 15 x 15cm and is made from stout white card.  The card has been covered on the front with a piece of digital backing paper with an abstract orange/blue colourway.  It is available in my Etsy store.


The mat has been made from turquoise linen effect card and has been punched with Martha Stewart around the page punches.  A piece of narrow orange grosgrain ribbon has then been threaded through the edging and tied in a bow at one corner before mounting onto the card.


The girls face has been stamped with Memento black ink, cut out with a circular die and then coloured with alcohol ink brush markers.  The orange dots have been added using a Sakura Aqualip pen.  The image has been added in the centre with foam pads to add relief.


The 'On Your Birthday' foiled plate was also added on foam pads.


Finishing touches were added by edging with orange chalk ink.

Sid xx

Pin It

Wednesday, April 18, 2012

B & B


No not Bed & Breakfast !!  .............. but Box & Brooch to be more precise.


This brooch came about as my creation for Janet ........ one of our little band of crafters who meet up for long & crafty weekends 3 times a year.  This was made as my gift for her (we each have a crafty partner who we make a handmade item for at the weekends).

Unfortunately I forgot to take my gift (slapped wrists) to our March meet and have sent this to her instead.  Hope she likes it.


The box was made from heavy card which was subsequently decorated as shown in the same colourway as the brooch.  The box sides and top were coloured with fired brick Distress ink and panelled with black magic coredinations card with a mauve core after passing through a spots embossing folder.  The core was revealed by rubbing over the embossed spot with fine sandpaper.


The decorative elements are made from stamps from Lynne Parrella made by PaperArtsy, stamped on white card with Memento onyx black, trimmed and coloured with red and purple Marvey alcohol brush pens.  They were assembled after selectively heat embossing with kaleidascope embossing powder and a Versamark pen and mounting on foam pads. Some red and blue beads were adhered with Glossy Accents as was some Beadazzles as shown.

The box was filled with crumpled pink tissue paper to support the brooch


I used some flower dies from X-cut to cut  a variety of different sized petals from organza, sparkle fabric, fused fusible fibres and silk. These were assembled in layers on a card base with hot melt glue.


Some of the same beads used on the lid were added with red embroidery thread and a needle to decorate the centre of the brooch.


Finally a brooch back was added to finish the brooch.


Hope she likes it !

Sid xx

Pin It

Friday, July 15, 2011

'Live' Box


Here is a box have I crafted using All Tim Holtz products and I think it fits the bill for this weeks Simon Says Stamp and Show Challenge which requires us to 'Show some Stitching - Faux or otherwise' & The Stamp Man Challenge 'Anything by T!m'. 

The stitching on my box is definately faux and I have made a sort of patchwork effect with 'Lost & Found' papers on the top.

I cut out roughly 9 squares of paper and after distressing the edges stuck them on the top of a 4 inch square box blank which was painted black with Adirondack acrylic paint dabber in pitch black. I used Matte Medium as an adhesive. When dry I distressed the edges with sandpaper.


The sides of the top of the box were covered with die-cuts using the TH 'on the edge' mini scallop and pinking die from more lost and found paper. These were stuck in place on all sides with matte medium and again distressed. All the distressed edges were coloured with aged mahogony Distress ink and foam. The sides were then treated with clear rock candy Distress Stickles and rubbed over with a finger.


I then used stamps from the TH 'Bitty Grunge' plate to add some images onto the top in archival black ink and some faux stitches were added on some edges of the patchwork squares with a black Posca pen.


All the embellishmnets were made from Grungeboard shapes and letters coloured with aged mahogony, dried marigold, faded denim and pine needles Distress inks on bases coloured with more black dabber.  The number 18 is a lost and found salvage sticker.  All were adhered with Glossy accents.


I was tempted to add more but I think that was enough.  This box would make great storage for cufflinks !

Sid xx

Pin It

Monday, July 11, 2011

Text Background ATC's


This months swap theme for ATC's over on UK Stampers Forum is 'use some text as a background' so I made these three collage style ATC's as my offering.

The text backgrounds come from an old book featuring various styles of text over the centuries.  I simply tore out the page (did I say that?) and then adhered it to the ATC card blank and when dry trimmed round the ATC.

Each of the backgrounds were tinted with Distress inks and cut'n'dry foam, I used worn lipstick, old paper, walnut stain, aged mahogony and victorian velvet.


Various adhesions were used to decorate each ATC in the form of stickers, postage stamps, images, borders and plates.  I used the townscape TH 'on the edge' die to make a heavy acetate template and stencilled through it at the base of each ATC.


I used my trusty black Posca pen to outline some of the elements.  Just love those pens !!


The only stamping was with a small swirl stamp (?) and vintage sepia Versafine ink.  Each ATC was edged with Inka gold applied roughly with my finger and I definately could have been nicknamed 'Gold Finger' after that !

Sid xx

Pin It

Wednesday, February 16, 2011

Friend Card


Not like me to do cute really, but I have had some of the Lili of the Valley printed toppers for ages so I decided to start to use them.

This card simply uses the topper as a centre piece, matted onto purple linen textured card and edged wirh diamond stickles.


I embossed stars on a piece of white card using a Sizzix texture plate and cut this into a larger square which I again matted onto a larger square of the purple textured card.

Before mounting I took a piece of mauve silk ribbon and tied around the smaller mat into a bow before matting this onto the larger mat.


All of the mats were then stuck in place on a plain square white card.  The 'Friend' plate was made using a Nestability die and thin white card which I embossed and coloured with Dusty Concord Distress Ink before stamping with 'Friend' using a polymer stamp.  This plate was then edged with Stickles and stuck in place as shown.

Sid xx

Pin It

Monday, December 20, 2010

Timmy's Tag Day 7


Next one in the series of Tim Holtz Tags............this one is Day 7 and I am determined to finish the series before Christmas Day.  The background tag was made from white card first coloured with wild honey Distress Ink and a blending tool.  I didn't have the woodgrain embossing folder so I used a cuttlebug folder that  I did have and coloured the folder with walnut stain DI before embossing.  The tag was then edged with vintage photo DI after roughing up with course sandpaper.


The poinsettia came next and I did use the two Sizzix dies to produce the petals and leaves but this time I used linen cardstock instead of grungepaper, once coloured and cut out I assembled all of the petals on 3 large sticky dots finishing off with a large pale green plastic gem.


The letters were actually white flock self adhesive ones that I first coloured with fired brick DI and heat dried before sticking onto the tag.  The flourish was cut from Grungeboard and coloured with white brilliant white emulsion paint before colouring the edges with vintage photo DI.  This was cut in two and applied with Glossy Accents as shown.


Finishing touches were to apply a gold eyelet with the crop-a-dile and add a short length of silk ribbon, threaded through and tied around with some green wire.  I cut the 25 from some of Tims printed paper, coloured the edge stuck in place and added a half pearl .  That's it !!

Sid xx

Pin It

Sunday, September 26, 2010

Crowning Glory


This tag is another in the rolling recipe challenge over on UK Stampers Forum. This weeks recipe is:

1.  Crown
2.  Fabric
3.  Paint

I started with a white card tag and painted the background with red Dylusions acrylic paint followed by gold paint dabber.  I die cut the crown from grungepaper with a Sizzix TH Alterations die and coloured with more gold paint.


Next I took a piece of crimson rouched chiffon and applied this over the background with some glue dots and trimmed around the edge with scissors.  I cut another border from Sizzix TH alterations from a piece of spin 'n' splash card I had made ages ago with Alcohol inks and Mixables and applied this at the bottom with Glossy Accents.  I then stamped an owl several times from Red Castles Rango Zoo 2 plate in jet black Stazon and applied the gold crown on foam pads to one of the stamped images as shown.


Some gold drops were added and a little platinum Stickles to embellish the crown and base decoration.


A red eyelet was added with the crop-a-dile and some gold chiffon ribbon added and fixed with a gold staple to finish.

Sid xx

Pin It
Related Posts Plugin for WordPress, Blogger...