>
Showing posts with label Tag. Show all posts

Friday, September 10, 2021

Vintage.....


Made a collaged vintage style tag ...

The background was made on watercolour card with mica sprays in a range of colours (the shine doesn't show well in the photo) ..... I then stamped images on the background in sepia Archival and red memento inks.

I then added a number of ephemera items including a stamp, tickets, mini playing card, tile and stamped dragonfly below which some green papertape was added along with a metal drawer identifier secured with brads and 'Take Risks' Washi tape in the window.

I added a cute bunny too ! The tag was edged with a squiggly line in black Micron pen, distress ink and some white pen spatters.

A length of jute string was tied in a loose bow and added at the top with a decorative paperclip to finish ....

Sid xx

Pin It

Sunday, August 15, 2021

Dream .....


Made a tag today .....

The tag base was cut from re-cycled food packaging and covered with some stripes printed paper.

I stamped the swirl and the tree (Paperartsy) in black Archival ink and applied a strip of black and white spotty Washi tape near the bottom.

The house (Paperartsy) was stamped on white card in more Archival ink and trimmed out. It was coloured with Distress ink washes and a blue and gold Gelly Roll pens before adding on foam pads.

The tag was punched and a yellow flower eyelet applied with the Crop-a-dile and threaded through with some yellow velvet ribbon. The tag was finished with a Dream brad .....

Sid xx

Pin It

Saturday, October 17, 2020

Airborne......


A decorated Tag made with AALL & Create stamps ......

I started with a piece of white card and made a background with a Chevron stencil and Distress inks by applying the inks direct to the stencil, spritzing with water and laying down on the card.

I then stamped the balloon in Versafine black ink onto the background and then stamped again on another piece of white card. The balloon was trimmed out and coloured with watercolours and a waterbrush and treated with Glossy Accents. I used Ochre and vermillion (also colouring the background flags. I trimmed out the binoculars and coloured grey.

I then concentrated on decorating the background with more stamps in Grey Versafine Clair and red Distress Oxides. I added a couple of metal star embellishments and some adhesive gems.

The balloon and binoculars were added on foam pads over the original images and the adhesive words added as shown. The balloon and words were edged with grey Inktense pencil spread with a waterbrush to add depth.

The background was edged with Ochre Versamagic chalk ink and then matted onto some re-cycled packaging. A black eyelet was added with the crop-o-dile and the hole threaded through with some red grosgrain ribbon to finish.

Sid xx

Pin It

Tuesday, August 25, 2020

Purple .....


A variation on the Butterfly theme for a decorated tag made to swap with a crafty friend .....

This time I have used a white tag blank and stamped with a series of triangles in Distress inks in purples & greens followed by a numbers stamp in black Versafine ink. I have embellished with adhesive stickers in a triangular shape and also with butterflies. Some dots in purple Versafine Clair and lines in purple glitter gel pen. The main butterfly is die-cut from washi paper and embellished with a metal tag and purple clear dot and it is applied with foam pads.

The tag was edged with gold Krylon pen and a black eyelet added with the crop-a-dile, threaded through with some purple ribbon to finish ....

Hope he likes it ....

Sid xx

Pin It

Saturday, August 22, 2020

Judgement .....


Made a vintage Tag for a monthly swap on UK Stampers Forum .....

The base was cut from re-cycled card and another was cut from white cardstock. I then stamped a series of triangles in Distress Ink ( Bundled Sage, Shabby Shutters, Dusty Concord, Milled Lavender) and dried with a heat gun to set. I then overstamped with a numbers stamp in Versafine black ink and also stamped a baseline for the boy to stand on in Sepia Archival Ink.

The tag was then edged with Antique Linen Distress IN applied with a make-up sponge.

The boy ( TH paper Dolls) was then edged in black ink and applied as shown on foam pads. The self adhesive words are also by Tim Holtz and were edged with black Micron pen.

The front was attached to the base and I added a gold eyelet with the Crop-a-dile and tied through with some mauve ribbon to finish the tag.

I would like to enter this into the Daring Cardmakers Challenge whose subject is Picture Perfect

Sid xx

Pin It

Sunday, October 30, 2011

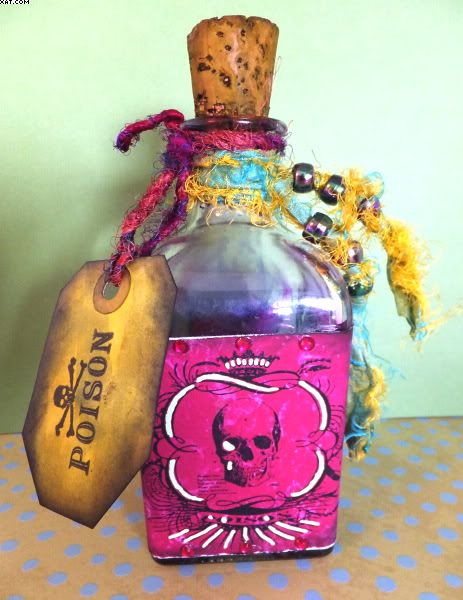
The Elixir - of death !


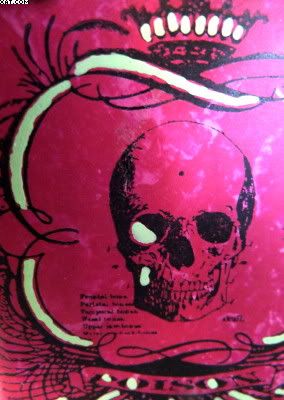
Here is an altered poison bottle just ready for Halloween. The bottle started life as one of those reed air fresheners and I liked the shape for this project.


I gave it a good wash and when completely dry liberally coated the inside with splashes of alcohol in in red pepper, denim & raisin added directly from the dispenser and moved around the bottle to mix and obtain a splashed and dripped finish in the bottle. Once happy with the effect I set about doing a spot of embellishing.


I stamped a clear stamp from PinkPaislee onto magenta printed paper with Archival black ink to make a label.  Trimmed this out and then distressed the edge with sandpaper and black soot Distress Ink applied on cut'n'dry foam.  This was further coloured with a lime green souffle pen before sticking in place on the bottle with Glossy Accents. Some magenta crystals were stuck onto the top and bottom of the label.


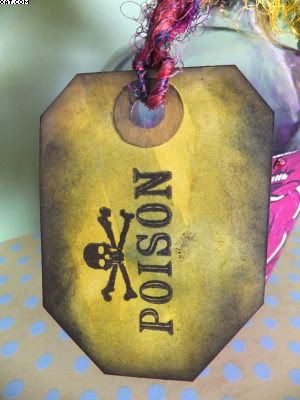
I then made a tag by cutting down a white tag into a sort of coffin shape and colouring with crushed olive and bundled sage Distress Stains.  The tag was dried, edged with black soot Distress ink and stamped with another of the PinkPaislee stamps in Archival black.  The tag was threaded through with some magenta silk woven thread and put aside.


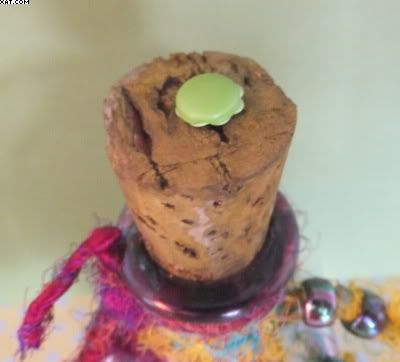
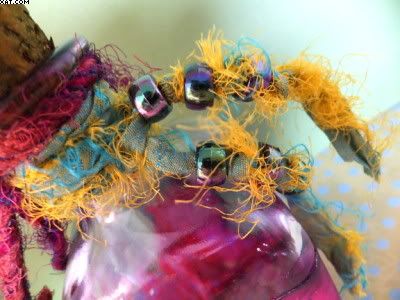
Next I did the cork which I coloured with a few coats of the crushed olive Distress Stain.  I topped this with a lime brad and eyelet stuck into the top of the cork. The fibres (made from silk sari ribbon in yellow and lime green) were threaded with black AB beads, separated by tied knots.  The bottle was then embellished with the tag and the fibres tied round the neck of the bottle.

This one also qualifies for the 'Just For Fun Challenge' !

Fancy a swig??

Sid xx

Pin It

Sunday, June 20, 2010

I'm forever blowing bubbles !


Here is another rather bubbly creation made as my entry for this weeks Rolling Recipe Challenge over on the UK Stampers Forum.  This weeks ingredients were:

1. Heat embossing
2. Something round
3. Something shiny

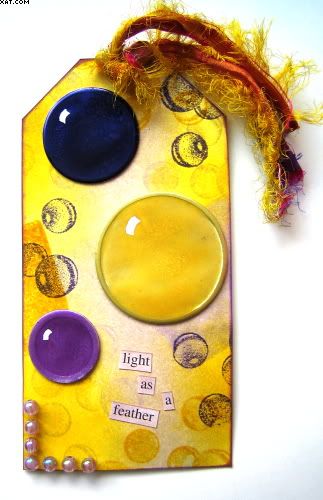
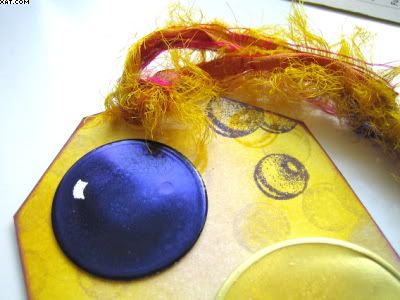
So I decided on a theme of bubbles.  I started with three round metal edged tags in different sizes.  Each one was heat embossed several times with Moonglow embossing powders in aurora amethyst, midnight violet obsidian & sunset yellow orange.

The base tag was cut from white card and coloured with cut'n'dry foam and Distress inks in milled lavender and mustard seed.


Next a bubbles stamp (Cherry Pie) was inked in Milled lavender then mustard seed and lastly in dusty concord and stamped randomly on the background. A couple of squares were also stamped in the same inks.


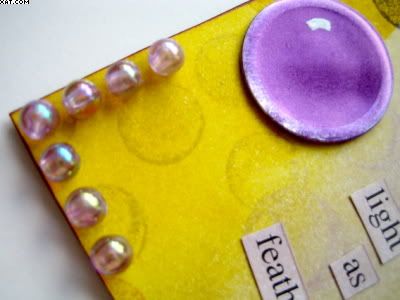
The words 'light as a feather' were coloured in milled lavender and stuck in place as shown with Glossy Accents.  Some iridescent beads were stuck in place at the bottom left corner and allowed to dry.  The embossed circles were then shaded with reflections in white opaque pen and these were stuck in place.

Final touches were made by adding a yellow eyelet with the crop-a-dile and tying some sari silk through the hole.  The tag was then finished with purple chalk ink on the edge.

Sid xx

Pin It

Saturday, August 01, 2009

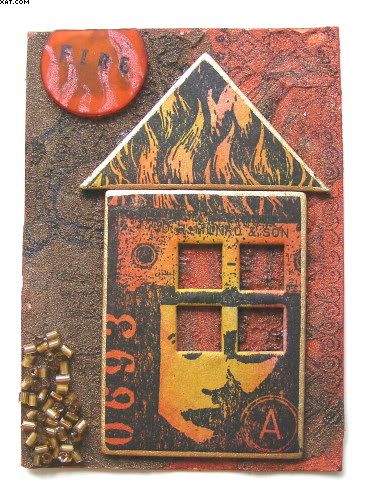
'Fire' ! ATC

Here is another ATC, this one entitled 'Fire'. I have managed to try out my new Viva Ferro metal effect colours in bronze and copper. I love the texture and the way they spread and they are loaded with fine metal filings which add an even better surface finish too.

I cut the ATC from card and used a palette knife to spread two stripes of the Ferro, blending in the middle. The house and roof were cut from chipboard and first stamped with black Stazon using a Zettiology stamp. They were next coloured with distress inks in spiced marmalade and fired brick applied with cut'n'dry foam before edging with gold Krylon pen.

I then stamped (again in black Stazon) some feint images onto the dried background and they are hardly visible and added a small pool of glossy accents in the bottom left to which I adhered some old gold bugle beads and allowed to dry.


I then took a little opaque orange plastic tag and trimmed it to fit the top left of the card. I drew some flames onto it using orange Tiara Gelly Roll pen and stamped the word 'Fire' in black stazon. The card was then assembled as shown using glossy accents to adhere the house and the tag.

I am really impressed with the Ferro colour and will definately be trying it out on more artwork in the near future. Sid :-)

Pin It

Sunday, June 28, 2009

Altered Cutlery ?


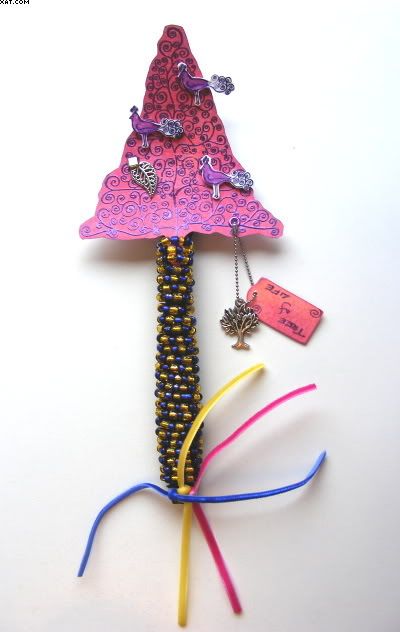
Well this is it ! My weirdest creation yet. I have called it 'The Tree of Life'. It's made from a black plastic fork obtained with a salad from Subway last week. It is part of a swap run by Hazel on UK Stampers Forum in the altered art section.

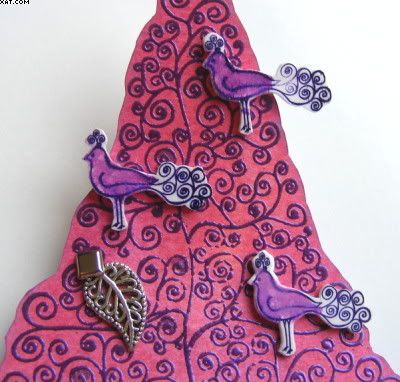
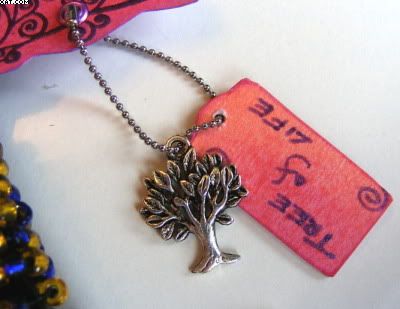
I made the tree itself using a stamp from PaperArtsy which was heat embossed with violet pearl EP on a background made with Adirondack wild plum and red pepper inks applied with a piece of cut'n'dry foam. Once embossed the tree was cut out and left to one side. In the meantime I made three shrink plastic embellishements which were stamped in purple Stazon ink on white shrink plastic sheet. The bird stamp was also PaperArtsy. The bodies were coloured with pink chalk ink before cutting out and shrinking. A metal leaf was attached with a square silver brad and a hole punched with the cropodile on the bottom right of the tree. An eyelet was applied. The mini tag was coloured and written upon and threaded with a metal tree embellishment with the ball chain as shown. The three birds were applied with mini glue dots as shown


Detail of tree


Detail of Tag


Next was to cover the handle of the fork. I took a long strip of mediumweight black craftwire and threaded it with alternating gold and blue glass beades with silvered centres until I had a length of threaded wire long enough to spiral around the handle to hide it completely. One end of the wire was wrapped around the middle two prongs of the fork and the beads pushed down to the top of the handle. I then commenced wrapping the beaded wire round and round the handle to the base where the last coil was made to trap 3 pieces of coloured velvet ribbon before securing the wire into the last coil.


Handle base and ribbon detail

I used big sticky dots to attach the tree to the front of the fork prongs, hence the reason that the tree is curved slightly (following the contour of the prongs). The whole thing was wrapped in white tissue secured with three pieces of the same ribbon.

This was certainly a challenge for me ! Hope whoever gets it in the swap is happy with it :-)

Pin It

Sunday, January 25, 2009

Baby Boy Tag-in-a-Sleeve


My partners boss is about to go off on maternity leave to have her second child. She already knows that she will be having a boy so I decided to do a little Tag-in-a-Sleeve in advance of the big day ! I don't usually 'do' cute but hey-ho what the heck. Most of the materials are ready made also.

In my effort to be a bit greener, the sleeve was made from a cut down kitchen foil tube as described in an article in the February edition of Craft Stamper Magazine by Jo Capper-Sandon. She describes how to use what would be waste items in your craft projects.

I needed:

  • Cardboard tube from kitchen roll
  • Card Tag
  • Decorative printed papers in various blue designs
  • DCWV clear quote stickers 'boy'
  • Flourish Stamp (Ilusive Images)
  • Colorbox Chalk Ink (Blue Iris)
  • Stazon (Ultramarine)
  • Adhesive Gems (Blue)
  • PVA Glue
  • Ribbons & Fibres (Blue)
  • Cropadile or hole punch

The roll middle was first cut to the desired length and then flattened to form an open ended sleeve. PVA glue was applied to the inside 1/4 inch of one end of the tube and this was clipped together with a strong crocodile clip until perfectly dry.

Meanwhile I prepared the tag. I chose one of the blue papers and adhered this with PVA glue to one side of the tag and repeated this for the other side. I trimmed the edges around the base tag and re-punched the hole in the top of the tag with the crop-a-dile (easy work!).

Once completely dry I used the small flourish rubber stamp and stamped in Stazon on both sides of the tag as shown. I then applied a few selected clear quote stickers (trimmed to fit) to both sides of the tag in a pleasing arrangement. Burnishing the stickers with the handle of a pair of scissors to ensure no air bubbles were present under them. A blue self adhesive gem was applied to each side of the tag for a little dimension.

I then edged the tag with the blue iris chalk ink pad directly. The fibre and 3mm ribbons were chosen and applied in a simple slip knot through the hole in the tag as seen.

Once the glue on the sleeve had dried I covered the sleeve with decorative paper and ensured that all edges were folded in and well stuck down. I applied more chosen clear quote stickers and again edged the whole sleeve with the chalk ink. The tag was finally slipped into the sleeve to finish.

I think she will like it and I enjoyed making it too. Hope this is of interest :-)

Pin It

Saturday, August 16, 2008

Sunday Challenge No 2

Here are my two offerings for the UK Stampers Sunday Challenge No 2


The challenge was to make two tags one in colour and one in black & White using the same stamp/s.

For the coloured tag I have covered a cricut made tag with some Japanese Washi Paper I bought on my visit to Japan recently. I cut the hole through with the Crop-o-dile. I then applied three layered colours of Brilliance ink (pearlescent crimson, pearlescent ivy and rocket red gold) from top to bottom to the oriental stamp (Inkadinkado 93191) and stamped centrally over the Washi paper. I applied a metallic pink eyelet with the crop-o-dile, edging the tag with pink chalk ink. I chose three pastel brads in lemon, mauve and pink and applied through the centres of some of the printed flowers and finished the tag with some 3mm organza and satin ribbon in pink, tied through the hole in the tag.

The black & white tag was made with the cricut and the same Inkadinkado stamp applied centrally after inking with Versafine onyx black ink. I then used a second stamp of Chinese calligraphy (Judikins artifacts cube 67181) to fill in the top and bottom of the tag. I used Brilliance starlite black ink on this. I then stamped another image of the Inkadinkado stamp in black and cut out the chrysanths and the chop image which I decoupaged over the original images with foam pads. I applied a black eyelet to the hole in the tag, edged the tag with black Stazon ink and knotted some plain black and white satin ribbon through the hole.

Hope you like them, and wonder what the next challenge will be?

Pin It
Related Posts Plugin for WordPress, Blogger...