>
Showing posts with label Sisal Webbing. Show all posts

Monday, April 16, 2012

Making Waves


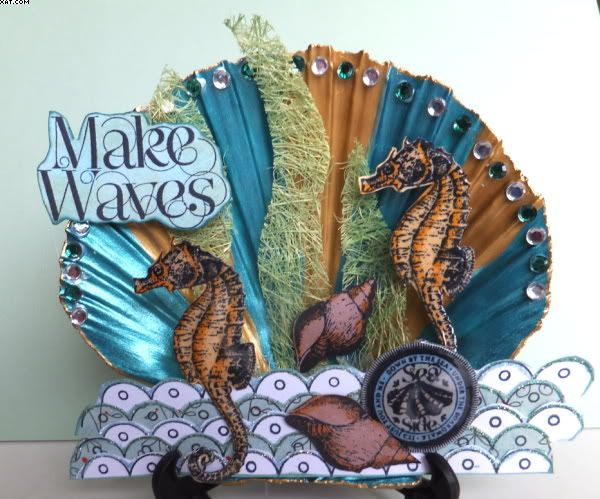
This has been in the making for a long, long time. The real scallop shell was decorated months ago and has sat around since then waiting for attention.  Because of the shells links with the sea I wanted to do some craft related to that environment so did this 3D scape.  All contained in its own shell home.

The shell was thoroughly washed and then painted with stripes in Viva precious metal colour in gold and turquoise.  It took a couple of coats to cover properly. The edges of the shell were then gone over with gold Krylon pen to neaten.  Some acrylic gems were adhered around the edge of the shell with more Glossy Accents and alternate gems coloured with the brush pen in green.
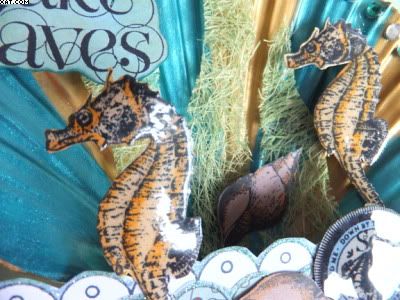


All stamped elements (apart from the waves) came from a plate of polymer stamps by Pink Paislee (Nantucket).  The shell, seahorse, word seal and words were all stamped on white card with Memento tuxedo black ink which were then coloured with Marvey alcohol brush pens before trimming out and edging with AI to cover white card edges.  A word seal and two seahorses were glazed with Glossy Accents.

The sea was made up from a border stamped multiple times on printed paper, trimmed and layered and edged with a Quickie glue pen and glittered with transparent blue water Art Glitter.
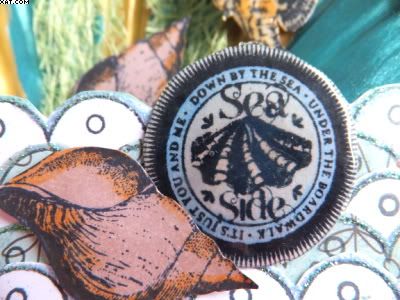


Some fused green sizal was cut into frond shapes before assembling and layering all elements as shown with hot melt glue to make a 3d seaside scene.

The shell has been supported for display using a plate holder.

It turned out just as I had envisaged it and it was great to use up that shell !!  You know what they say ......... 'Better Late Than Never'

It will also fit the challenge over on the Happy Daze Design Team blog this month which is 'April Showers' and the Simon Says Stamp & Show challenge which is 'Anything Goes'

Sid xx

Pin It

Sunday, December 04, 2011

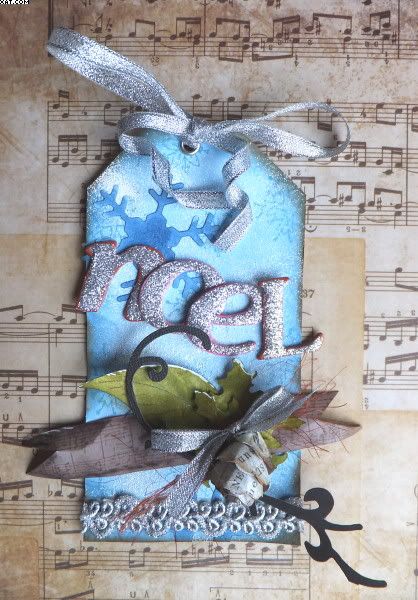
Tims Tag No.1


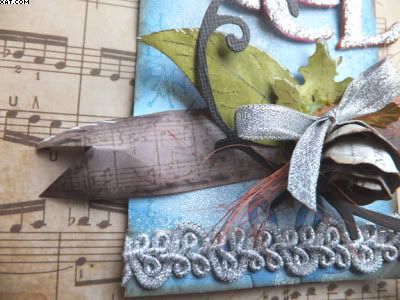
In the best traditions of following Tim Holtz '12 Tags of Christmas' for 2011 this is my first offering. Not quite using all of the Ranger materials but certainly using some of the techniques.


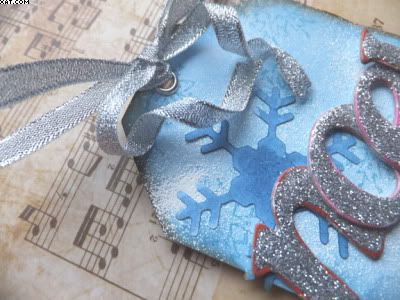
I Started with a blank tag and covered with a piece of printed paper (snowflakes).  Gave it a coat of picket fence Distress Stains and dried with the heat gun.  Then used a couple of small snowflake stamps and stamped randomly with faded jeans Distress Ink.  Finally applying a sprinkling of seafoam white embossing powder and heating from below until melted.  The tag was then edged with vintage photo Distress Ink.

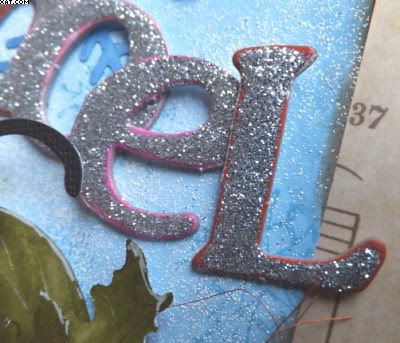
Then I prepared the diecut letters to spell out 'Noel'.  These were coated with fine silver glitter after a liberal coat of pva glue and allowed to dry.


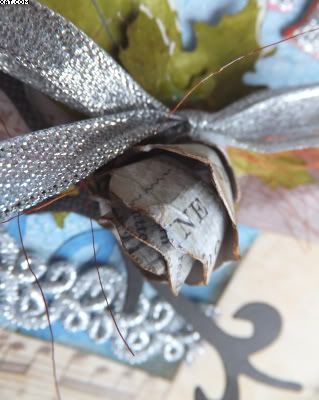
The embellishmnents were all cut using Sizzix dies (Non-Ranger) and the pine cone made by hand by cutting a spiral with a wavy edge. The  leaves were cut from card coloured with shabby shutters Distress Stain. and the banner was made by hand and stamped with a music stamp in vintage sepia Versafine ink.  Other additions were some strands of brown sisal and a little silver bow along with a die cut stem from another Sizzix die.  All were assembled using various foam pads and glues at the bottom of the tag.


Some more large snowflakes were diecut out from blue paper coloured with faded denim Distress Stain and these were stuck onto the background.  A piece of silver braid was applied at the base of the tag.


Finishing touches were to add a silver eyelet with the crop'a'dile and to tie through with some more of the silver ribbon.

Sid xx

Pin It

Friday, August 27, 2010

'On Your Bike' Tag


Here is another tag for the UK Stampers Forum weekly challenge.  This weeks recipe is:

1. Dots
2. Transport
3. Fabric

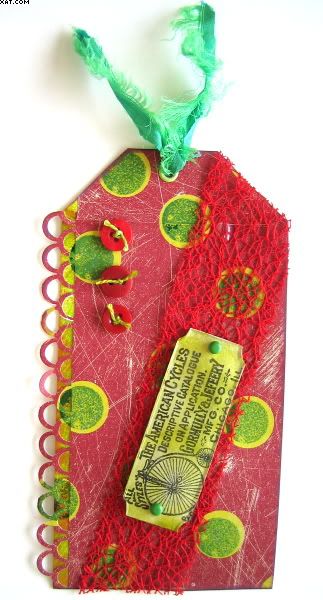
I started with a blank card tag and took a piece of  Basic Grey printed paper, a design with a red distressed background and lime dots and used a Martha Stewart punch to scallop the left edge.  The blank tag was coloured down the left hand edge with chartreuse and camel Impress ink.  The backing paper was then applied leaving one layer of the scallops to overlap the left edge of the card.  A foam Dot stamp was inked with dark green dye ink and stamped inside each of the background dots to add a different shade of green.


I then stamped an old American bike advert stamp (Tanda) onto white card with Versafine onyx black ink, and coloured with peeled paint Distress ink.  Next a clear acrylic bookplate was covered in Glossy Accents and stuck over the coloured stamped image (positioning to suit).  Once dry the excess card was trimmed from the edges of the bookplate.  Two green brads were added through the plates holes.


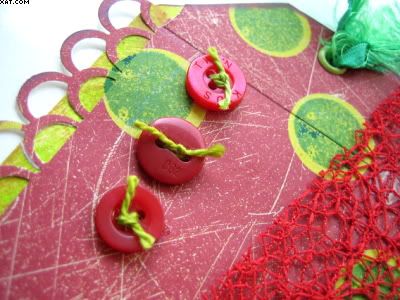
Three assorted  red buttons were then tied through with lime green embroidery thread and stuck in place as shown with Glossy Accents.  A piece of red spiders web fabric was then added on small glue dots across the tag at an angle and trimmed off at the edges.  The bookplate was adhered onto the webbing with glue dots also.


A Lime green eyelet tied through with lime green silk fabric was then applied with the crop-a-dile to finish of the tag.

The colours are actually a bit festive I suppose, but I liked the really bright contrasting finish.

Sid xx

Pin It

Sunday, October 05, 2008

Structure ATC

Here is an ATC done for this weeks Wednesday Stamper challenge. I thought hard and long about this one. The theme this week was 'Structure'

I decided that I wanted to go natural, so I chose some natural sisal webbing dyed blue as the background. This was adhered to a white base card with glossy accents. I then used some real bark fibres for the bottom left hand corner which I stamped with letter stamps in black Stazon before overlaying on the webbing as shown. I heat embossed some loose pearlised blue EP in an irregular stripe half way up the card and applied some iridescent lilac seed beads to the top right again with glossy accents. The card was finished by edging with dark blue colorbox chalk ink.

I liked the texture which provide some structure too. Hope you like it too :-)

Pin It
Related Posts Plugin for WordPress, Blogger...