>
Showing posts with label Printed Letters. Show all posts

Wednesday, June 25, 2014

Shooting Stars


This 6 x 4 inch postcard is my entry into the UK Stampers Forum monthly postcard swap.  This months theme requires you to use a star or stars somewhere on it.

I used a plain white card covered in a printed green paper with criss-cross navy lines.  I have used rubber stamps and dye inks to stamp the base leaves, starry flowers & arrows.  The stems and leaves have been added by hand with pens. A little bit of bling was added with Stickles in the centre of each flower.


The top line of images is actually a piece of clear glossy printed tape.

Finishing touches were to add the words and a little embellishment with Posca pens in white and gold with a spray of matt acrylic lacquer to seal.


These are sent as they are to the recipient ........... why not join us and have a go, it's very popular !

Sid xx

Pin It

Saturday, March 01, 2014

Defining Moment


This card was made with an acrylic paint mono printed background, overstamped with black archival ink with some Tim Holtz Stampers Anonymous stamps.


The background was sewn onto some textured black card and the plate was embellished with a couple of stamped images from PaperArtsy.


Some detail was added with Posca pens in gold, yellow, white and orange.  These were stuck in place along with a printed 'Defining Moment' wordplate.  Idea came from Craft Stamper Magazine and I have entered this in the Craft Stamper Make it Take it challenge.

Sid xx

Pin It

Friday, September 27, 2013

No. 42 A Pot Plant


Here is another weekly entry onto my mini easel PhotoBook.  This one is No. 42 - A Pot Plant !

I have had this Begonia Rex for many years and it sits in my porch (often neglected but still full of fab and colourful decorative leaves.  I have lots of pot plants actually.  The pic was taken on my phone and printed on the Pogo printer.


I have used papers from a 6 x 6 inch paper pad.  The background is a plainish rose pink trimmed to fit my easel book and I have decorated the base with another matching border which has been embellished with Card Candi as shown.


Next some decorative leaves were stamped in Versafine onyx black along the left and right sides of the paper.  The photo was mounted on some green paper and stuck in place as shown.

The words are made from self adhesive alphas, printed words and epoxy stickers.


Finally a piece of self adhesive ruler tape was added across the right top corner of the photo.  Most edges were coloured in dye inks and the finished page was finally stuck in place.

If you would like to join in click HERE and HERE for more info.

Sid xx

Pin It

Monday, March 12, 2012

CC Domino Book


I have joined in on making an Altered Domino Book as part of a swap over on UK Stampers.  The swap had an open theme so I chose my theme along the lines of the pottery art of Clarice Cliff.  All stamps used are from a set I have had for ages from Tanda.

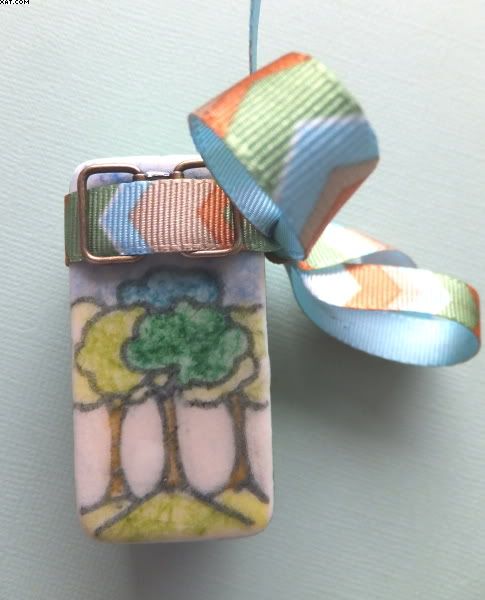
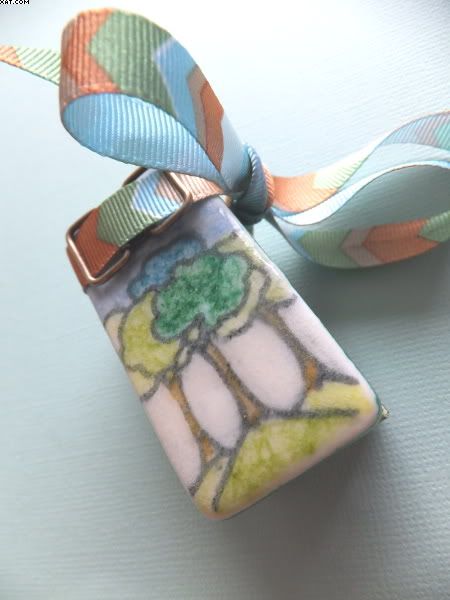
The two ivory coloured dominoes I used had metal spinners on the spots side which I first removed with a pair if pliers followed by a stiff sandpapering of the plain back and sides to offer a key for the surface treatments.

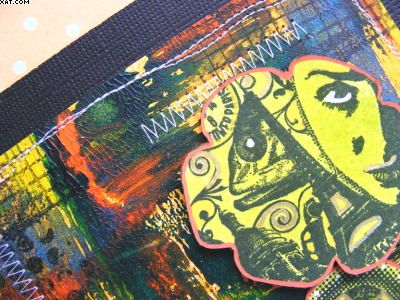
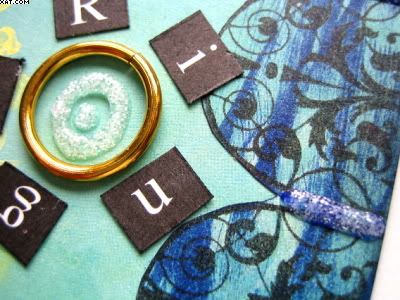
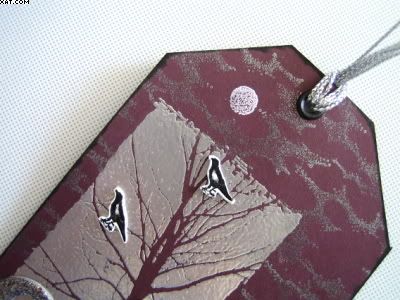
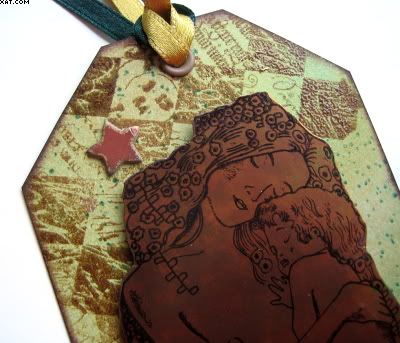
I carefully stamped part of a tree design in Archival black ink on both of the donimoes and dried this thoroughly with the heat gun.  I then carefully coloured the design with Alcohol ink markers taking care not to damage the outline.  Once thoroughly dry I quickly applied Versamark ink and then heat embossed with clear UTEE.  As can be seen from the pics this sort of caused a mottled but not unpleasant appearance to the images, in fact I thought it looked like a pottery glaze.

Once cool I applied a metal ribbon loop with Glossy accents to the front domino and allowed to dry. All outside edges of the dominoes were carefully painted with two coats of Viva Decor Metallic emerald paint.


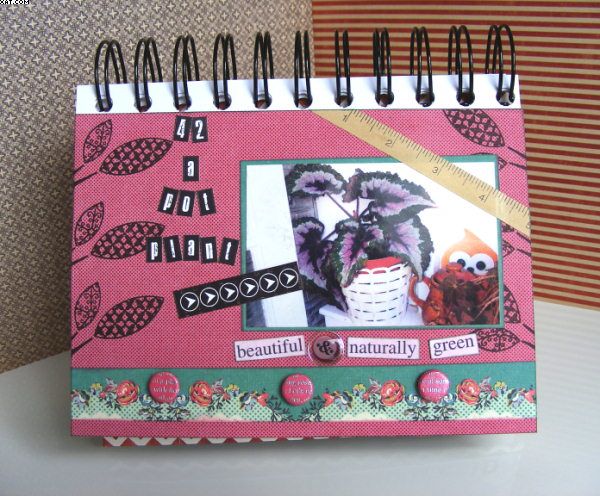
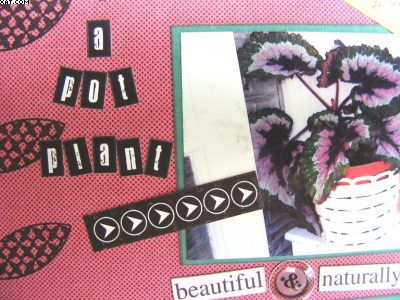
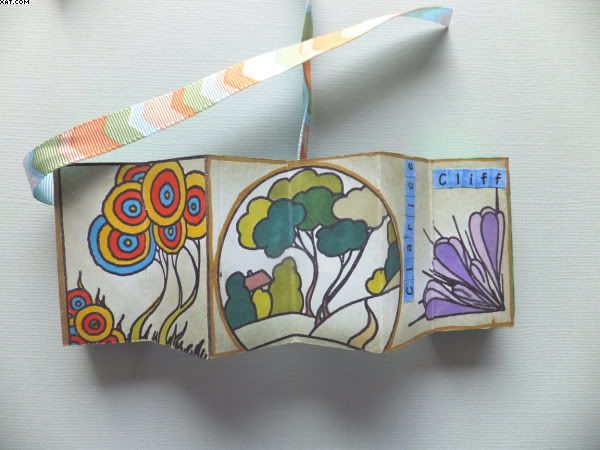
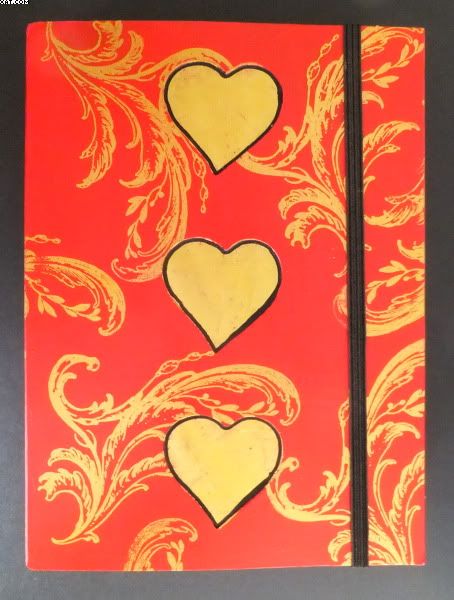
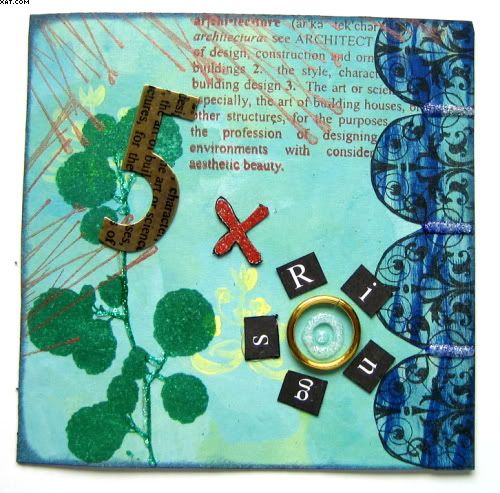
The concertina insides were made from light green card measured and folded as shown.  The decoration was done before sticking to the inside of the two 'domino' covers.

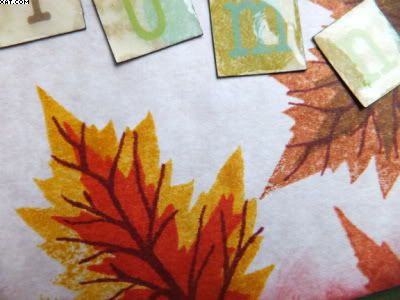
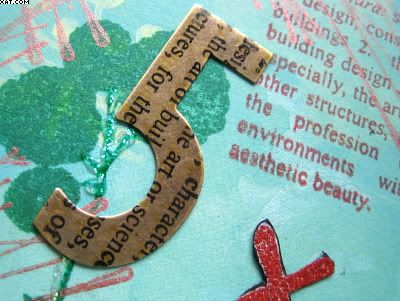
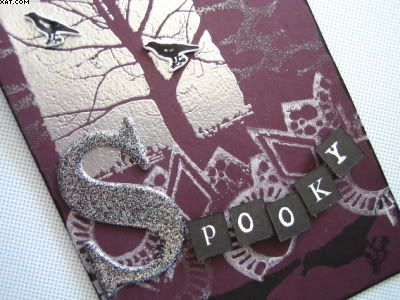
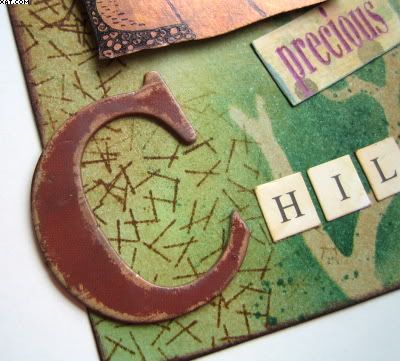
Again I used more stamps from the set which were coloured with more AI brushes, more embellishmnet was added with Pitt gold pen and some self adhesive letters, coloured blue to spell 'Clarice Cliff'.


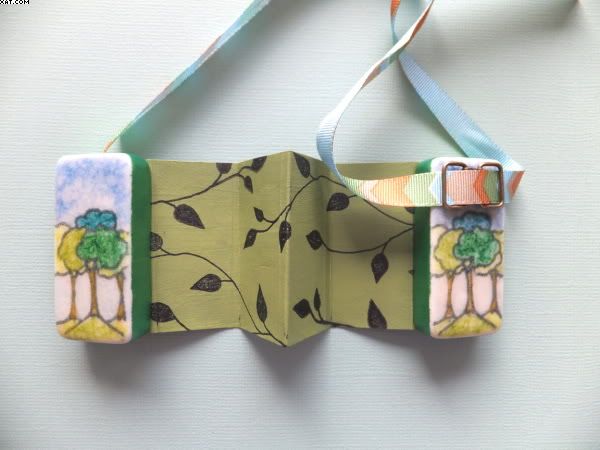
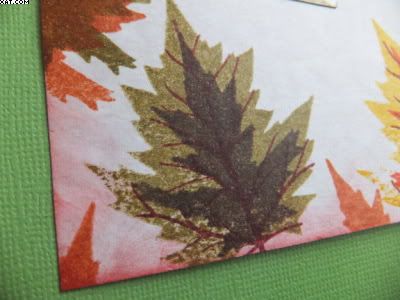
The opposite side was painted with lichen green Acrylic paint and stamped with a leaf/vine stamp in Archival black ink.


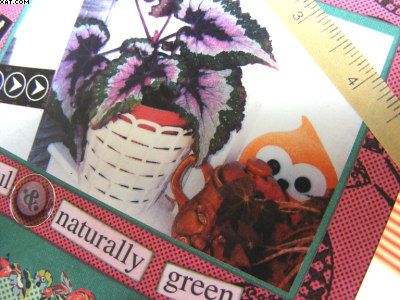
Both dominoes were stuck to the concertina with Glossy Accents and a short piece of chevron grosgrain ribbon in similar colours was threaded through the metal ribbon loop so as not to hide the design.  This was tied in a bow at the side as a closure for the book.


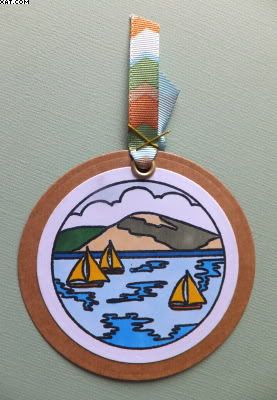
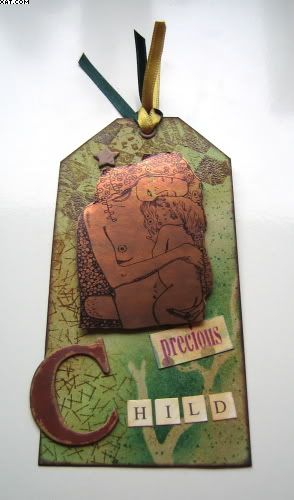
Finally I made a matching tag from two pieces of diecut card with more stamping and colouring.  An eyelet was added with the crop-a-dile and some more of the ribbon attached with gold staples.

Sid xx

Pin It

Sunday, March 04, 2012

The Fragile Heart


Here is a piece I made for a challenge on The Cupboard Trilogy Blog.  The main stamp used in this piece is a cover stamp from Craft Stamper Magazine designed by the late, great Sarah Lawrence of Crafty Notions who passed away very suddenly in December 2011.

The challenge is to design a piece of craft using the cover stamp. 


I have used a box that originally contained Valentine chocolates and have altered it to contain a flower made from the hearts depicted in the stamp. The box was painted with red satin acrylic paint and stamped on the outside with a swirl stamp inked in Stazon Gold.  The three hearts were coloured in Posca gold pen and edged in Posca black fineliner.

The inside of the box was lined with spotty red paper and decorated with a flower made from the heart stamp which had been stamped a number of times in black Archival ink and coloured with barn door Distress ink.  Glossy accents was used to assemble the heart 'petals' finally adding a red glass cabochon as a centre.


The words were printed on the printer and added over another stamped heart on foam pads. Hope this is a fitting tribute in the memory of a great crafting icon !

Sid xx

Pin It

Sunday, November 27, 2011

Festive Shadow Box


In the same theme as my last post and using the same papers here is a mini shadow box book which I have decorated in a festive way. All papers used are from Cosmo Cricket 'Dear Mr. Claus' 6 x 6 inch paper pad (3d Jean).


The outside of the box has been embellished with some elements cut from the paper along with a red satin bow and hat pin (The Ribbon Girl)


The inside boxes have a variety of papers, wooden snowflakes, ribbon, metal charms, felt shapes etc.  Yes, the little Christmas tree is from my cake featured in the last post so it's 'waste not want not' recycling in action !!


The internal frame was given a generous coating of pale green transparent glitter applied with PVA glue.


I have used Distress Stain in forest moss and barn door along with the corresponding Distress Inks to colour edges and raw chipboard surfaces.


Really enjoyed making it !

Sid xx

Pin It

Sunday, September 25, 2011

Autumn Leaves


This is the next postcard in the monthly challenge over on UK Stampers Forum.  This months theme is Autumn.  I started by cutting a 6 x 4 inch card blank from mottled brown card.


The stamps are from Lavinia and are a set of three layered leaf stamps. All were inked and stamped with Adirondack dye inks in butterscotch, espresso, redcurrant & pesto in different configurations.  Once stamped they were dried with a heat gun and sprayed with cheap hair lacquer to seal the inks as the card will be posted as is to the recipient.


The letters spelling out 'Autumn' were pre printed and edged with black stazon ink before sticking in place with Glossy Accents.


Each of the letters were then covered with a coat of Glossy Accents to give them a raised glaze.  Once dry the card was edged with barn door Distress ink applied with cut'n'dry foam.

Sid xx

Pin It

Saturday, September 24, 2011

Keeping Up Appearances


I have an owl fixation at the moment, especially these collage elements from ARTchix studio.  Whilst on my owl 'roll' I made an A4 background from stout white card.

The base was made with Distress Stains in scattered straw, spiced marmalade, barn door & pine needles applied directly from the bottles onto a water spritzed card.  These were then dried completely.

I then used a plastic scraper and applied a lightly spread coat of grey Dylusions paint - this knocked back the colours slightly and provided a nice matt surface.  Some more Dylusions paint in magenta was added and scraped selectively over parts of the background with some added using the edge of the scraper to form lines. 


I then used a filigree glimmer screen mask and sprayed with Moonglow Glitz Spritz in royal emerald fire and desert moon purple sage.  The mica effect is subtle and can't be seen easily in the pics.  This was completely dried again before stamping.  I used more Distress stains and a brush to add shadows in the arrows and colour some of the flower petals in walnut stain.


The arrows (Prima), flower border (Elusive Images) and the seedheads (PaperArtsy) were stamped as shown in Archival black ink. The owl, eyes and hat were stuck in place and the printed words coloured in barn door and edged with black Posca pen before adding and edging with white Posca pen.


More of the white Posca was added to highlight elements of the stamped images.  The whole piece was then edged with barn door distress ink added with cut'n'dry to finish. Hope Hyacinth Bucket is not offended !!

Sid xx

Pin It

Tuesday, April 27, 2010

'Fly, fly dragonfly' ATC


Here is a little Dragonfly ATC I made for a swap.  I used torn bookpaper on the background which was coloured with cut 'n' dry foam and Memento inks in bahama blue and bamboo leaves helped along with a little crushed olive Distress ink too. 

The dragonfly stamp (Artistic Stamper) was stamped in onyx black Versafine and coloured with Marvey le Plume II pens, cut out and applied onto the background. The eye stamp (Stamp in the Hand) was stamped three times also in onyx black and the little bird (?) was stamped several times with the Memento bahama blue. Highlights were added with a white opaque pen and the letters (K&Co). I added a Sizzix die cut corner cut from green paper to finish.

Sid xx

Pin It

Sunday, November 22, 2009

12 Days of............Day 5

Here is my next entry for the 12 Days of............ Challenge ! This one is representing Day 5 (5 Gold Rings).

I actually had a gold ring (not real gold , of course !) which I wanted to include on the 4 x 4 inch square. I used a background of printed paper which was stamped with a Purple Onion stamp and emerald Impress Dye ink. I then used a text stamp (Purple Onion) and stamped this top right with autumn leaves Impress ink.

Next I stamped a swirly arch stamp (Purple Onion) several times in a line on the same background paper with black Stazon ink and cut this out, swiping with ultramarine Impress ink before applying with glue stick down the right hand side. This was trimmed to fit. Another Purple Onion stamp was used to add the spikey bits on the top left in Brilliance cosmic copper.

Next a metallic bronze No. 5 numeral was stamped over with the text stamp and black Stazon and stuck into place with Glossy Accents. The x ( See D's alphas) was stamped on blue card with Versamark and heat embossed with terracotta embossing powder. This was cut out and applied as shown.

Next the gold ring was applied as shown with Glossy Accents and surrounded by printed letters to spell 'Rings'. The whole card was edged with iris chalk ink and small amounts of frosted lace and crystal Stickles added to finish.

Sid xx

Pin It

Monday, September 14, 2009

'S' is for Spooky Tag


Here is my tag for this weeks challenge over on UK Stampers Forum. This weeks theme was 'S' is for Spooky. Wanted to create a dark and bleak effect on this one.

I began with a dark brown card trimmed to size. I first used a stamp of a bare tree (PaperArtsy) and inked the stamp with Versamark ink and heat embossed with detail silver embossing powder. I then used a cloud stamp (A Stamp in the Hand) and inked this with Brilliance moonlight black ink and stamped the cloud background. The moon (A Stamp in the Hand) was stamped in Brilliance moonlight white in a gap in the clouds.


The bird stamp (PaperArtsy) was next inked with black Stazon and stamped onto white shrink plastic 3 times, and trimmed and shrunk with the heat gun. The stamp was then inked with Versafine onyx black and stamped along the bottom of the tag. I used a Stewart Gill Artaglio stamp inked with Brilliance starlight silver to fill in the gap under the words.


The chipboard letter S was coated in Versamark and heat embossed twice with Marcasite embossing powder. The tag was then assembled by sticking the shrunk birds on the tree as shown with Glossy Accents. The chipboard letter S was stuck in place followed by some K&Co black letters (mounted on foam pads) to spell out 'Spooky'. The whole tag was edged with Brilliance graphite black. A black eyelet was applied with the crop'a'dile and 4 short lengths of silver metallic cord were tied through the hole.


Sid xx

Pin It

Sunday, September 06, 2009

'C' is for Child Tag


Tag time again !! This is the 'C' for Child Tag I have crafted as a challenge over on UK Stampers Forum. I thought the Klimt image was appropriate and it looks really cool on the metallic card that looks very much like copper !

Pale blue card was used as the base tag. This was then coloured with Distress inks applied with cut'n'dry foam in shabby shutters & vintage photo. This was then stamped with vintage photo and a diamond stamp from PaperArtsy at the top and was heat embossed with clear embossing powder. Two background stamps (dots & sticks ?) were inked in Distress pine needles and vintage photo and stamped as seen. A mask (Heidi Swapp) of a tree branch was applied at the bottom right and more Distress pine needles applied over it. That completes the base tag.

Next a Klimt image of a mother and child(Cherry Pie) was inked in black Stazon and stamped onto a two-tone metallic card. This was trimmed out and applied to the tag with foam pads as shown.


A chipboard 'C' and a star were coloured with Distress vintage photo and applied as shown with Glossy Accents. The pre-printed 'precious' and letters (K&Co) were inked with vintage photo Distress and applied as shown. Finally the whole tag was edged in dark brown chalk ink and an eyelet and satin ribbons threaded through to decorate.

Pin It

Tuesday, August 18, 2009

Lizard ATC

This is an ATC I did for this weeks TMTA challenge. Reptiles was the theme so I made a black Fimo polymer clay lizard using a mould from Krafty Lady and applied mica powders before baking. The base is black card which has been stamped with galaxy gold Brilliance ink using a stone texture stamp from Judikins 'Artifacts' cube and sprayed with Moonglow gold glitz spritz. The letters are pre-printed by K & Co and attached with Glossy Accents. The ATC has been edged with gold Krylon pen.

One problem I found is as usual the shiny finishes on this card are very difficult to photograph so it looks much better in real life.

Sid:-)

Pin It

Monday, June 22, 2009

'P' is for Party Tag


Another tag in the Alphabet series. This time it's 'P' for Party and rather than go for the usual party hats, clowns, baloons etc. I thought more Political and went for the Green Party - eco friendly so I though that green plants and flowers fitted the bill.

The tag was cut from oatmeal mottled card and was coloured with the wonderfully vibrant Nick Bantock inks from Ranger in chartreuse leaf and sapmoss green, applied with cut'n'dry foam and a swirling motion to achieve the shaded areas.

The stamps used on the body of the tag are a selection from PaperArtsy and Crafty Individuals. I wanted to achieve a relatively densely layered effect so I just overstamped many times using NB sapmoss green, Brilliance pearlescent ivy & starlight black inks. Some flower were stamped also and coloured with a waterbrush and Adirondack stream and cranberry inks as shown.

The main letter P was made from chipboard which was rubbed over with Versamark and triple heat embossed with dark green embossing powder. At the last layer the leaf stamp was inked with Brilliance sunflower yellow ink and whilst the EP was still molten the inked stamp was stamped into the EP on the letter and left for a few moments until the EP had set. Full instructions on triple heat embossing are available as a class on my blog by clicking HERE.

All the letters are K&Co and I trimmed them and edged with green chalk ink. These were stuck in place along with the main chipboard letter as shown. To finish a green eyelet was applied with the cropadile and a small piece of dry natural twig applied as a hanger. The tag was finished with an edging of green chalk ink.

This shot shows more detail of the letter P embellishment. :-)

Pin It

Sunday, May 17, 2009

'B' is for Bird Tag

Here is my 'B' is for Birds tag. Just finished for my entry into the UK Stampers Sunday Challenge.

You already guessed the theme from the title so I used a recently bought stamp to make the birds. First I stamped onto a blue background paper with an Illusive Images flourish stamp and Brilliance Pearlescent blue Inkpad to make the background for the bird bodies. The wing background was stamped with Stazon Hydrangea ink and a field of sky stamp from Stamp In The Hand onto another background paper. These backgrounds were then stamped with bird bodies and wings stamps from Build a Bird plate from Stamp Camp in onyx black Versafine Ink. The wings and bodies were trimmed out with scissors ready to be added to the tag.

The tag was cut from plain cardstock and this was coloured with Distress Inks in Faded jeans, Dusty Concorde and Milled Lavender using an applicator tool and cut'n'dry foam. A square background stamp was then spritzed with water and applied onto the tag to wet the ink. This was then dried quickly with a heat gun to set. The letter B was stamped with a foam stamp and the Faded Jeans distress ink as shown.

The birds were assembled and stuck onto the tag as shown and were finished with the eyes and legs in the same onyx black ink using the component stamps. Three squares of the bird body background were punched out and folded in half and applied around the edge of the tag as shown. The letters were cut out from K & Co printed letters and applied as shown. The Fly Away Home was stamped twice in Iris Blue Chalk ink and once at the base with the onyx black Ink. The final flourish was to add an eyelet in cerise and a piece of tied pale blue velvet ribbon through it.

Rather like my bird stamps...........will definately use them again !

Hope you like the tag :-)

Pin It
Related Posts Plugin for WordPress, Blogger...