>
Showing posts with label Acrylic Stamp. Show all posts

Monday, January 28, 2019

Valentine .....


Made a set of 3 Artist Trading Coins on lasercut MDF bases for Valentines Day ....

The bases were painted with matt acrylic paints and stamped with hearts in Versafine black ink before being coloured with posca Markers with a few clear acrylic circles in violet.  The 'Big hugs' was stamped on coloured card in Archival black ink, trimmed out and applied on foam pads.  The Coins were edged in Krylon gold.

Sid xx

Pin It

Wednesday, April 04, 2018

Florals ......


A mass of ATC's prior to being swapped for a monthly swap over on UK Stampers Forum Facebook Group .....

What a fantastic array of colour !!!!

If you fancy joining in our swap click HERE to join the group - it's free, friendly & fun !!!

Sid xx

Pin It

Thursday, August 04, 2016

Low Calorie Diet?


The challenge this week over on the City Crafter Challenge Blog for week 323 is 'I Gained A Stone' so I made this rather sweet card as my entry.

I started with a 6 x 6 inch white card base.  On another piece of white card I stamped four 'inchie' stamps from Inkadinkado in black Memento dye ink and then punched these out with a 1 inch square punch.  Thought that these stamps fitted the bill for the subject perfectly.


These were then coloured with Marvey alcohol brush pens, edged in black and decorated with diamond Stickles for a bit of bling.


I then cut lengths of rainbow striped Washi Tape, torn at one end and applied directly to the card base and edged the left and bottom sides with fine black Micron pen to add relief.


I then applied the decorated inchies on foam pads over the Washi Tape as shown.  The sentiment is from Stamping Bella and I stamped direct onto the card in Versafine black ink to finish.

Think if you have a sweet tooth these little tempting treats could soon add on the weight although the subject centres on baking really and who doesn't like to spoil themselves with a little treat from time to time ?

Enjoy !!!!

Sid xx

Pin It

Wednesday, August 03, 2016

Leafy Celebration


I made this card using mainly Uniko stamps and clear embossing powder.  Bold colours but subtle embossing to allow the original colours to show through and acting as a resist to more colour layers added after the embossing.

I started with a 4 x 4 inch white card blank and cut a matt slightly smaller out of more white card.  I then set about colouring this with Adirondack and Distress inks in greens and blues applied on cut'n'dry foam.  I then randomly stamped the rough spots (Finnabair) in emerald ink.


I then stamped in the leaf stamps in Versamark ink and heat embossed with detail clear embossing powder to act as a resist.


More of the same colours were added to produce a much darker layer and the excess wiped off with a dry paper towel to reveal the lighter lower layer.

The Celebrate Today sentiment was stamped in black Versafine ink on more white card, trimmed out, edged with blue distress ink and applied on foam pads as shown. Three green pearl cabochons were added to finish.

A bit moody but bold at the same time.

Sid xx

Pin It

Thursday, April 21, 2016

Spring has Sprung .......


Well I think you will all agree ' Spring has Sprung' finally, with gorgeous daffodils out in their full Spring glory.

I decided to make this little card to celebrate the season.  I used Beth Hughes stamps from a 'Seasons' series.  I first stamped the daffodils image in black Memento ink on white card, trimmed it out and coloured with Alcohol Ink markers.  The plate was then edged in more Memento and mounted on foam pads.


The sentiment was again stamped on white card in more Memento black ink, trimmed and edged and a mounted on more foam pads.


Love the clean and simple look on this card and here's wishing you a fantastic Spring !

Sid xx

Pin It

Sunday, April 17, 2016

Inchies of Gratitude ......


A big thank you to all who take the time to comment on my blog.  This monochrome card sums it all up !  This card also fits the bill for the Less is More Blog Challenge for week 272 whose requirement is for you to 'Use 3 Stamps'.  That's exactly what I have done here !

I started with a 5 x 7 inch topfold white card blank.  From another piece of white card I cut a smaller matt and embossed this through a an Indentz leafy vine folder using the Sizzix Big Shot. This was adhered on the card front.


I then stamped a couple of Spring inchie stamps on more white card in Versafine black ink.  These were punched out with a 1 inch square punch.  I then diecut more larger squares in more white card and layered up the stamped inchies on these using foam pads.

These were adhered over another strip of white card left plain.


The sentiment (Papertrey Ink) was stamped on white card with more Verafine black ink, trimmed out and mounted as shown on more foam pads to finish.

So thanks once more !!

Sid xx

Pin It

Wednesday, March 23, 2016

One for the Guys


Thought that this card would be great for a man.  I used a cream 4 x 4 inch scalloped card base to start.  All papers used came from a 6 x 6 pad by Kaisercraft (Sears & Son)


I first stamped the base card with a compass stamp in brown dye ink.  Papers were then selected, cut and trimmed out to make a collage of layers as shown. All stuck in place with acrylic glue.


Final touches were to add the sentiment which was preprinted on cream card and to stick a metal key in place with hot glue.

Sid xx

Pin It

Saturday, March 12, 2016

Believe .........


Love 'Shades of Green' as a colourway for fresh looking cards so I decided to make this fantasy card featuring these colours.  The contrast of black against the colours really makes the main image pop !

I started with a white card blank with a top easel fold.  I then cut a matt out of lime green card and layered this onto the card front. I cut another smaller matt from white card and coloured this with Adirondack dye inks on cut'n'dry foam through a butterfly stencil, layering with various shades of green.


I selected a Lindsey Mason silhouette acrylic stamp, inked in Versafine onyx black ink and stamped directly onto the stencilled matt.  The matt was then stuck in place on the card front.

I stamped the sentiment onto more lime green card in Versafine onyx black and trimmed this out before matting onto white card, trimming again and sticking in place.


I then adhered some green acrylic gems onto the card front to finish.  I like the clean lines set off with some bling on the finished card.  Hope you do too !  This card meets the Craft Stamper Take It Make It Challenge for March whose theme is 'Anything Goes'.

Sid xx

Pin It

Sunday, December 13, 2015

Krafty Cheer


Here is another Christmas card I have made.  Again using a Kraft card base.  I have matted the green Christmas tree background paper onto red card to leave a border on the base card.


The animals were diecut from the same red card and stuck in place.  I then cut some self adhesive cork sheet into an undulating shape and stuck this over the base of the animal diecut.


I then stamped the sentiment in onyx black Memento onto white card, trimmed to size and stuck in place.

Simple but effective I think as I have gone back to the traditional Christmas colours for this one.

Sid xx

Pin It

Friday, November 07, 2014

Bunny Love !!


This little card featuring a cute bunny and was made from a 5 x 7 inch white card blank.  I used a set of letter dies to cut out the word 'LOVE' as shown, carefully positioning the dies before cutting with some low tack masking tape.  Once done I lined the inside front of the card with some plain pink cardstock trimmed to size and this was adhered to show through the letters.


I then stamped a little bunny in black Memento ink and coloured this with Copic markers.  I applied some Glossy Accents to bunnies paws and once dry trimmed him out, sticking him in place through the letter O.


Finishing touch was to tie a piece of lovely checked ribbon around the card as shown and that's it !!

Sid xx

Pin It

Sunday, August 17, 2014

Good Luck


This very windy Sunday I am relaxing after doing the usual household chores and I made this card.  I started with a 4.5 x 4.5 inch white card blank.

I then stamped the bird (pinkpaisley) in Memento tuxedo black ink on a plain white card plate and coloured with alcohol ink pens.  This was matted on black card and the whole plate heat embossed with Versamark ink and detail clear embossing powder to give a glossy finish.


I then adhered a piece of stripey self adhesive fabric strip as shown across the card and mounted the birdy plate over this on sticky dots.


The words were stamped on more white card in Memento ink and trimmed out.  This was mounted as shown on foam pads.


The pic above shows the clear glossy finish achieved with the embossing powder.  This fits the bill for this weeks Less Is More challenge blog for week 185 whose theme is 'Animal'.

Have a great Sunday everyone and thanks to all who take the time to comment and follow my blog ...... it is really appreciated !

Sid xx

Pin It

Wednesday, August 14, 2013

Friendly Flower


Like the idea of simple sometimes ?

This little card was done simply with three strips of washi tape cut with an angled end, a stamped image of a flower with Memento tuxedo black, coloured with an alcohol brush marker and a die-cut sentiment plate adhered on foam pads.

Sid xx

Pin It

Saturday, March 24, 2012

Face Forwards


Here are a set of Twinchies made for a swap over on UK Stampers Forum.  I have used white card, swiped with various colours of Impress dye inks and overstamped in Archival black ink with an old cover stamp from Craft Stamper Magazine.

I have used bleach in a waterbrush to bleach out the faces to obtain that effect.  Each is finished by edging with contrasting chalk inks and embellishing with dots and circles added with a gold Posca pen.

Nice and bright just as I like it !

Sid xx

Pin It

Sunday, March 04, 2012

The Fragile Heart


Here is a piece I made for a challenge on The Cupboard Trilogy Blog.  The main stamp used in this piece is a cover stamp from Craft Stamper Magazine designed by the late, great Sarah Lawrence of Crafty Notions who passed away very suddenly in December 2011.

The challenge is to design a piece of craft using the cover stamp. 


I have used a box that originally contained Valentine chocolates and have altered it to contain a flower made from the hearts depicted in the stamp. The box was painted with red satin acrylic paint and stamped on the outside with a swirl stamp inked in Stazon Gold.  The three hearts were coloured in Posca gold pen and edged in Posca black fineliner.

The inside of the box was lined with spotty red paper and decorated with a flower made from the heart stamp which had been stamped a number of times in black Archival ink and coloured with barn door Distress ink.  Glossy accents was used to assemble the heart 'petals' finally adding a red glass cabochon as a centre.


The words were printed on the printer and added over another stamped heart on foam pads. Hope this is a fitting tribute in the memory of a great crafting icon !

Sid xx

Pin It

Monday, December 19, 2011

Tim's Tag No.6


Still battling on with the 12 tags of Christmas and I am determined to get them all done before Christmas.  This is my version of Tag No.6.  I have used a sizzix embossing folder on a piece of silver mirri board cut to the size of the tag as the base.


This has then been selectively inked with a variety of colours of Alcohol Inks over the embossing.


A Noel stamped plate and a Merry Christmas plate  were then 'hung' on pieces of golden fancy braid adhered with double sided tape.  The plates were raised on foam pads.


Another piece of braid was added at the base of the tag. The tag was then finished with a gold eyelet applied with the crop'a'dile, a green ribbon bow and some red/gold mesh ribbon tied through.

Sid xx

Pin It

Sunday, October 30, 2011

The Elixir - of death !


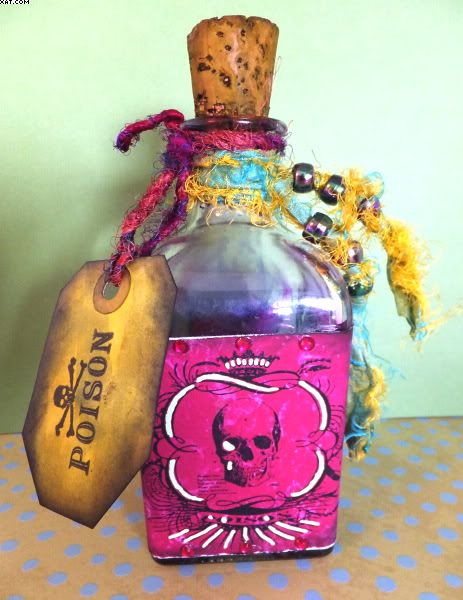
Here is an altered poison bottle just ready for Halloween. The bottle started life as one of those reed air fresheners and I liked the shape for this project.


I gave it a good wash and when completely dry liberally coated the inside with splashes of alcohol in in red pepper, denim & raisin added directly from the dispenser and moved around the bottle to mix and obtain a splashed and dripped finish in the bottle. Once happy with the effect I set about doing a spot of embellishing.


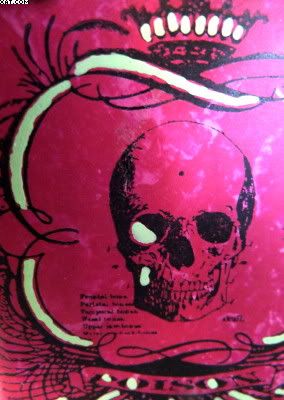
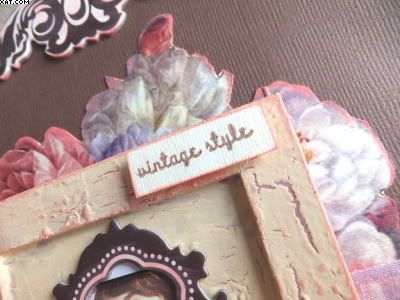
I stamped a clear stamp from PinkPaislee onto magenta printed paper with Archival black ink to make a label.  Trimmed this out and then distressed the edge with sandpaper and black soot Distress Ink applied on cut'n'dry foam.  This was further coloured with a lime green souffle pen before sticking in place on the bottle with Glossy Accents. Some magenta crystals were stuck onto the top and bottom of the label.


I then made a tag by cutting down a white tag into a sort of coffin shape and colouring with crushed olive and bundled sage Distress Stains.  The tag was dried, edged with black soot Distress ink and stamped with another of the PinkPaislee stamps in Archival black.  The tag was threaded through with some magenta silk woven thread and put aside.


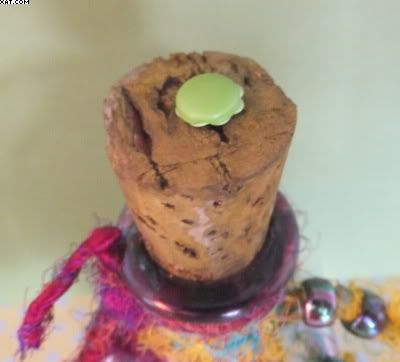
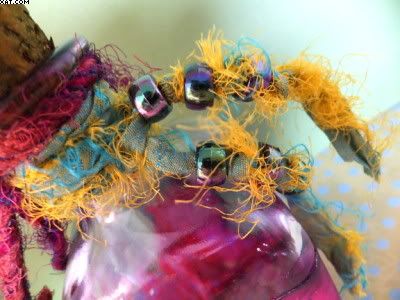
Next I did the cork which I coloured with a few coats of the crushed olive Distress Stain.  I topped this with a lime brad and eyelet stuck into the top of the cork. The fibres (made from silk sari ribbon in yellow and lime green) were threaded with black AB beads, separated by tied knots.  The bottle was then embellished with the tag and the fibres tied round the neck of the bottle.

This one also qualifies for the 'Just For Fun Challenge' !

Fancy a swig??

Sid xx

Pin It

Sunday, July 10, 2011

Vintage Style


Crafty Individuals have a challenge blog run by Jean Hardy and this months challenge centres on a colour theme of Pink, Cream and Brown so I thought I would have a go at a vintage style creation.


I started by cutting out a pre-printed pink and cream rose floral display as the main base.  This was edged in pink grapefruit Versamagic chalk ink and adhered onto a piece of brown linen textured card which was then matted further onto a piece of cream card cut at an angle.  All edges were inked with the same Versamagic ink.


The main central feature is made from a CI small collage frame which I painted first with french rose acrylic paint.  When dry this was liberally coated with cheap PVA glue and then overpainted with plenty of buttermilk acrylic paint.  I used a heat gun to immediately dry the paint to achieve the distress crackle effect.  This was enhanced with more of the pink grapefruit Versamagic.


I then cut a CI domino sized glossy printed image and attached it to the back of a Tattered Angels glimmer chip frame with Glossy Accents.  The frame was also coloured with the Versamagic and was then stuck in place within the collage frame.  Three flowers were punched from some brown and pink paper and attached at the bottom left of the frame and centred with pink half pearls.  A small piece of cream paper lace was added at the bottom of the frame.


Next I attached a piece of pink satin ribbon centrally over the base matts sticking with double sided tape.  I added a little plate with the words 'vintage style' stamped in Vintage Sepia Versafine ink on a piece of cream card. This was attached with foam pads as shown to the frame and the finished frame was adhered to the base with large Glue Dots.

Finishing touch was to add a Tattered Angels chipboard finial to the top with glossy accents.

Sid xx

Pin It
Related Posts Plugin for WordPress, Blogger...