
Here is an altered playing card.......err well 3 really, that I have done as a swap run by Hazel over on
UK Stampers Forum.
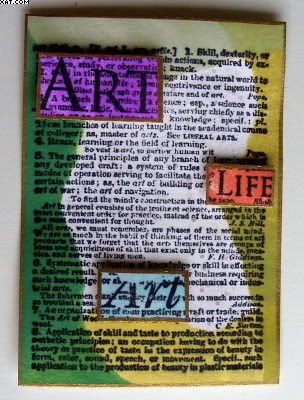
I have entitled my piece 'You're A Diamond in Disguise' because I suppose that is just what it is the main playing card is the Ace of Diamonds. The main piece consists of two cards sandwiched together with foam pads and the third card is used as a tag with details on it. The back card is a Joker and the card tag is the 4 of Diamonds.
This is what I used:
- 3 ordinary playing cards (Joker, Ace & 4 of Diamonds)
- Stazon Inkpads (Eden Green, Imperial Purple)
- Whispers Dye inkpad (Crimson)
- Versamark Inkpad
- Lumiere Paint (Purple Halo Gold)
- Embossing Powder (Moonglow - Midnight Teal Obsidian, Midnight Ruby Obsidian & Holly Berry Red/Gold)
- Stamps (Diamond, Stone - Texture Cube, Crown & Fleur de lys - Paper Artsy, Tag - Crafty Individuals)
- Wire coil (Red)
- Mountboard
- Krylon Pen (Gold)
- Gelly Roll Pen (Stardust Purple)
- Eyelet (Red)
- Decorative Fibres
- Foam Pads
- Glossy Accents
- Square PunchMetallic
- Spray (copper - Sticky Fingers)
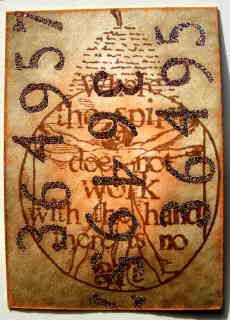
The Ace of Diamonds card was taken and a hole punched with a square punched twice from opposite sides to produce an oblong window in the centre of the card. The crimson Whispers inkpad was applied straight to the card to ink in a random square effect and this was dried with a heat gun. The Tag stamp was inked with the Imperial Purple Stazon and stamped over the card as show leaving an edge left and bottom. The stone texture stamp was inked with Eden Green Stazon and this was applied to these edges. The Crown and Fleur de Lys stamps were stamped as shown with Versamark and heat embossed with the Moonglow powders. All edges were inked in Purple Stazon.

Next the Joker was taken and stamped randomly with the stone texture stamp and Eden Green Stazon. The card was allowed to dry and then sprayed with the Copper spray and dried with the heat gun to give a metallic effect. The edges were again edged with Purple Stazon.
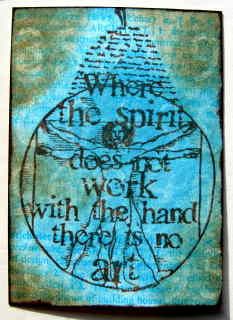
The other side of the Joker card was giver two coats of Lumiere Purple Halo Gold Paint. When dry the diamond stamp was inked with Versafine and this was stamped centrally (to show through the window in the top card) and heat embossed with The Holly Berry Moonglow EP and finished by assembling one card over the other with six 3mm foam pads.
Next the diamond stamp was stamped twice with Versafine on the mountboard and heat embossed with the Holly Berry Moonglow EP. These two diamonds were trimmed out to make the dangly embellishment.
A length of the red wire spring was taken and the two halves of the diamond stuck together back to back with Glossy accents after trapping the wire between the two. A small nick was cut into the top left hand corner of the top card and the wire passed through this nick to allow the embellishment to dangle on the front of the card. The remaining wire was laid against the foam pads inside the card sandwich and passed round all four sides before finishing at the same left hand corner nick. Two small sticky pads were then used to adhere a square flat backed gem over the edge at this top corner to attach and seal the wire to the card. The diamond embellishment was edged with Krylon Gold pen.

I then took the Four of Diamonds and again added ink to card directly with the Stazon Purple card on both sides. I puched a hole with the crop-o-dile and applied a red eyelet as shown through which some decorative fibres were added. I hand wrote in Gelly Roll stardust pen (horrible writing !!!) the details of the swap and the title on the front of this card to act as a tag.
Pin It


.jpg)


