>
Showing posts with label Beadazzles. Show all posts

Friday, September 13, 2019

Metallic .....


Made a set of Inchies for a swap over on UK Stampers Forum ...

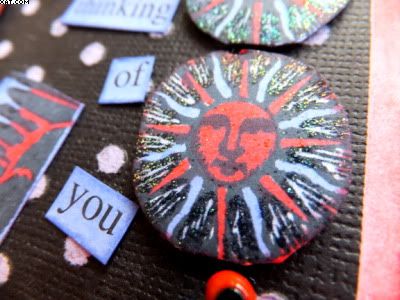
They are 1 inch square with a base of re-cycled packaging.  I have covered with iridescent blue painted black card, stamped this in Archival ink, added some Posca pen. The Inchies have been edged in sparkly Beadazles & red metallic paint. A light blue gem was added to the base of each flower to finish.

Sid xx

Pin It

Tuesday, June 04, 2019

Pearly squares ....


A set of Inchies made for a swap in UK Stampers Forum ....

I punched out the 1 x 1 inch bases from recycled board from cartons and then chose some mushroom fleck card and stamped a flower stamp in Versamark ink which I heat embossed with opal pearl embossing powder.  I then selectively punched out 1 x 1 inch squares from this background and applied to the bases.

I applied a fine stripe of redline adhesive tape to each and sprinkled with Beadazzles to decorate. A thin strip of black paper lace was then applied next to this as shown.

I coloured some adhesive pearls with grey Copics to match and applied as shown.  Each Inchie was then edged in brown Versamagic Chalk ink to finish.

Click on the link above if you would like to join the Forum and perhaps join our swaps too !

Have a super day !!

Sid xx

Pin It

Thursday, February 07, 2019

Fly .....


This Artist Trading Coin measures just 2.5 inches in diameter ....

It has been made on die-cut recycled cereal boxes which have been painted in a variety of pearlescent acrylic paints.  Another smaller circle was treated with a number of different embossing powders.  The feather was stamped in Archival black ink and highlighted with white Posca pen. The smaller circle was applied to the larger ash shown.  I used glossy accents to adhere a coating of Bedazzles in green, purple and gold and edged the coin with Krylon gold pen. The 'fly' word is made from individual self-adhesive letters.

Sid xx

Pin It

Sunday, August 03, 2014

Someone Special !


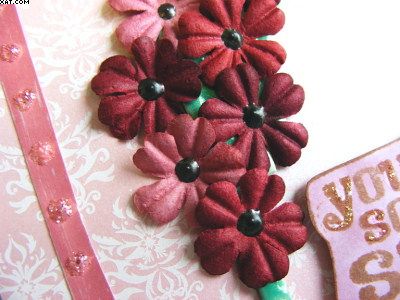
A very pink card today !!  Wind is blowing hard outside as I finish this.  The peppermint green card base is 6 x 6 inches and has been matted with some pretty pearlescent print paper.

The chipboard frame was cut using a frames mover and shaper die from TH Sizzix.  This was heat embossed using a Versamark inkpad and a couple of coats of Blond Moments spring tropic lustre embossing powder (this has a fab pearlescent gold overtone, not easy to photograph!).  I have then stamped into it whilst molten with a rubber stamp coated with more Versamark to act as a release.  This has added some texture too !


The frame was stuck in place as shown and the paper flowers in shades of pink towards maroon added at each of two opposite sides of the frame.  The centres have been highlighted with dark brown dimensional pearls.

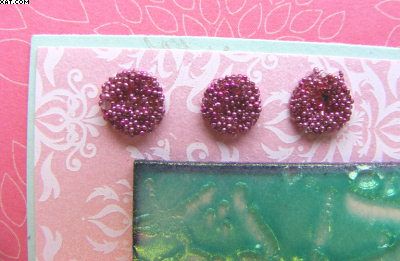
The dotty embellishments were made on a craft sheet by squeezing dots of Glossy Accents which were then loaded with TuTu Beadazzles and allowed to dry.  Once dry they were peeled off the craft sheet and applied as shown.  I thought they looked very much like the coated jelly's in Liquorice Allsorts !


The pink paper ribbon on the left was embellished with dots of worn lipstick Distress Stickles and stuck in place.


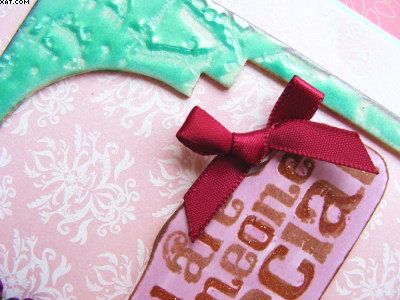
The sentiment was stamped on pink card in Archival sepia ink and edged with the same ink before trimming out and mounting in place with foam pads.  The maroon ribbon bow was added on a foam pad to finish.

Sid xx

Pin It

Wednesday, April 18, 2012

B & B


No not Bed & Breakfast !!  .............. but Box & Brooch to be more precise.


This brooch came about as my creation for Janet ........ one of our little band of crafters who meet up for long & crafty weekends 3 times a year.  This was made as my gift for her (we each have a crafty partner who we make a handmade item for at the weekends).

Unfortunately I forgot to take my gift (slapped wrists) to our March meet and have sent this to her instead.  Hope she likes it.


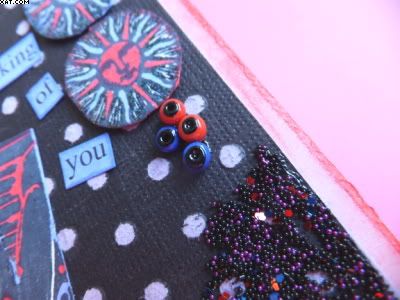
The box was made from heavy card which was subsequently decorated as shown in the same colourway as the brooch.  The box sides and top were coloured with fired brick Distress ink and panelled with black magic coredinations card with a mauve core after passing through a spots embossing folder.  The core was revealed by rubbing over the embossed spot with fine sandpaper.


The decorative elements are made from stamps from Lynne Parrella made by PaperArtsy, stamped on white card with Memento onyx black, trimmed and coloured with red and purple Marvey alcohol brush pens.  They were assembled after selectively heat embossing with kaleidascope embossing powder and a Versamark pen and mounting on foam pads. Some red and blue beads were adhered with Glossy Accents as was some Beadazzles as shown.

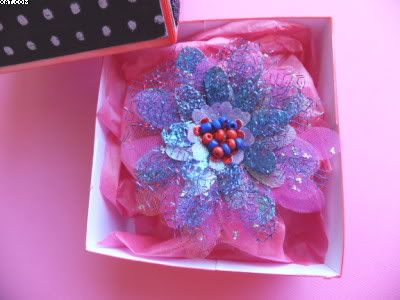
The box was filled with crumpled pink tissue paper to support the brooch


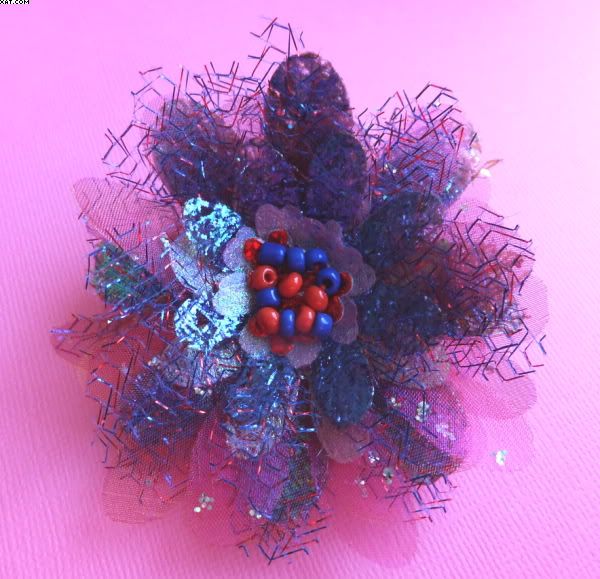
I used some flower dies from X-cut to cut  a variety of different sized petals from organza, sparkle fabric, fused fusible fibres and silk. These were assembled in layers on a card base with hot melt glue.


Some of the same beads used on the lid were added with red embroidery thread and a needle to decorate the centre of the brooch.


Finally a brooch back was added to finish the brooch.


Hope she likes it !

Sid xx

Pin It

Sunday, March 11, 2012

A Window on Italy


Another 6 x 4 inch postcard done as part of a swap over on UK Stampers Forum.  The theme this month is 'Windows' so I have done mine on an Italian theme.  The postcard travels to it's recipient 'naked' so it needs to be able to stand up to the RM treatment !


The background is plain white card and I have used a mask and Distress Ink in crushed olive and wild honey to build up layers to leave no white showing.  This has been dried to set with a heat gun.

An old Italian map has been stamped with an arched window stamp from PaperArtsy twice to form a round window in Archival black ink and trimmed out.

The background was then stamped with a leaning tower of Pisa stamp (PaperArtsy) in grey Memento dye ink as shown to form muted images on the right.  I have then heat embossed two stamped images (chandelier & finial) with Versamark and heat embossed with Ranger turquoise embossing powder after first rubbing over with an antistatic bag.


The bottom border is punched from black card with an EK success border punch.  The card was then assembled and edged with turquoise Versamagic chalk ink.  Final touches were to add the computer word, edged with gold pen, and apply Macarena Beadazzles with Glossy Accents to the top left and right of the card.  The whole card was then sprayed with a thin coat of matt sealer to fix.

Sid xx

Pin It

Thursday, February 23, 2012

Domino Reflections


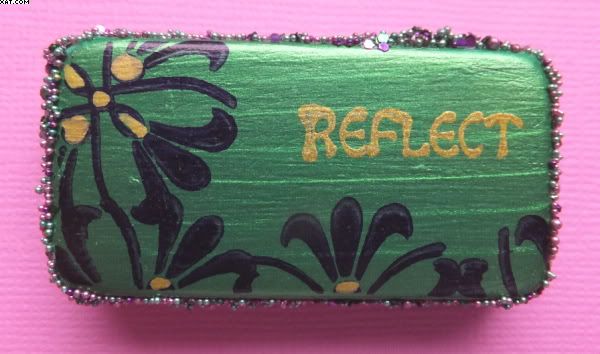
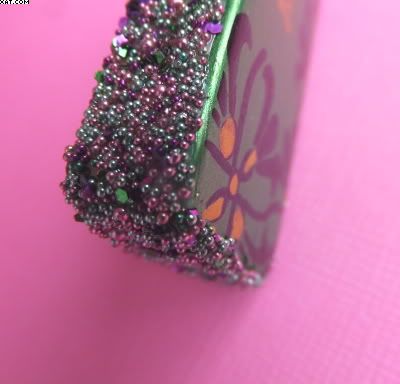
I have decorated a domino !   The shot above makes it look huge but it is actually only 2in x 1in, just wanted to show the detail...........

I started by sandpapering the plain side of the domino to afford a key before painting with 3 coats of pearlescent emerald Lumiere paint, ensuring it was dry before applying each successive coat.


I then stamped a small flower stamp in black Stazon several times as shown and infilled with a gold Posca pen.  The word 'Reflect' was stamped in gold Stazon.


Once thoroughly dry, Glossy Accents was applied to all sides of the domino as a strong glue before dipping in Ranger calypso Beadazzles to afford a bit of glitz.

Sid xx

Pin It
Related Posts Plugin for WordPress, Blogger...