>

Wednesday, July 14, 2010

My work area....again !


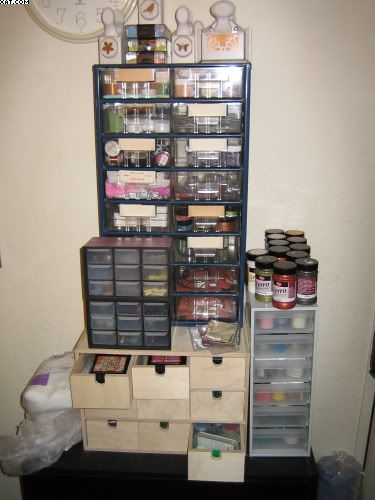
Just one picture today of a bit of my craftroom because I didn't have much time to take pics.  This little storage tower has sort of grown by adding various storage units and it looks a bit like a skyscraper on some cities skyline. It's my entry into WOYWW 58 set up by Julia HERE

I store embossing powders, Distress inkpads and foam all my Viva crackles and ferros, some brads & eyelets, decoballs, shimmer paints, some rubber, MS punches and other very mixed stuff !

Off to look at all your little crafty havens soon !

Sid xx

Pin It

Tuesday, July 13, 2010

On a Bluebirds Back


This page is from a CJ I am taking part in.  Actually the background started life as a serendipity piece, that is a piece of plain white copier paper that I have used on my craft mat during my craft sessions.  It has picked up allsorts of images and colours etc.from my other crafty sessions in a totally random way.  I always save these background sheets because they sometimes can provide inspiration and look great too on other projects.

I have helped complete this page using Distress inks in similar colours to the background to fill in any gaps and edges once the background had been stuck onto the backing card of the page. Some Ranger gold acrylic dabber was added also.


The bird was a supplied stamp with the CJ that had to be used and it was selectively coloured with Marvey brush markers in light blue, blue, bottle green & yellow, stamped onto white card, spread with a waterbrush and heat embossed with clear UTEE (Ultra Thick Embossing Enamel) which gave it a great shine and enhanced the colours.  I trimmed out the image and cut off the feet.  The feet on the stamp were then inked with Stazon black ink and stamped directly onto the page.  The cut-out was then positioned and stuck in place with Glossy Accents.


The word stamp (Paperartsy) was inked in azure Stazon and stamped onto white card which was coloured with the same Marvey brush marker colours as on the bird and spread with a water brush.  The coloured words were then put through the Big Shot using a slide mount die from Sizzix.  The two components were then inked with Versamark and again heat embossed with clear UTEE.  The centre stuck in place and the outside frame raised on foam pads and applied directly over the centre.


An 'on the edge' TH Sizzix die (Artistic Stamper)  was used to cut a border in white card and this was inked with chocolate brown Impress die ink and gone over with frayed burlap Distress ink applied with cut'n'dry foam.  This was applied on the right edge as shown.  Finally another Paperartsy bird and grasses stamp was inked in black Stazon and stamped twice at the bottom of the page.  Dark green chalk ink was used to edge the page.

Suprising how useful those serendipity backgrounds can be !  Why not try it?

Sid xx

Pin It

Monday, July 12, 2010

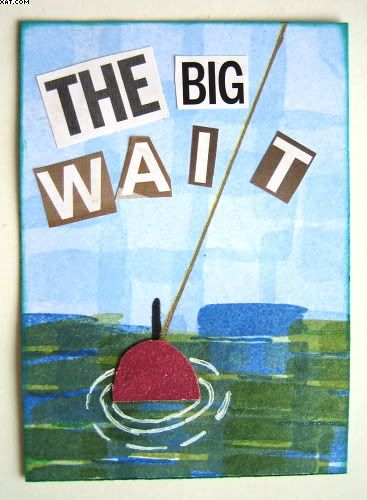
The Big Wait ATC


This is my entry for the latest Wednesday Stamper challenge whose theme is 'Gone Fishing'.

I am definately not a fisherman............ but my Dad was and all I can really remember about the times when he took me fishing with him as a child was the waiting for a bite !  The endless waiting !

So when I saw the theme I couldn't resist doing this ATC.  I took some white card cut to size and used some Hero Arts graphic shapes stamps to colour in the water using Memento inks in danube blue, new sprout, bamboo leaves & cottage ivy.  The ink is transparent so you can build up  a depth with overstamping (remembering to clean your stamp between colours of course).


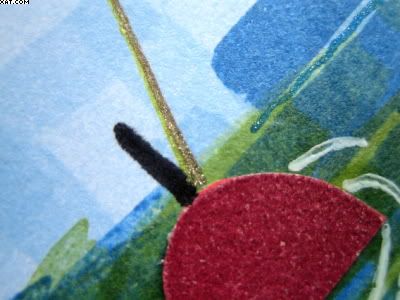
The sky was done next with a square shape and summer sky Memento overlapping bits to give depth.  Once happy I stamped an oval stamp with Versamark and heat embossed this with dark pink embossing powder, trimming out and cutting in half to represent the float.  This was stuck in place and a point was drawn in using a permanent black pen.  Some ripples were drawn in with the white pigment pen. The line was drawn in with a straight edge and gold sparkle Gelly Roll pen.


The letters and words were cut from a magazine and stuck in place and the ATC was edged with emerald green chalk ink.

Sid xx

Pin It

Sunday, July 11, 2010

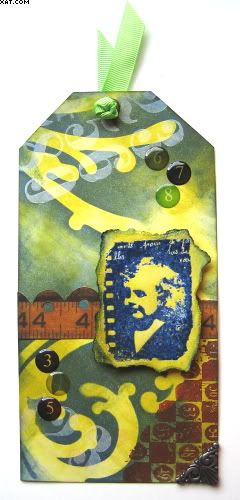
Child Of Our Time Tag


This tag is No.25 in the UK Stampers Rolling Recipe Weekly Challenge.  The recipe this week is:

1. Something shiny
2. Numbers
3. Stamped image of a child

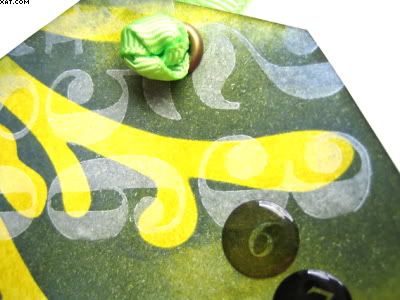
I started with a piece of white card cut to size.  This was liberally covered in crushed olive Distress ink applied with cut'n'dry foam.  I then used the flourish mask from TH and rubbed over with chipped sapphire Distress ink until the desired image was obtained. I left some areas still showing the original colour.


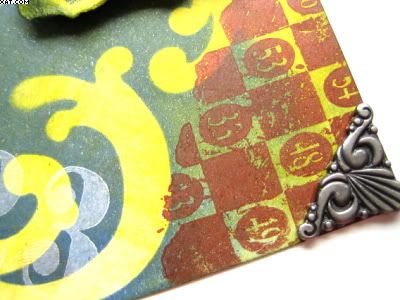
Next I used a numbers plate from Paperartsy and stamped with moonlight white Brilliance ink top and bottom as shown.  I then took another numbers corner stamp from Paperartsy and stamped this in coffee bean Brilliance ink in the bottom right corner.


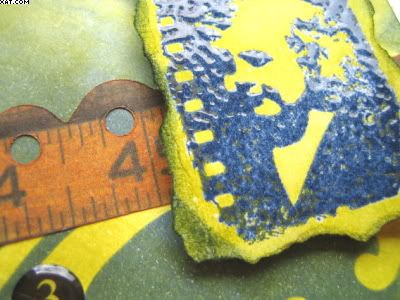
Next I used a TH Sizzix 'on the edge' die and diecut some printed ruler paper with the Big Shot and applied this piece centrally across the tag.

The child plate was made by inking another Paperartsy stamp with chipped sapphire Distress ink and heat embossing this with Clear UTEE.  Once cool the image was torn out and coloured with crushed olive and chipped sapphire Distress inks. This was mounted on foam pads and stuck in place as shown.


Finally I added some shiny epoxy numbers top and bottom, applied some lime grosgrain ribbon through an eyelet done with the crop'a'dile and applied a pewter metal corner to the bottom of the tag.

Simples !

Sid xx

Pin It

Saturday, July 10, 2010

Greens & Oranges


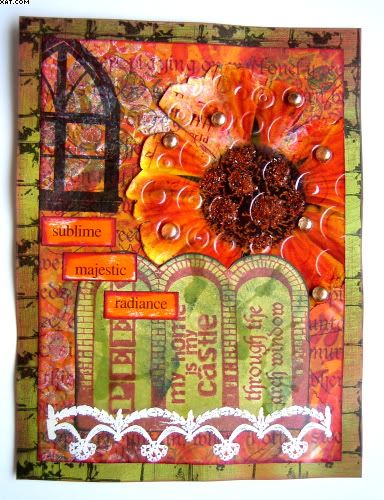
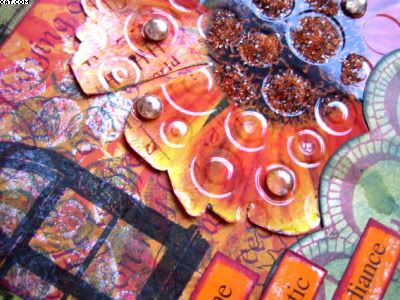
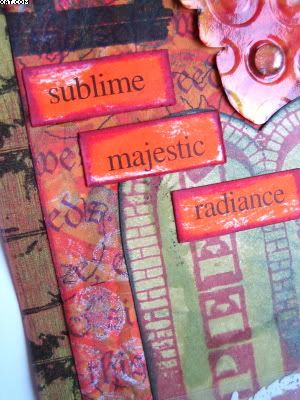
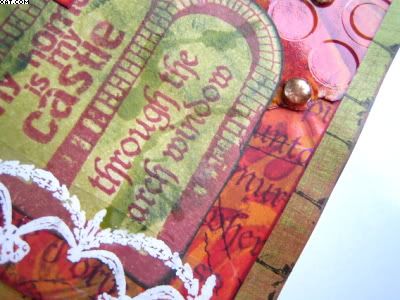
This piece was done as an experiment using two base colours along with collage, stamping and embossing.  I didn't plan what I did, just used elements that fitted the colourway and completed the whole thing in one session.

I started with a piece of printed paper from Graphicus and then used Brilliance inks in pearlescent icy and moonlight white applied to a piece of bubblewrap and used as a stamp.  I then made up a strong spray with shabby shutters distress reinker in a mini mister and sprayed this so it ran down the page before drying with a heat gun. I stamped the arch (top left) using a Paperartsy stamp in onyx black versafine ink over some of the bubblewrap stamping.


Next I pinched a glossy orange flower image from a Crafty Individuals postcard and trimmed it out edging the cut areas with orange chalk ink.  This was put through the Big Shot using a Cuttlebug circles embossing folder to provide some texture.  The flower was then loosely stuck in place with some of the petals lifted.

Next I stamped another Paperartsy arch in rhubarb stalk Memento ink and coloured this with shabby shutters Distress ink applied with cut'n'dry foam and then sprayed with the same colour.  This was dried with a heat gun, trimmed out and stuck in place over the flower as shown.


The white bottom border was made by stamping onto heat resistant acetate with a border stamp and Versamark ink and heat embossing with white embossing powder.  This was trimmed and applied with Glossy Accents at the base.

The centre of the flower was then decorated with orange glass glitter held in place with Glossy Accents and some gold Dew Drops (3d Jean) also applied with Glossy Accents.  The words were printed, trimmed out and coloured with tangerine Impress dye ink and edged with maroon chalk ink before sticking in place.


The whole plate was then edged in maroon chalk ink and matted onto a piece of Basic Grey backing paper which had been stamped with onyx black Versafine ink with a square lattice stamp from My Minds Eye.  The mat was also edged with maroon chalk ink to finish.

I wondered whether it was a bit too fussy when I finished it but when I came back to it next day it looked ok.  I think you get visual overload when working on a project from start to finish in one go !

Sid xx

Pin It

Sunday, July 04, 2010

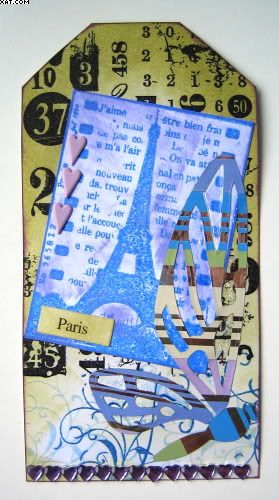
Paris Tag


This tag is number 24 in the Rolling Recipe Tag Challenge over on the new and upgraded UK Stampers Forum.  This weeks ingredients were:

1. Something shiny
2. Numbers
3. Paris


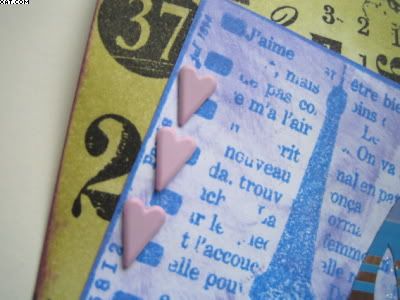
The tag was cut from white cardstock and a numbers background stamp (PaperArtsy) was inked with onyz black Versafine ink and stamped at the top of the tag.  I then took a swirls stamp (Trimcraft - My Minds Eye) and inked this with Memento ink in summer sky and danube blue and stamped randomly at the base.  The tag was then sponged with cut'n'dry foam and shabby shutters Distress ink.


Next an Eiffel tower stamp from Paperartsy was inked with hydrangea blue Impress dye ink and the image stamped onto more white cardstock which was then cut out.  The image was coloured in the background with Versamagic pretty petunia chalk ink.  This plate was then stuck in place onto the tag as shown.

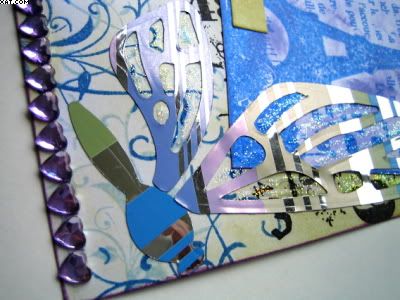
I had some sticky backed striped metalised border paper and I used this with the Big Shot and a Tim Holtz alterations fanciful flight die to cut out the body and two wings of the butterfly.  The backing was removed and the bits stuck in place.  The spaces in the wings were infilled with diamond Stickles glitter glue.


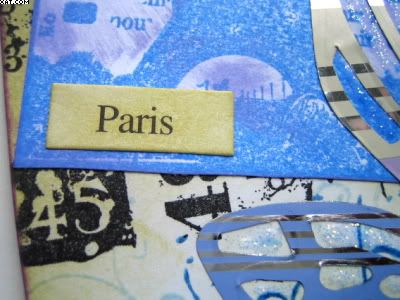
Final touches were added by applying three lilac heart brads, some flat backed lilac hearts at the bottom and the word 'Paris' which had been coloured with shabby shutters Distress Ink.

Sid xx

Pin It
Monday, June 21, 2010

Great Cooks ATC


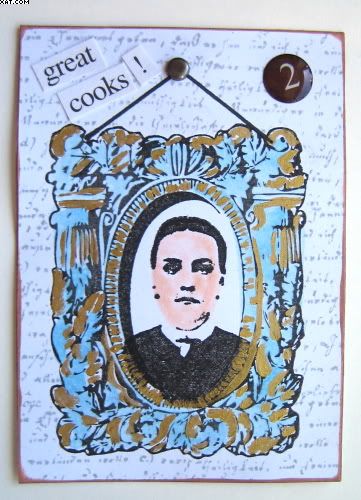
This ATC was made by first stamping a mask of the polymer frame stamp (My Minds Eye), then stamping again with onyx black Versafine ink onto a white card blank.  The mask was then used and a text stamp from MME was then inked with london fog Memento ink to fill in the background.

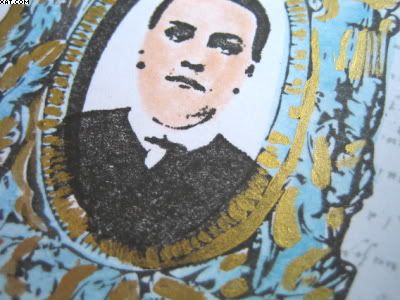
I then took a rubber stamp of a rather stern looking lady (Tuscan Rose) and stamped this into the frame centre. The frame was painted with Viva gold paint and a fine paintbrush to gild it followed by a wash of broken china Distress re-inker.  The ladies face was then coloured with a pinkish Marvey Le Plume II pen.  Two lines were drawn in fine black permanent ink to represent hanging wires and a pewter brad applied as the hanger.


The words were printed and stuck on and a self adhesive dome sticker applied as shown.  The card was finished with beige Versamagic chalk ink to the edges.

Don't know why, but she reminded me of one of those rather stern Victorian cooks so I made her a cook and she is cook No.2 in a series yet to be completed. I'm sure I will find countless other stamps of stern ladies in my collection.

Sid xx

Pin It
Sunday, June 20, 2010

I'm forever blowing bubbles !


Here is another rather bubbly creation made as my entry for this weeks Rolling Recipe Challenge over on the UK Stampers Forum.  This weeks ingredients were:

1. Heat embossing
2. Something round
3. Something shiny

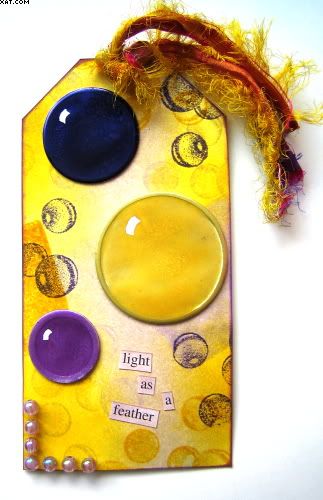
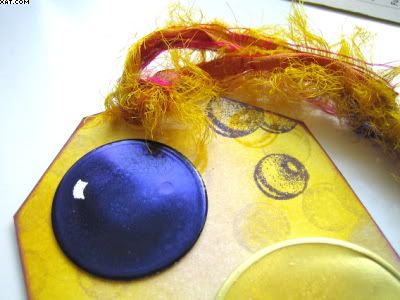
So I decided on a theme of bubbles.  I started with three round metal edged tags in different sizes.  Each one was heat embossed several times with Moonglow embossing powders in aurora amethyst, midnight violet obsidian & sunset yellow orange.

The base tag was cut from white card and coloured with cut'n'dry foam and Distress inks in milled lavender and mustard seed.


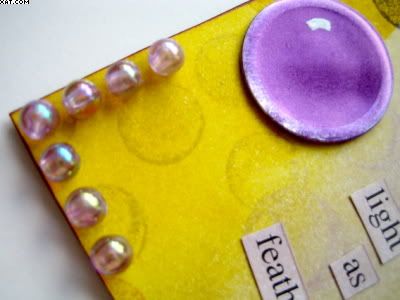
Next a bubbles stamp (Cherry Pie) was inked in Milled lavender then mustard seed and lastly in dusty concord and stamped randomly on the background. A couple of squares were also stamped in the same inks.


The words 'light as a feather' were coloured in milled lavender and stuck in place as shown with Glossy Accents.  Some iridescent beads were stuck in place at the bottom left corner and allowed to dry.  The embossed circles were then shaded with reflections in white opaque pen and these were stuck in place.

Final touches were made by adding a yellow eyelet with the crop-a-dile and tying some sari silk through the hole.  The tag was then finished with purple chalk ink on the edge.

Sid xx

Pin It
Friday, June 18, 2010

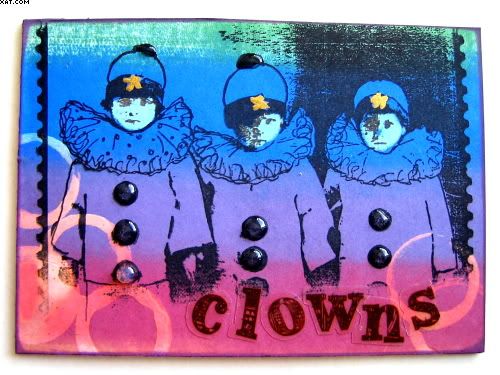
Clowns ATC


I made this ATC using a stamp from Zettiology and it fits in rather well with the theme for this weeks TMTA theme which is 'Groups'.

I cut a piece of thin white card to size and stamped with Stazon black, I actually used most of the stamp but didn't ink the legs of the child clowns.  I then used a Memories primary rainbow pad and a brayer to colour the whole card.  I then used bleach and a fine brush to go over the faces which turned a delightful shade of turquoise !  The same bleach was used on the rim of a small bottle to produce the bleached out circles.  The bleach was dried with a heat gun.  The stars on the hats were coloured with Viva gold paint and the buttons and bobs glossed with Glossy Accents. Finally some vellum letters were added, the card mounted on chipboard and the edges coloured with purple hydrangea Versamagic chalk ink to finish.

Sid xx

Pin It
Thursday, June 17, 2010

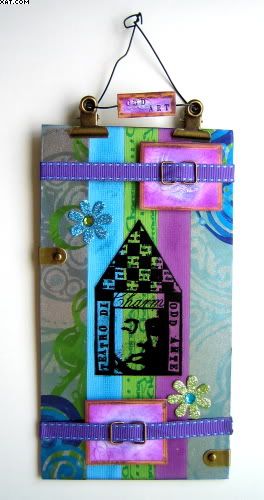
Odd Art !


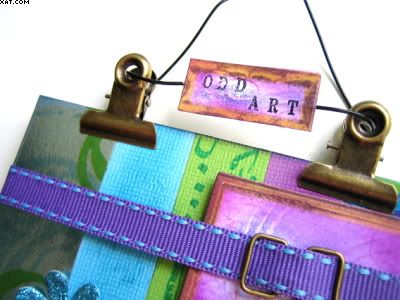
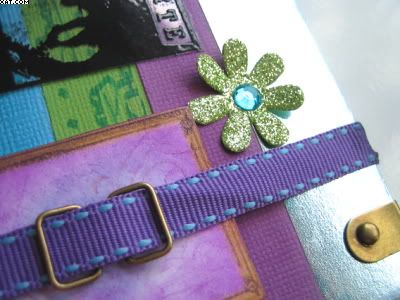
Here is a little wall hanging I have entitled 'Odd Art' because I think it is.  Actually the idea came from the stamp.  This was done for the Ready Steady Stamp challenge blog as a guest designer sample.

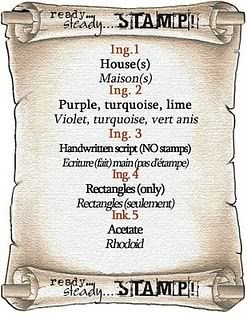
The 5 required elements this time were:


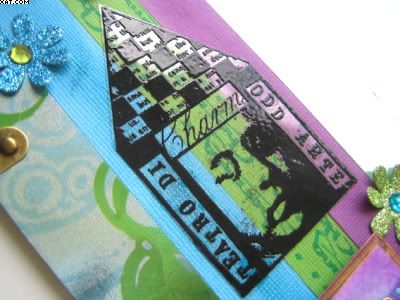
Not an easy bunch of requisites, especially the handwritten script background !  I can't write for toffee actually and I ended up writing the word Charming several times with a green script pen on the lime green stripe in the middle.


I started with a piece of chipboard 8 x 4 inches and trimmed three strips of coloured textured card using the challenge colours.  These were stuck in place centrally with a glue stick.  The remaining edges of the chipboard were covered with some metalised foil strips from the LLB collection (Trimcraft)  which just happened to be in the same colours.  These were stuck in place to complete the background..  I then handwrote the word 'Charming' several times with a Sakura green script pen on the lime greem stripe and applied a little Adirondack dye ink with sponge in stream & wild plum to the other two coloured stripes.


I then took some heat resistant acetate and stamped the house stamp (Zettiology) with Versamark ink and heat embossed this with detail black embossing powder.  The cooled image was then trimmed out.

Next I chose some little rectangular die cut frames from the same LLB collection and coloured these with more wild plum ink, stamping with a swirl stamp and violet pigment ink and heat embossing this with clear embossing powder. The centres of the frames were rubbed over with Memento grape jelly dye ink  These were placed and attached on the background with foam pads.


The embossed acetate house was stuck in place with Glossy Accents.  I took some ribbon and some brass ribbon embellishments and applied some purple and turquoise grosgrain ribbon over the frames sticking in place at the back with glue dots.  A couple of metal fold-over clips were added at the sides and two glitter flowers with gem centres added as shown.

The hanger consists of two brass spring clips threaded with a length of black glossy wire twisted to close.  Another of the rectangular frames was stamped in black Stazon with the words 'Odd Art' and this was attached to a piece of card over the wire with double sided tape to finish.

How ODD is that?

Sid xx

Pin It
Related Posts Plugin for WordPress, Blogger...