>

Sunday, August 02, 2009

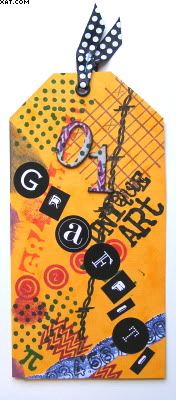
'G' is for Graffiti Tag

This weeks Sunday Challenge over on UK Stampers Forum is make a tag using the letter G in the theme of Graffiti. Not an easy one really !!

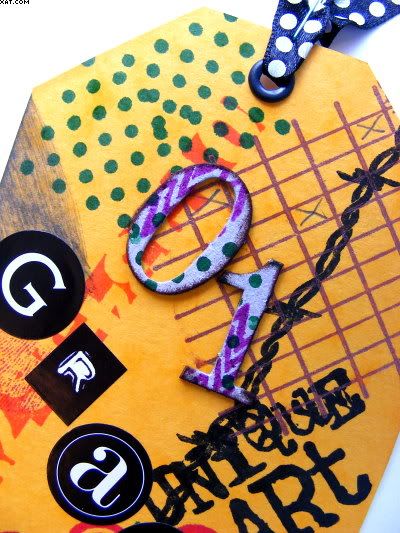
I cut the tag blank from bright orange cardstock and then stamped to my hearts content with a range of rubber stamps in Stazon and Brilliance inks.


The letters are pre-printed self adhesive and the 01 is grungeboard (stamped on and stuck in place with Glossy Accents). Last thing was to add a black eyelet and some spotty ribbon, stapled in place.
Sid :-)

Pin It

Saturday, August 01, 2009

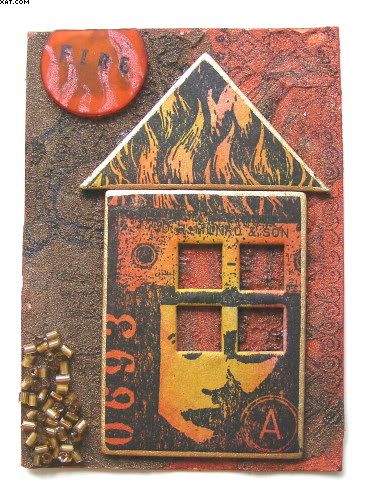
'Fire' ! ATC

Here is another ATC, this one entitled 'Fire'. I have managed to try out my new Viva Ferro metal effect colours in bronze and copper. I love the texture and the way they spread and they are loaded with fine metal filings which add an even better surface finish too.

I cut the ATC from card and used a palette knife to spread two stripes of the Ferro, blending in the middle. The house and roof were cut from chipboard and first stamped with black Stazon using a Zettiology stamp. They were next coloured with distress inks in spiced marmalade and fired brick applied with cut'n'dry foam before edging with gold Krylon pen.

I then stamped (again in black Stazon) some feint images onto the dried background and they are hardly visible and added a small pool of glossy accents in the bottom left to which I adhered some old gold bugle beads and allowed to dry.


I then took a little opaque orange plastic tag and trimmed it to fit the top left of the card. I drew some flames onto it using orange Tiara Gelly Roll pen and stamped the word 'Fire' in black stazon. The card was then assembled as shown using glossy accents to adhere the house and the tag.

I am really impressed with the Ferro colour and will definately be trying it out on more artwork in the near future. Sid :-)

Pin It

Friday, July 31, 2009

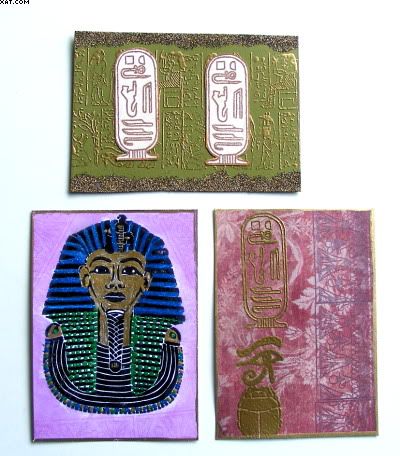
Egyptian ATC's


Here are three ATC's I made to swap with my friend Diane in the USA. I have used stamps from Tanda and Judikins along with printed papers Versamark, Brilliance, Chalk, Versafine & Stazon Inks. Embossing powders and Viva metallic paints were also used including Krylon gold pen.
Hope she likes them ! :-)

Pin It

Thursday, July 30, 2009

Polymer Clay Beads


When I was in John Lewis the other day, I came across a FIMO bead roller machine. Of course, I had to buy it and when I got back from my shopping spree had a go at making some beads. I used Sculpey clay as my base and also tried some Claydium (air or oven bake). Once I had made them I brushed them with a few different Moonglow mica powders before I baked them (15 minutes at 130C) - not forgetting to put a hole through with a wooden cocktail stick before doing so !

These are my first attempts and I must admit it's a bit addictive when you get going. I will be doing more I think after this trial so watch this space !

Pin It

Wednesday, July 29, 2009

Queen ATC


This weeks TMTA theme is King/Queen so I thought I would do a little abstract version as my Royal style entry.

I used 4 stamps. All stamped in black Stazon on a white card. The body stamp is from Cherry Pie, the face is from Invoke Arts and the crown and border from PaperArtsy. The background colour is Nick Bantock inks in chartreuse leaf, chrome yellow & sapmoss green (applied with a sponge) .The border stamp was inked with sapmoss green. The crown was stamped onto a separate piece of card and cut out. The remaining colours on the crown & face were from Marvey le Plume II pens and a waterbrush. The crown also has some gold paint (Viva) and some Stickles glitter glue applied. The crown has simply been stuck into place at a jaunty angle.

Hope you like it :-)

Pin It

Tuesday, July 28, 2009

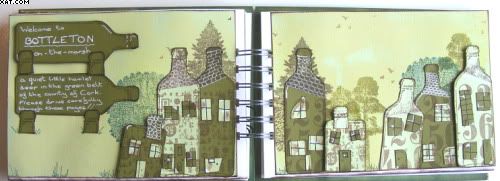
Bottleton-on-the-Marsh !


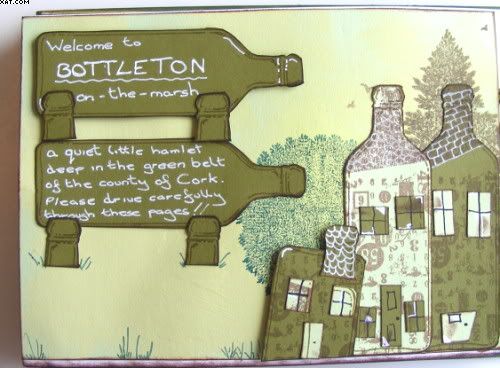
Well here it is at last ! My July entry into a CJ being run on UK Stampers Forum. This CJ was originated by Chicken Licken (Tasha). She chose the colour green and also her chosen stamp was a bottle. I searched my mind for ideas and finally came up with this theme. Why not do a little hamlet called 'Bottleton-on-the-Marsh' and make little houses of the bottles?, I thought !


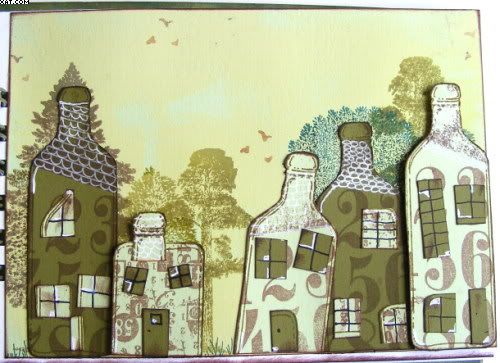
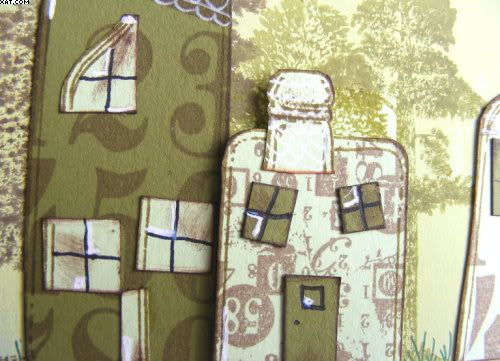
I basically chose two colours of cardstock, a mint green and a moss green. I then got to work and stamped numerous bottles onto each card in oregano Adirondack ink, cutting them out and edging in dark brown chalk ink. I then overstamped with a couple of numbers plates from PaperArtsy in the same ink. I then cut some smaller and some at an angle for a bit of variety and on some cut cut off the cork and bottle neck to act as a a chimney which I stuck back on afterwards.


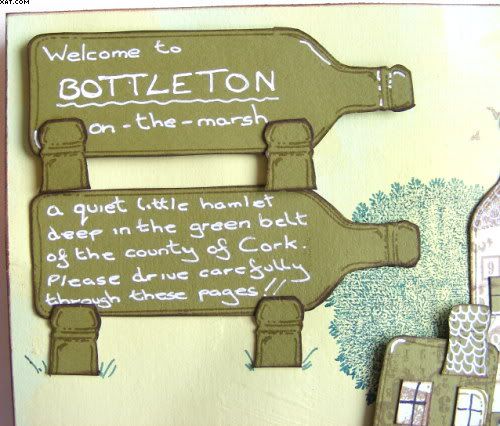
Windows and doors were cut from the contrasting card in different shapes and a black pen was used to draw in window frames etc. I then used a white opaque Gelly Roll pen to embellish the roofs and highlight bits of the buildings. Two other bottles were used for journalling as shown on the pic above !

The background card was the mint green and onto this I prepared the base using green matt acrylic paint applied roughly with a wide brush and allowed this to dry. I chose some tree stamps from Tanda and then stamped the background with these in Adirondack bottle, lettuce, meadow & oregano inks overlapping as necessary. I then laid out the pages and positioned the pieces before applying them with glossy accents (some on foam pads to add relief).


Once satisfactorily applied a small flying bird trio stamp from Crafty Individuals was inked in vintage sepia Versafine and applied randomly into the sky area. I thought about adding some blue in the sky but thought it would detract from the overall green effect - blue was definately out. Some little grass clumps were added by hand as a final touch using Marvey le Plume II pen in pine green (fine end).

The last two pics just show some detail on the houses ! The pages were then stuck onto the CJ base and that was it done.

Overall very few materials were used on this entry and I am quite pleased with the overall effect not to mention the fun had in its making.


Hope she will like it :-)

Pin It

Monday, July 27, 2009

'Nature' Box

Here is a little box I have decorated for an altered swap over on UK Stampers Forum. The brief was to use something which had grown from the earth or in the sea and to turn it into a piece of art for swapping.

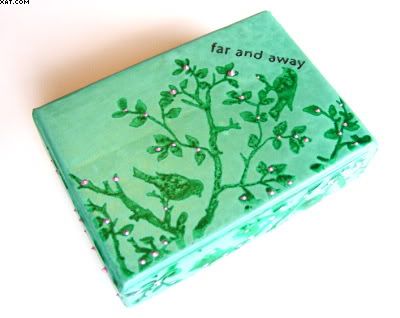
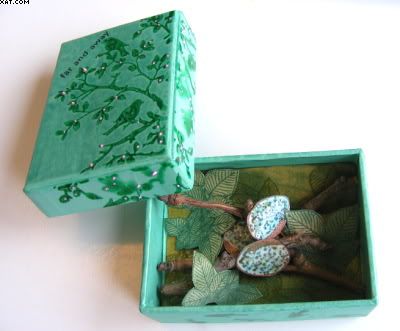
I had collected a piece of very lichen covered deadwood from under some trees ages ago and this has sat in my hall waiting to be used ! I had a plain box which is 8cm long x 6cm wide x 3cm deep. I painted it in a pale green semi-gloss acrylic all over and allowed to dry. I then used a couple of rubber stamps from Crafty Individuals (one a single bird and the other a branch with birds) in eden green Stazon on the top, 3 sides and all sides of the base of the box. Once dry I sprayed desert moon gecko green Glitz Spritz generously on all surfaces and allowed this to dry naturally. Once dry I added tiny blobs of pink Pearly Doodles dimensional paint to represent blossom on the leaves and branches on the top only. The words 'far and away' were stamped on the top of the lid in black Stazon. The mica shine does not show very well on the shots unfortunately, but they are quite shiny !


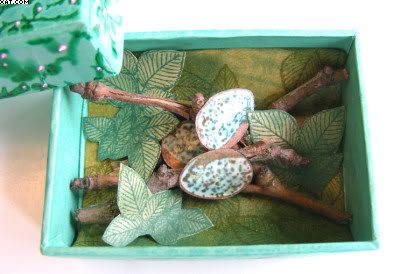
I then stamped 3 birds eggs (PaperArtsy) in vintage sepia and used a waterbrush and Marvey le Plume II pens to colour the eggs in green, blue and brown. Once dry I applied Versamark from the pen and heat embossed them with clear detail EP. I then trimmed them out carefully.


I wanted to make a leafy background and on a piece of beige paper stamped a leaf stamp (Crafty Individuals) onto a background made with Distress inks in pine needles, shabby shutters and peeled paint. Three of the leaves were trimmed out for decoration. The background was stuck in place with double sided tape.


I broke my twig into useable sized pieces and stuck these in place with clear silicone glue, arranging them to suit. The eggs and leaves were then shaped and also applied the same way to provide a 3D effect..........loosely resembling a birds nest ! I am quite pleased with the effect overall and its great to use natural pieces in your artwork too.

Hope you like it :-)

Pin It

Friday, July 24, 2009

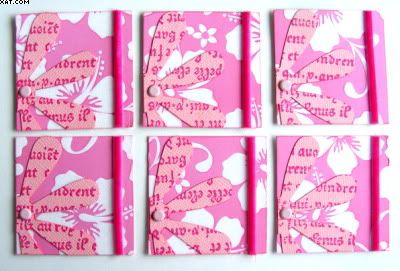
Monochrome Twinchies

I am definately not a very 'Pink' person when it comes to crafting so I challenged myself to do a set of 'Monochrome' Twinchies in just that colour !!

It is part of a swap I am running on UK Stampers Forum. Each player has to do 6 twinchies (either all different or all the same).

The base card is pre-printed and embossed with a glaze containing holographic glitter. I have then die-cut 6 daisies from textured pink cardstock and stamped them with a chunky text stamp (don't know where from !) in fuschia pink Stazon. These have been edged with Marvey le Plume II pen in dark pink before adhering to the base cards and trimming off at the edges as shown. A pink brad has been added as shown through the centre of the die-cut. A piece of narrow velvet ribbon in bright pink has been backed with double sided adhesive and attached as shown (trimming to make neat at the edge). Each twinchie was then edged with pink chalk ink to finish.

Hope you like them :-)

Pin It

Thursday, July 23, 2009

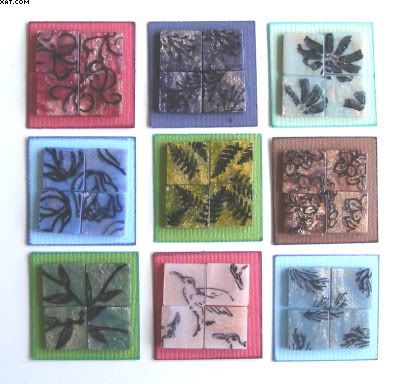
'Free Choice' Inchies


Here are my 'Free Choice' Inchies for this months swap over on UK Stampers Forum. I have simply used coloured backing card and adhered 4 small pearly mosaics in a colourway to each inch square with Glossy Accents. I then have stamped the mosaics with black Stazon with stamps from a set of SeeD's Morsels. Each inchie has been edged with appropriately coloured chalk ink to complete.

Simple is sometimes best....or so they say !! Hope you like them :-)

Pin It

Monday, July 20, 2009

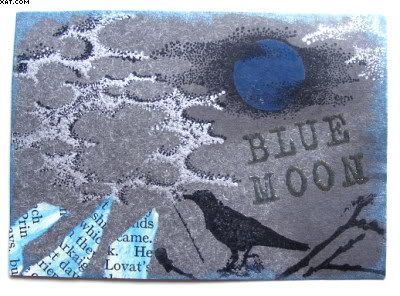
'Blue Moon'

Here is my entry for the TMTA challenge this week. The theme is 'Moon' so I decided to go a little 'Blue'. Background is grey & silver mottled card. Stamps are by PaperArtsy and A Stamp In The Hand inked with black Stazon & starlite silver, pearlescent sky blue Brilliance. The alphas are Making Memories magnetic heat embossed with Versamark and Moon Glow madonna robe blue gold EP. The moon is coloured with Marvey le Plume II pen.

Hope you like it :-)

Pin It
Related Posts Plugin for WordPress, Blogger...