>
Showing posts with label Mica Powder. Show all posts

Sunday, January 15, 2012

Happy Alice !


I'm Alice mad at the moment I think !!

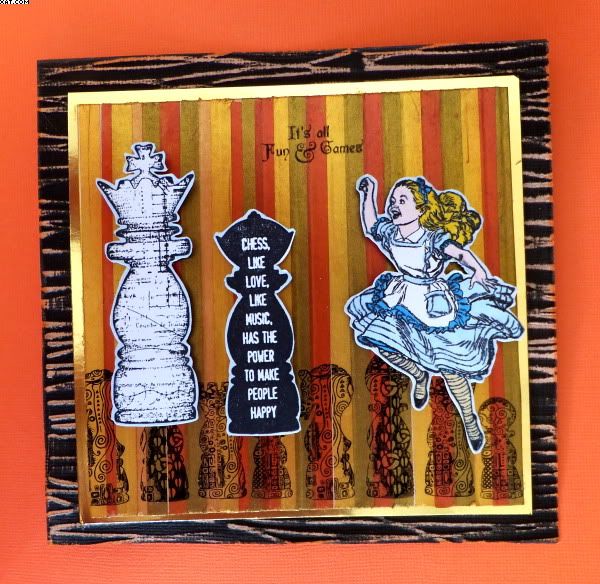
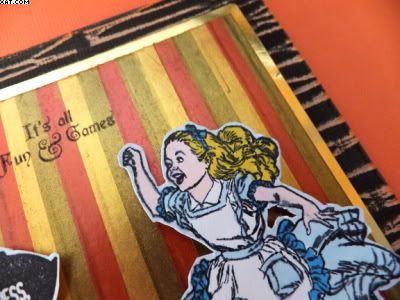
Here is a card I made as an entry for The Altered Alice challenge blog which has a theme of 'Stripes' this month.  The stripes in my piece are used as a background which I made using double sided adhesive applied onto a square piece of card and dusted over with metallic mica powders in bronze, copper and two types of gold.  Each stripe is individually applied and coated until the whole square is completed.


I then used chess piece rubber stamps from a plate by Chocolate Baroque to stamp a base onto the stripey card with black Archival ink.
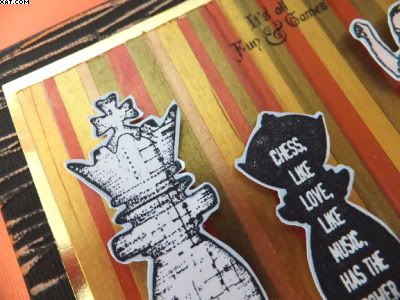


More chess pieces were stamped and trimmed and Alice herself stamped and coloured with alcohol ink pens.  These were trimmed out and  mounted on foam pads for depth. 
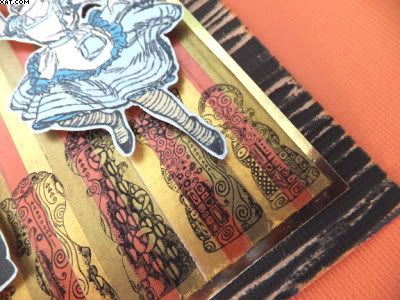


The text stamp was stamped directly onto the base card also.  The whole thing was mounted onto a mat of gold mirri board and then onto a background made by passing a square of Coredinations 'black magic' through the Sizzix machine using an embossing folder and this was sanded back to reveal the orange core.

Sid xx

Pin It

Sunday, May 01, 2011

Mailart ATC's


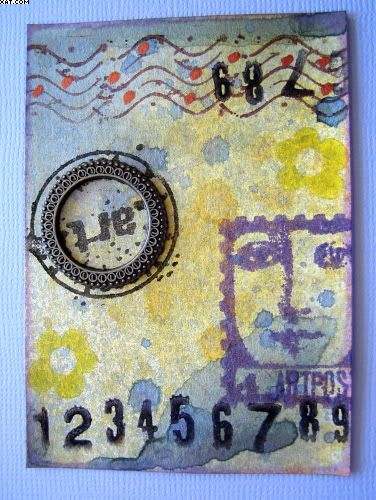
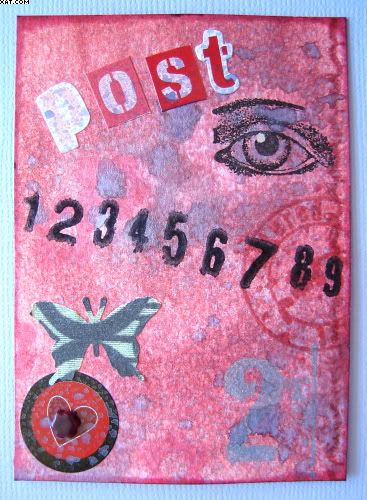
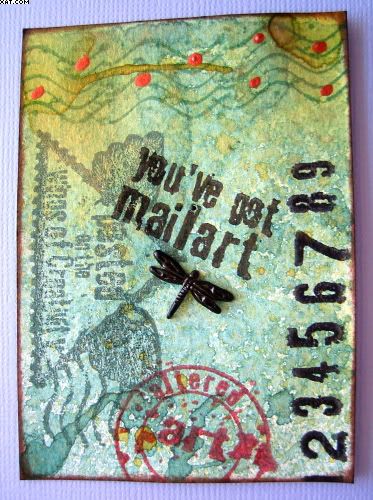
Here are three ATC's done as part of a swap over on UK Stampers Forum.  The theme this time was 'It's In The Mail'


I used spray mica inks for all the backgrounds in different colourways.  Some were homemade using distress re-inkers and mica powders whilst others were Glimmer Mists. All were applied in layers, dried between coats until I was happy. with the effect.


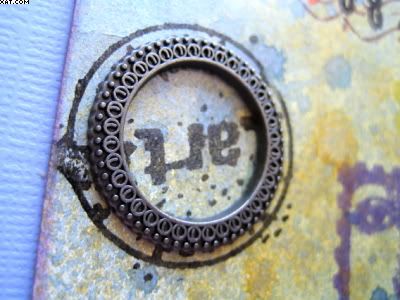
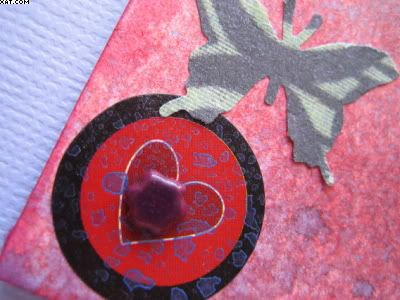
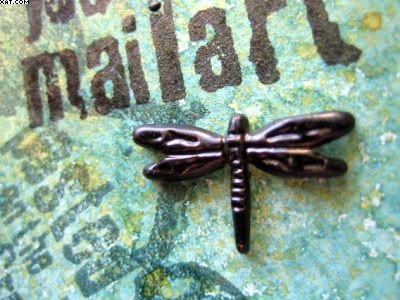
Most of the rubber stamps used were from Invoke Arts and I also used a variety of inks including Stazon, Brilliance, Versamark, Archival & Versamagic.  Each ATC was embellished with a brad or metal frame, stickers and punched paper.  They were all edged in Chalk inks to finish.

Sid xx

Pin It

Saturday, October 23, 2010

Memory Lane


I have been extremely busy of late so have had little time to craft, until today that is !!  This piece is entitled Memory Lane and uses stamps from Crafty Individuals and Paper Artsy.  The colours sort of  just 'happened' and I know that they are unconventional to say the least but still here it is.

I started by using a piece of thin card which had been sprayed in an uneven way with fired brick distress re-inker in a mini mister with water .  Once dry this was enhanced with fired brick distress applied with cut'n'dry foam to even out the colours.  I then used a Paper Artsy squiggly ink border stamp inked with Brilliance lightning black and stamped top sides and bottom as shown.  Another stamp from the same set was inked with Memento bahama blue ink and stamped at the bottom.  Yet another squiggly ink stamp was used and inked with Brilliance pearlescent poppy and stamped inside the border several times.


Next one of the house stamps from Crafty Individuals was inked with Versamark and stamped several times onto the background to give a watermark effect.  A selection of the houses were stamped in Versafine onyz black onto white card and coloured with a waterbrush and Marvey le plume II markers.  I also used Sakura souffle pens to colour the windows finally overstamping with an inkblot stamp (Paper Artsy) and black ink before glazing with fine clear embossing powder to add depth and a shine.  These were cut out ready to mount.


Next the four plain Hero Arts flowers were sprayed with a home made mica spray in turquoise and dried with a heat gun.  They were touched with a Memento bahama blue inkpad to colour the raised parts.

The stamped background was edged with Versamagic red brick chalk ink before matting onto some turquoise cardstock which again was edged with the chalk ink.  The flowers were added with red brads and the houses stuck in place with Glossy accents.


Finally the words (Crafty Individuals & 7 Gypsies) were stamped in onyx black Versafine ink to finish.

Sid xx

Pin It

Wednesday, April 28, 2010

Another D-Fly ATC


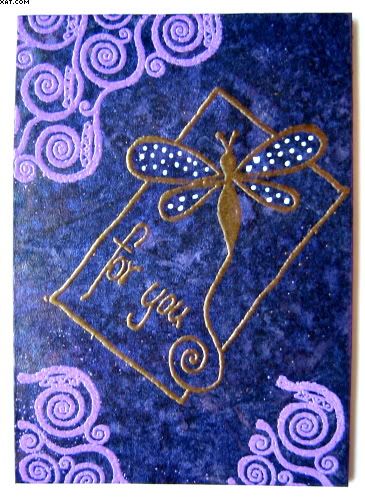
Another dragonfly ATC with a much darker background this time.  This ATC was cut from black mountboard and the background made by spraying with homemade mica sprays.  I used lilac, sapphire and silver micas in a mini sprayer with water and a few drops of Distress re-inkers to add a colour element.

I sprayed liberally and allowed the coats to dry between (they don't photograph well unfortunately but look fab in the light).

The swirl stamp is from Cherry Pie and was stamped with Versamark and heat embossed with imperial crown violet gold Moonglow embossing powder.  The other stamp of the dragonfly tag was then stamped with Versamark and heat embossed this time with antique gold embossing powder.  A few dots were added to the wings with an opaque white pigment pen to finish.

Simple, but effective, I think the black mountboard is a super surface for moonglow or mica sprays because it really enhances the mica shimmer and colours.

Sid xx

Pin It

Sunday, December 20, 2009

Christmas Baubles


'And now for something completely different!'

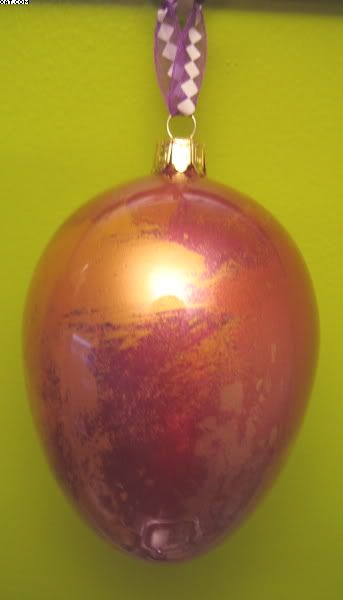
Ages ago I bought four clear glass Christmas Baubles and had never done anything with them. I dug them out and decided to decorate them, sort of inside-out. So here are two of the four that I have finished today.

To decorate them I used various Luminarte Primary Elements polished pigments & Simple solution and some fine glitters too. The company also make the Twinkling H2O's and were due to close but have been resurrected because of popular demand and support. I actually used No2 simple solution and this worked just fine.

I am sure that you would be fine using any mica pigments, glitters and some watered down 'dries clear' PVA adhesive though !


The method is simple: Remove the stopper from the glass bauble and pour in the simple solution and rotate the bauble to coat the whole of the inside with a thin film of the solution. Place upside down in a suitable round support (glass jar) and allow excess simple solution to drain. Once drained select your mica powders and glitters and, whilst holding the bauble, spoon in small amounts of them on the end of a suitable spatula. It's best to use sparing amounts of the mica and glitter. The bauble is shaken and rotated after adding each mica or glitter to disperse. This way you can see what effect you are creating. Once happy with the effect leave the bauble to dry for a few hours. I added little ribbons to mine.

The effects can be startlingly beautiful and the world is your oyster regarding the colourway you go for ! Have fun if you do try it.

Sid xx

Pin It

Monday, December 07, 2009

Cool, Cool Xmas Tag


Just been doing a little Xmas catch-up. Wanted to do an icy cold background for this one with a touch of gold to warm it up a little.

I started with a tag cut out from pale blue cardstock and a home made mica mist made from weathered wood Distress Reinker and pewter cosmic shimmer mica powder, shook up in a mini mister with a little water. I sprayed over a small scroll glimmer screen and dried quickly with a heat tool. I then used faded jeans Distress reinker on its own with water to overspray as required until the desired effect was achieved.


Next I took a swirl stamp (?) and loaded it with gold Ranger paint dabber, stamping a couple of times top and bottom on the tag. If you do this ensure you quickly clean the stamp before the paint dries !


I then inked a text stamp from PaperArtsy with onyx black Versafine ink and stamped in three places as shown.

The square Santa stamp (PaperArtsy) was stamped in black Stazon onto the same blue cardstock base and trimmed out. This was then coloured with Caran D'ache Neocolour water soluble wax crayons using blue, red, white & green and a water brush. Once dry I heat embossed the plate twice with clear UTEE. This was embellished with a gold screw brad and applied with foam pads to raise it.


The blue paper ribbon (bottom left) was made separately using a small snowflake stamp inked with onyx black versafine, adding dots of Stickles glitter glue and swiping with a blue dye inkpad when the Stickles has dried. This was then applied with glue stick and stuck in place and trimmed to fit.

Finishing touches were made by adding a silver rub-on snowflake and the words 'Seasons Greetings', a white eyelet applied with a crop-a-dile and a small length of narrow powder blue velvet ribbon threaded as shown.

The whole tag was edged with mid blue chalk ink.

Sid xx

Pin It

Sunday, October 18, 2009

Grungepaper Flower


This is a Grungepaper flower made for a swap on UK Stampers Forum. I decided to do a fantasy flower made up of three layers. I inked a flower stamp from Studio g for the centre with black Stazon ink onto the Grungepaper and trimmed around it making some slits for the petals. This was then sprayed with a purple ink with mica powder added allowed to dry and some dusty concord Distress ink was applied with cut'n'dry foam.

The second layer was stamped in black stazon using a Funstamps gerbera stamp. Again this was trimmed out and coloured with Distress ink in spiced marmalade.

The third layer was made up from a hat stamp from Lost Coast Designs, which was stamped 8 times in a sort of circular format in black Stazon and cut out. This was then inked with cut'n'dry foam and Distress ink in faded jeans, tattered rose and dusty concord.

All the grungepaper was heated and shaped to form the petal shapes before holding the layers together with a square gem brad. Some dots of Stickles glitter glue were added to the outer spikes. I thought it slightly resembled a snowflake so I added a bit of thin velvet ribbon in purple applied to the back with glossy accents to act as a hanger.

Sid xx

Pin It

Friday, August 28, 2009

Nature Card


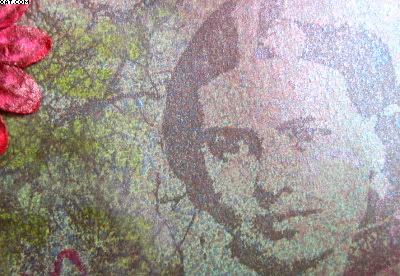
Here is a rather grungy card I have entitled 'Nature'. I am on a spray background kick at the moment so the base card started off pale green. I then mixed some mica sprays in green, blue and copper using Cosmic Shimmer mica pigments and sprayed until the desired effect was achieved (drying between sprayings). The main stamp is from PaperArtsy and was stamped once as a mask and the second time on the sprayed background in vintage sepia Versafine ink. The mask was positioned over the original image and the foliage stamp (unknown) inked in cosmic copper Brilliance ink and stamped a few times over the mask to afford background around the main image but not into it. The image was hand painted with Adirondack inks in lettuce and cranberry applied with a waterbrush. The text (PaperArtsy) was stamped as shown in onyz black Versafine.


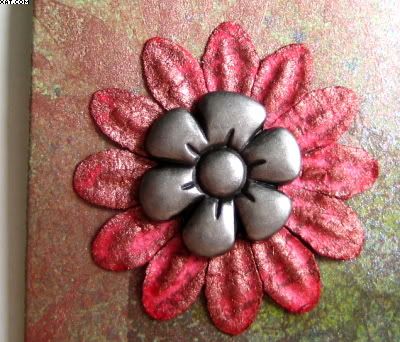
The flower embellishment is a mulberry flower from Hero Arts which I have coloured with dark pink ink and cosmic copper Brilliance. This was stuck in place as shown and a metal flower embellishment from Making Memories was applied in its centre.


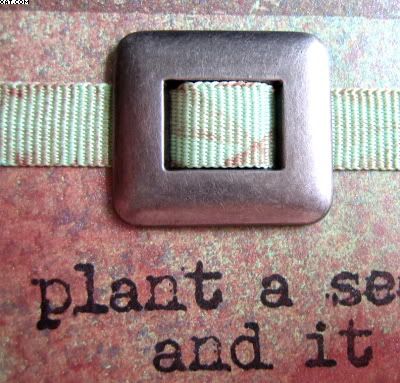
The ribbon of plain light green grosgrain has also been stamped with the Brilliance cosmic copper before threading through a buckle from MM and sticking in place.


The whole card is a bit moody, but I wanted it to be that way. Hope you like it.


Sid xxx

Pin It

Thursday, August 27, 2009

'Numbers' ATC


Here is an ATC I have made using a background of home made mica sprays in blues and greens. I applied multiple layers of spray onto dark green paper and dried between coats. I used a variety of micas from Cosmic Shimmer and added drops of Distress re-inker from Ranger to intensify the depth of colour. Once I was happy with the effect I backed the paper with orange card and trimmed off the excess.

I then took a large chipboard N and sprayed with green and gold mica sprays drying with a heat gun. The edges of the letter were coloured with orange Copic marker before triple heat embossing with clear embossing powder.


The background was overstamped with a number stamp from PaperArtsy in olive green Stazon and an acrylic swirl flourish stamp from Li'l Davis Designs in pearlescent rust Brilliance ink. The strips were stamped in olive green Stazon using another PaperArtsy stamp onto some textured paper which had also been sprayed with orangey mica spray. The strips were applied with gluestick and the chipboard N with Glossy Accents. The other letters were coloured with the orange Copic Marker and applied as shown. Finally the whole ATC was edged with Versamagic pumpkin spice chalk ink.

Hope you like it. Sid :-)

Pin It

Thursday, August 06, 2009

My Beady Eye


Here we go again, more beads. This time I used Fimo classic black polymer clay which seems to pick up the mica much better. The mica was misty lavender by Jacquard Pearl-Ex and was applied with a soft brush before baking the clay at 110C for a minimum of 30 mins. The seed beads in between are glass and I didn't make them ........... a bit too fiddly for my fat fingers I expect.

I also conditioned the clay at least 10 times through a pasta machine (set at its thickest setting & reserved just for this stuff !) before rolling in the bead roller machine. I will be doing more and then will actually do a necklace, at this stage just seeing which clays are best.

Sid :-)

Pin It

Saturday, July 11, 2009

'Man in The Mirror' Decorated Mirror


Only called 'Man in the Mirror' because I am reflected, complete with camera in the mirror on this shot of a decorated mirror I made today at a class at Paddy's Stamping Place in Prestwich - Manchester.

Our host and very talented crafter was Neet Hickson, who was very patient and an excellent tutor during the all-day session.


The base frame was from Ikea (Malmo Mirror) and we first removed the mirror and then covered the raw pine with black acrylic or claybord ink using cut'n'dry foam.


We the used Makins air dry clay to produce the tiles which were stamped into with a host of stamps and then covered with mica powders applied sparingly with a brush. The resultant pieces were adhered to produce the all-over design, and allowed to dry before replacing the mirror. I used a few black clay base pieces but mainly blue for the rest. Each piece was rolled out by hand with a small roller and spacers so we didn't use a pasta machine either.


I always find shiny things difficult to photograph and hope the close-ups show enough detail. I love the finish as I always love blue themes anyway. I think the bit of green adds interest too !


Had a fantastic day and really achieved a lot thanks to Paddy and Neet who are both stars !! All materials except the mirror are available at Paddy's too !
Hope you like it :-)

Pin It

Monday, August 18, 2008

Oriental ATC


Here is a quick ATC I put together for another swap. I brayered the background with green, blue and mustard Whispers dye inks in stripes, slightly overlapping and set with the heat gun. I then applied a trimmed piece of Japanese Washi paper to the bottom left. I stamped an image of a Japanese lady, a stylised chrysanth and three oriental characters in onyx black Versafine ink. I applied a strip of self adhesive gold foil down the left half of the card before applying a small polymer clay plate that I had made previously by stamping into some soft worked clay. I also applied some Pearlex metallic mica pigments to the clay before baking to give it a metallic sheen. I then edged with gold Krylon pen.

Hope you like it :)

Pin It
Related Posts Plugin for WordPress, Blogger...