>
Showing posts with label Dressmakers Pins. Show all posts

Wednesday, January 04, 2017

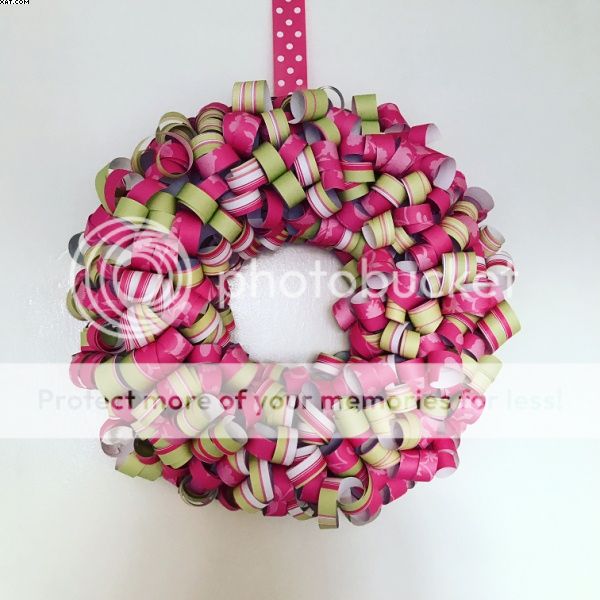
Happy New Year & Spring Wreath


Firstly may I wish everyone a Happy, Healthy & Prosperous 2017 !

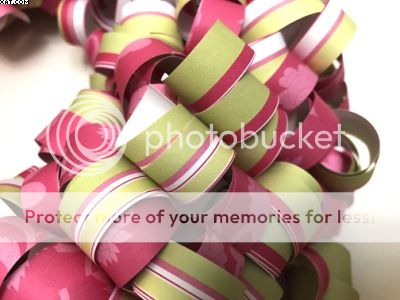
This is also my first project of 2017, a curled paper wreath !  I started with a polystyrene wreath form which was 25cm diameter.

I chose papers which I have had for ages (DCWV - Florals 12 x 12 stack). I used only two designs in green and pink, one a pink floral and the other a green & pink stripe.  In total I used 6 sheets.

I cut the sheets into half inch strips on the paper trimmer and then curled these from the centre of a strip outwards in both directions. I used a bone folder and my thumb to do this.  When I had curled all the strips I used plain headed pins to attach the curled strips to the polystyrene form in a random fashion until the form was totally covered.


Finishing touch was to add a length of white/pink spotty ribbon with more pins.  I wondered whether to add a flourish with the word 'Spring' but decided not too.  Also this would make a great table centrepiece with a battery candle in the middle. What do you think?

Sid xx

Pin It

Friday, December 12, 2014

Frosty !


Ta daa !!  Let me introduce 'Frosty' the snowman  !

My good friend Effie, at a recent craft weekend, gave us a project class to make one of these fab snowman decorations, thanks a lot for the tuition and this is my resultant creation.

His body is filled with rice and is both squigy and weighty and made from cream velvet which has been embellished with Brilliance pearlescent inks and a rubber icicle stamp which has been heat embossed into the pile side of the velvet by ironing onto the inked stamp.  Some pale blue heat set jems have been added randomly.  The body was cut from a circle and gathered with strong thread after filling with the rice.


His head was made from a polystyrene ball coated with Snowtex and glittered whilst still wet.  His eyes are black sparkly brads, his nose a whittled piece of wood coloured orange with an alcohol marker and his mouth is 5 black glass headed pins.  His neck is a piece of thin dowel pushed into the base of the ball.

His ruffs are made from patterned paper and tulle netting.  His hat is made from the same patterned paper made into a cone and embellished with some pompom ribbon and a crystal snowflake stuck in place with hot melt glue.


Once complete his head was stuck on the body with hot melt glue.  I have also added some extra Stickles glitter glue on the ruff and hat to finish.

I love him and Doesn't he look great ?

Sid xx

Pin It

Monday, March 07, 2011

Cool Cupcake


What a cool cupcake !!  Not of the edible variety and totally calorie free too.  This was made over the weekend as one of our crafty projects at our little crafty retreat in Skipton.  As I always liked blue that was my colour theme.

The whole concept was dreamed up and overseen by the very talented Efemera and many thanks to her  for sharing it.

The base is an empty cotton reel and the stand top is a piece of circular craft board both covered in patterned paper.  The fringe is also made from printed paper punched with a Martha Stewart edge punch.


The cupcake itself is made from a blue silicone cupcake case as its base.  The 'cake' is made from a polystyrene ball cut in half which is covered in a piece of white felt stretched and pinned in place over the half poly ball.  The frill is made from elasticated blue gingham ribbon from The Ribbon Girl.  This was stretched around the half ball and pinned in place into the polystyrene.  A very small amount of polyester fibre was added to the silicone base to fill it and the ball fixed in place with silicone glue applied around the ribbon before easing into the case. Once in position  I stuck a couple of pins through the case into the poly ball until the glue had set !


When the silicone glue had set the cupcake was embellished with a  piece of green satin ribbon, a paper flower, a red bead and a red headed pin to hold all in place on the top.


The finishing touch was to apply some blue Dew Drops from 3D Jean stuck in place with glossy accents.

What a tasty confection !!

Sid xx

Pin It

Saturday, December 04, 2010

Tattered Wreath


'Tis the Season' so here is a little offering that could be used as a seasonal piece or not. 

This wreath was made entirely from old bookpaper and Tim Holtz tattered florals and tattered leaves Sizzix diecuts.  The whole lot is mounted on an expanded polystyrene flat backed ring of 10 inch diameter.


The bookpaper (from an old electronic circuit book), was torn out in blocks of about 10 pages and passed through the Big Shot to cut out lots of both the leaves and the florals.

These were then separated and laid in cardboard boxes and sprayed with a variety of mica sprays, some from Glimmer Mists, Moonglow Mists and some home made sprays using mini-misters and Distress re-inkers with a little heirloom gold Perfect Pearls added.  The pictures don't do the shimmer justice as usual and the overall effect is muted but shimmery and a little antiqued.


Once spayed I allowed the mica mists to dry naturally and then assembled the various layers in a random way with drops of Glossy accents.  I made flowers of various sizes using 4, 3 & 2 layers.  There are even single flowers in places which were used as fillers.


The assembly was a labour of love and took a while and I attached using dressmakers pins threaded with a clear gold lined seed bead, a black cup sequin and a violet sequin.  I placed the flowers (some with a leaf added behind) randomly on the ring ensuring that the ring was completely covered and could not be seen at all.  The beauty of the poly ring is that you can easily reposition the florals if you need to until you are satisfied with the effect achieved.

I was going to add a Christmas sentiment but thought that it would be too much.  I added a length of wide red glitter ribbon cut in a chevron at one end added a red eyelet with the Crop-a-dile to allow it to be hung.  The ribbon was simply pinned into place with three pins from behind.

This wreath looks festive but also could be used anytime of the year with a different style of embellishment or ribbon hanger.  This creation has been entered into the Tim Holtz 'Tattered Florals Challenge'.

Sid xx

Pin It
Related Posts Plugin for WordPress, Blogger...