>
Showing posts with label Bakers Twine. Show all posts

Thursday, December 06, 2018

Festive Critters .....


This is a folding pop-up Boxcard made to fold flat to go in an envelope for posting ....

It features a plaid covered box filled with cute reindeer and squirrels in a Winter wonderland ..... it's for sale in my Etsy Shop - Harpies Crafty Corner, click HERE to go there .....

Sid xx

Pin It

Saturday, November 24, 2018

Red Deer .....


Sharing a handmade Christmas Card .....


It has an oval aperture filled with red glitter card and surrounded by green spotty kraft card frame......


The gold deer is die-cut and heat embossed in gold, he has a necktie made of red & white twine and a sprig of holly in his antlers.

This card is for sale in my Etsy Shop .... click HERE to go there .....

Sid xx

Pin It

Wednesday, November 29, 2017

Heart Tree .....


Made a Christmas Card ....

It is available for sale in my Etsy Shop ...... click HERE to have a look .....

Sid xx

Pin It

Monday, October 09, 2017

We Three Snowmen .....


Made my First CAS Christmas card over the weekend ......

Used stamps (with Memento black ink) and dies and coloured with Copic markers. These were attached on foam pads.  The sentiment was stamped in Versafine black ink directly on the card.  I added Glossy Accents to some of the clothing on the snowmen !  The card was tied round with red twine as shown to finish.

Sid xx

Pin It

Tuesday, August 15, 2017

Mini 'Hello' .....


Another 3 x 3 inch mini card in my series !

Took a white card blank and decorated this with a circle of printed paper, added two strips of Washi tape and a square of Kraft card stamped with a flower, matted on green card, tied round with bakers twine and mounted as shown on foam pads.

The sentiment (Papertrey Ink) was stamped in Versafine black on white card, trimmed and matted on more green card and mounted on foam pads.

Simply made .......

Pin It

Thursday, December 15, 2016

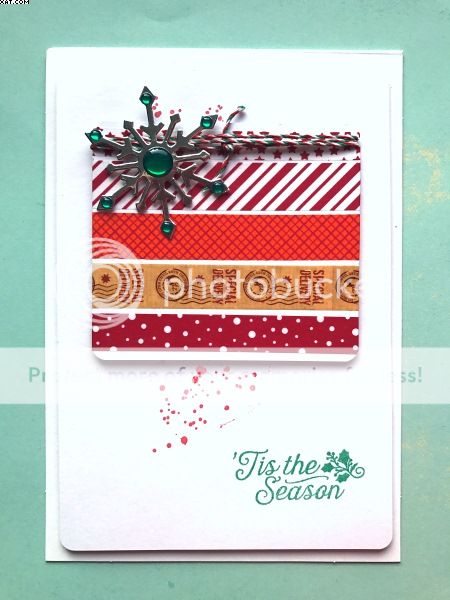
Star of Hope Card


Another Christmas card using mats, stamps and Washi tape along with a diecut.  I started with a 5 x 7 inch white card blank and then cut a slightly smaller matt in white textured card and I rounded the corners with a corner chomper.

Onto this I stamped some distressed spots in red Memento dye ink and the sentiment in the same green ink.  This was matted on foam pads on the card front.


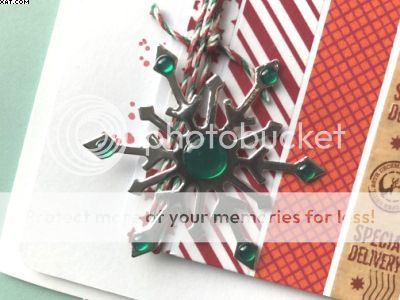
Another matt in more white card was then cut and again I rounded the corners.  I chose 5 different Washi tapes in Christmas colours and applied these in stripes over the matt.  I then diecut a snowflake in silver Mirri card and embellished the points with some green self adhesive cabochons.

I wrapped some bakers twine around the top of the matt and tied in a knot, securing at the back with some more tape.  The matt was attached to the card on more foam pads and the snowflake added on a couple more to finish.

Sid xx

Pin It

Sunday, December 04, 2016

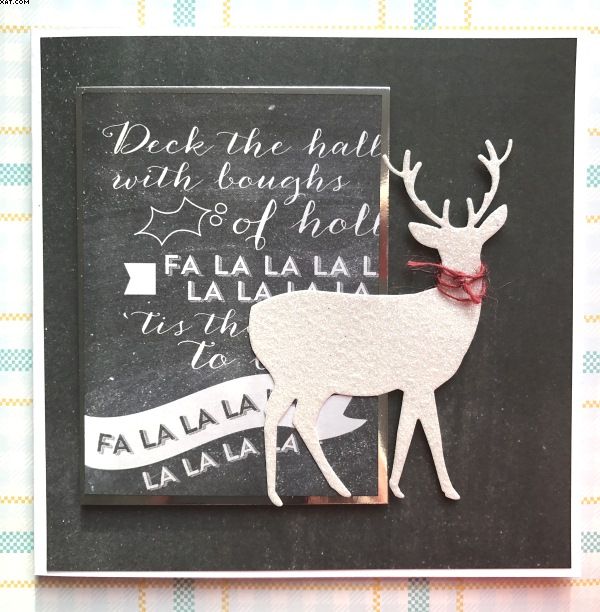
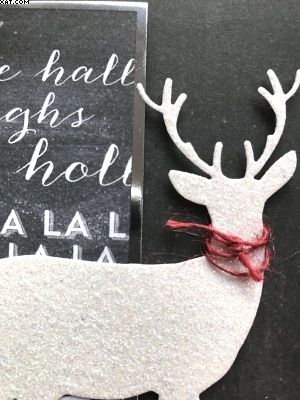
Deck The Halls .......


I do like different colours on Christmas cards !

This card has a white square 5.5 x 5.5 inch card base and I have matted some greyish coloured paper onto this.  I then made another mat with some more printed paper with some words this time and applied this to a piece of silver mirri card.  This was then applied as shown on foam pads.


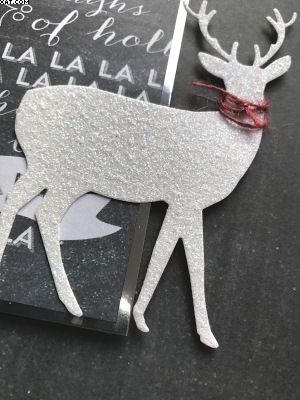
I then diecut a deer in sparkly glitter card (does not show up very well in the photo).


I gave him a necklace of red twine before applying him over the mat to finish.  Not much colour but I think it looks good !

Sid xx

Pin It

Wednesday, November 26, 2014

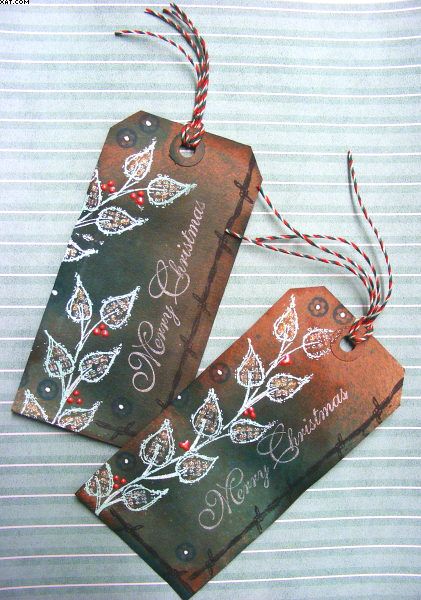
Twin Tags


Here are a couple of Kraft tags I made.  I used Dylusions sprays to colour the tags with a red and a green, drying with a heat gun.

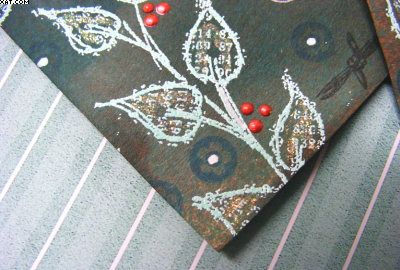
I then used a Dylusions stamp and Versamark ink which I heat embossed with a pastel green opaque embossing powder.


Extra detail was added with a barbed wire stamp and a flower stamp which I inked in Archival black ink.


Final touches were to add some red Dimensional Pearls to represent holly berries, white blobs in the flower centres with a Posca marker and the sentiment was stamped in moonlight white Brilliance ink.

Some Stickles glitter glue was added on the petals to add a bit of bling and they were tied through with red, white and green bakers twine.

I thought these added a different dimension to Christmas gift tags.

Sid xx

Pin It

Tuesday, November 04, 2014

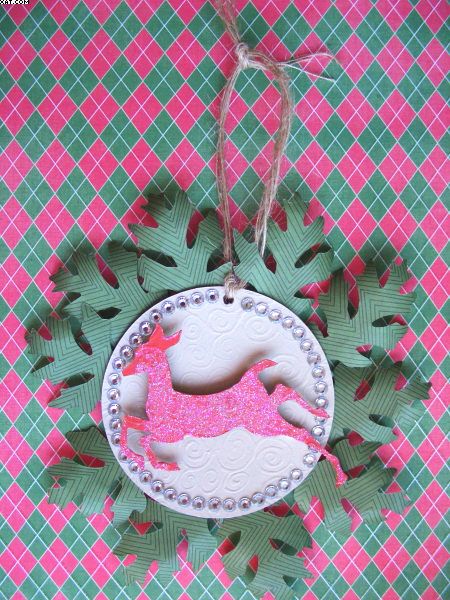
My Deer .........


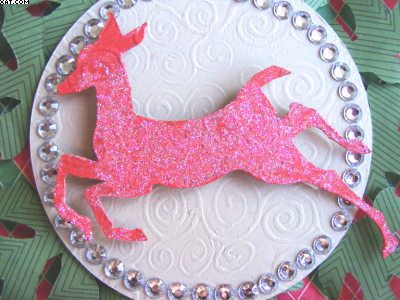
More on a Christmas theme in this post.  The City Stamper Challenge Blog for week 236 is asking us to make a craft project featuring a deer so I made this.


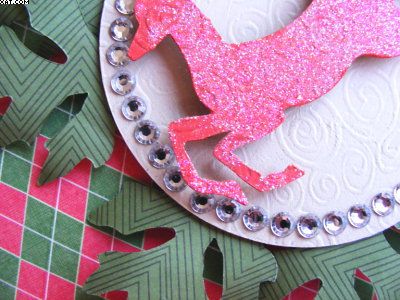
I decided to make a little simple Christmassy hanging after having pulled out a load of embossed Grungeboard which has sat there in my stash, unused for ages.  I diecut a circle from the swirly Grungeboard and painted it with some beige acrylic paint. as the centre background.

The leaves were next diecut from a Tim Holtz tattered leaves Sizzix die from some green striped paper.  These were stuck in place behind the grungeboard centre as shown.


The deer again was diecut (TH Sizzix) from more of the same grungeboard, which this time was painted red.  A layer of dries clear glue was spread over the painted surface and some glamour dust glitter adhered for a bit of glitz. It was mounted on double foam pads to raise it off the surface.

Next I added a circle of faux clear gems and mounted the deer on foam pads.  I cut a hole with a crop-a-dile at the top and added a few strands of jute twine tied through to form a hanger to finish.

I was going to add a sentiment but thought that it looked better without.  What do you think?

Sid xx


Pin It

Sunday, March 16, 2014

The Romantic Road


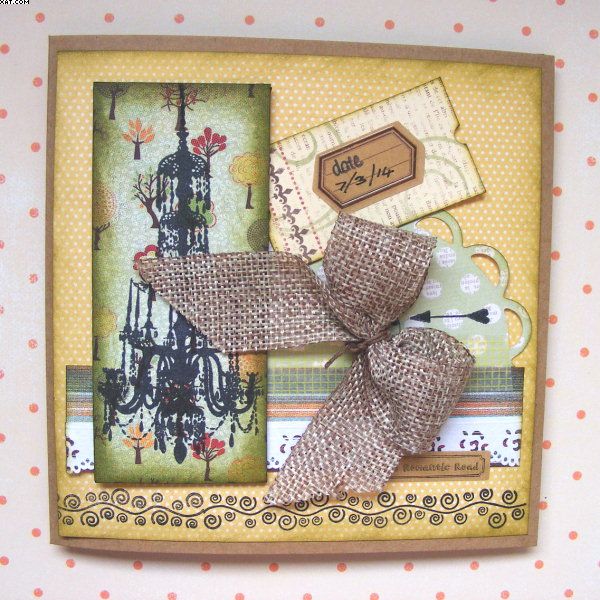
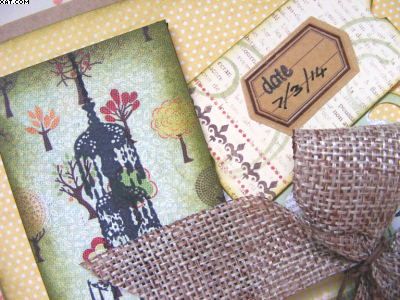
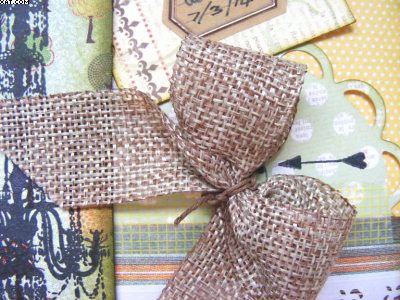
I love to use Kraft card, it possesses such a natural colour which blends well with earthy tones.  This card was made from a 4 x 4 inch base card and I think the colours are lovely.  Papers were selected, cut and applied as shown. Distress inks were used to edge most components.


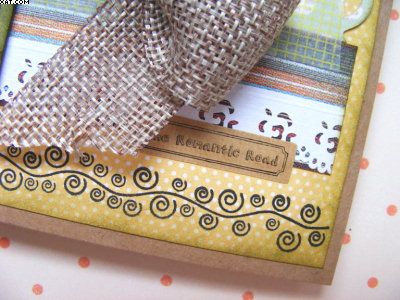
The main image is Moo sized and is a plate made of card, covered in paper and stamped with a chandelier stamp in Archival black ink.  One layer is a die cut circle with a scalloped edge and some Washi tape was used to hold the horizontal papers together.


I have used a sticker to record the date, layered over a printed ticket from 7 Gypsies. Some paper lace, more stamping with arrows and swirls stamps was done.


Crowning glory was the bow fashioned from fab hessian ribbon (available at The Ribbon Girl) which was tied at the centre with some brown twine.

Sid xx

Pin It

Wednesday, January 29, 2014

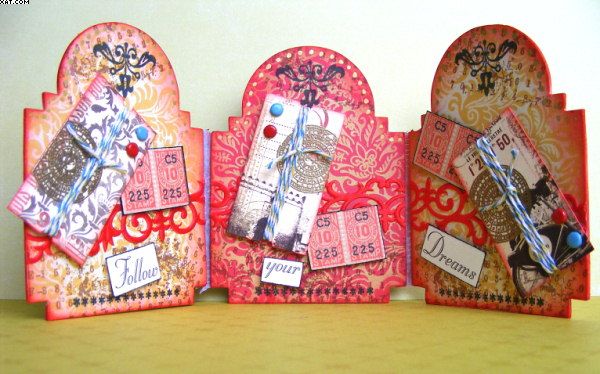
Follow Your Dreams Triptych


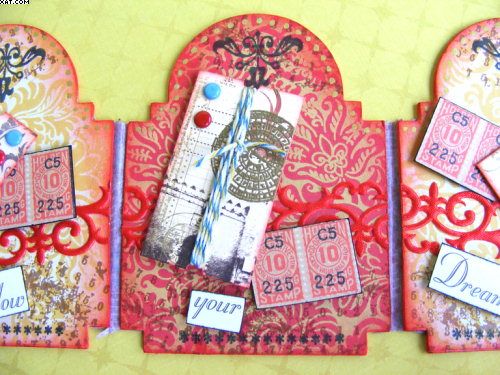
I used to like doing the Gothic Arches Challenge but sadly it wrapped up so I had it in my mind to make a triptych ......... and this is it !

I used chipboard and my Sizzix to make three base components with the TH  mini cabinet card movers and shapers die. These were covered with papers from Papermania (capsule collection - sunshine paper pack) also cut out with the die for an accurate fit.


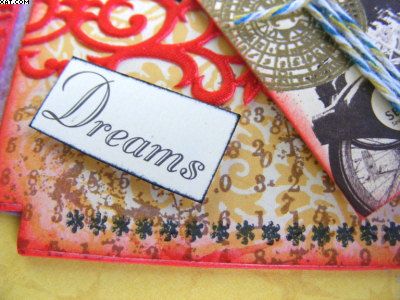
Once stuck in place these were sanded and edged with barn door Distress ink and cut'n'dry foam.  I used a stamp with distressed numbers from PaperArtsy to stamp at the top and bottom of all three panels in sepia Versafine Ink. Followed by a row of stars (bottom) and a swirl (top middle) stamped in Versafine onyx black ink


Next I adhered some swirly red satin diecut ribbon across each of the panels.


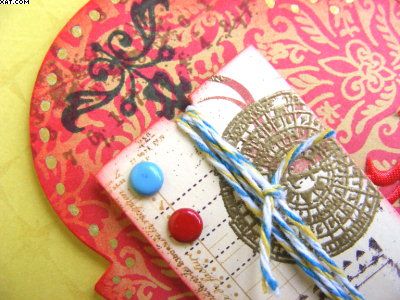
I then stamped three tickets from 7 Gypsies with Versamark Ink and heat embossed with detail gold embossing powder.  Each was edged in more Distress Ink and a length of bakers twine added and tied in a knot at the front.  Then some contrasting coloured brads were added to each ticket as shown.

Some more 7Gypsies stamps were then edged in black and these along with the tickets were mounted on foam pads.


The words came from K & Co and were also edged with black and added on foam pads.

Finishing touches were to add some Posca pen gold dots around the top edge of each arch.  The three panels were then hinged together with some Washi tape at the back.

Sid xx


Pin It

Tuesday, December 24, 2013

Sweet Treat


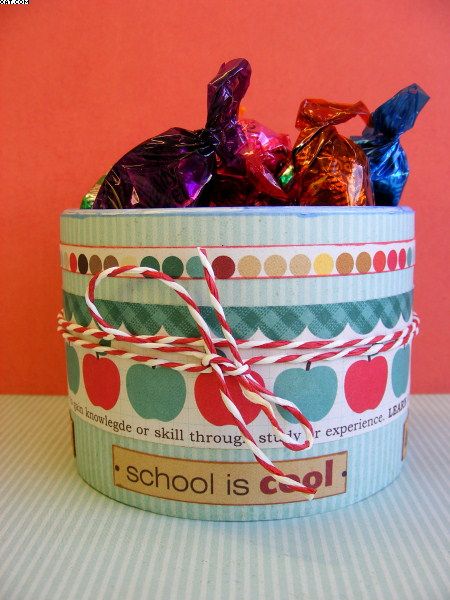
Here we go on this Christmas Eve, so I have decorated a used cotton wool bud container with some American 'Back To School' papers with a little treat of sweets to give to a little girl or boy when they return to a new term back at school in the New Year.


I love to upcycle as using packaging that would normally go to waste gives you a good feeling. Christmas always brings us loads of packaging so why not look at it and try to use it in a creative way?  The twine was actually on a box of Christmas cards so even that is upcycled too.

Sid xx

Pin It
Sunday, November 21, 2010

Ribbon Wreath


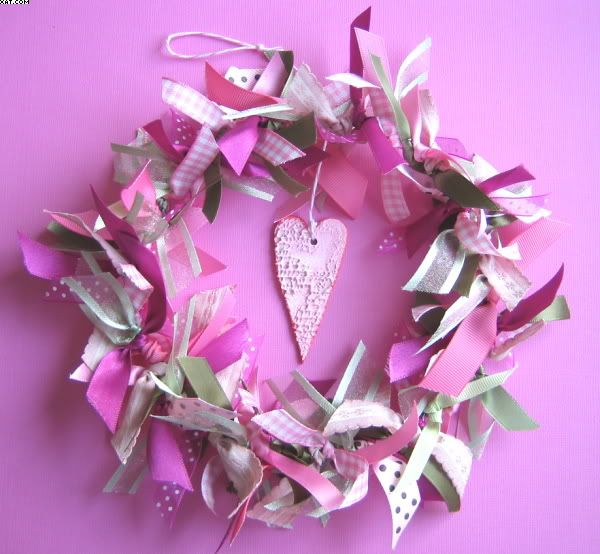
Another of my weekend creations.  This time a ribbon wreath made of .......... yes you guessed it - Ribbons, lots of them !!

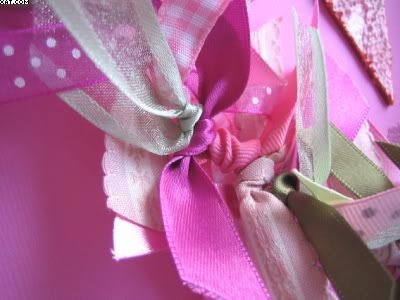
I started with a base made of florists wire twisted together to form a circle of about 8 inches in diameter.  I then selected the ribbons from a selection from Andrea the Ribbon Girl in pinks and greens and cut short lengths before tying onto the circle.  I worked around and around until the wire could not be seen.  The ends of the ribbons were cut at an angle to tidy them.


The heart was cut from chipboard using a Sizzix die and was triple heat embossed with opaque pink sparkle embossing powder using a Versamark pad.  A text stamp was used to imprint the design.


A hole was cut with a Crop-a-dile and a length of pink and white bakers twine was attached to the heart and finally to the wire finishing in a hanging loop.

Yet another first for me !!

Sid xx

Pin It
Related Posts Plugin for WordPress, Blogger...