>

Sunday, September 26, 2010

Crowning Glory


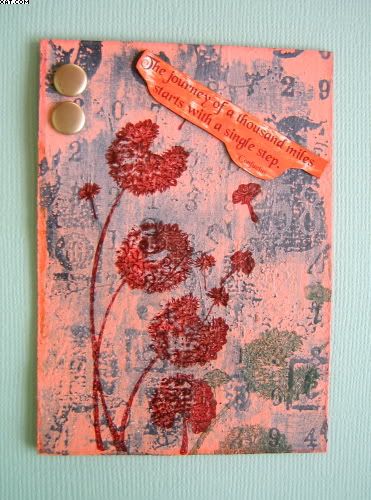
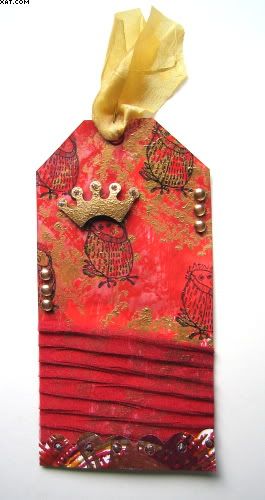
This tag is another in the rolling recipe challenge over on UK Stampers Forum. This weeks recipe is:

1.  Crown
2.  Fabric
3.  Paint

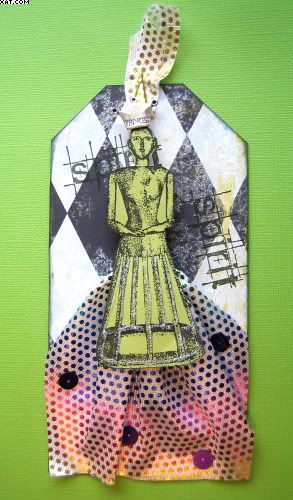
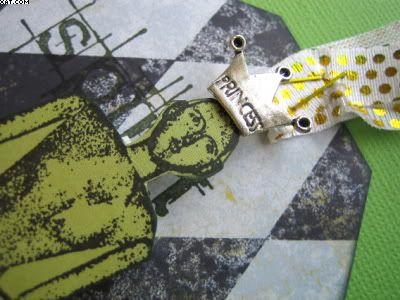
I started with a white card tag and painted the background with red Dylusions acrylic paint followed by gold paint dabber.  I die cut the crown from grungepaper with a Sizzix TH Alterations die and coloured with more gold paint.


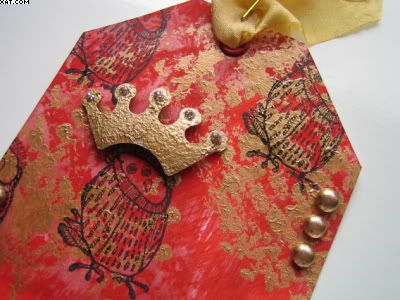
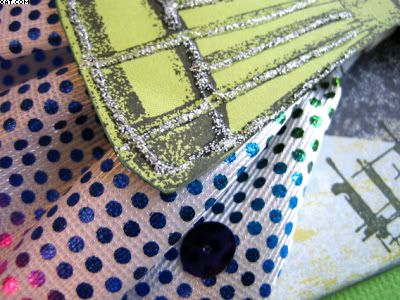
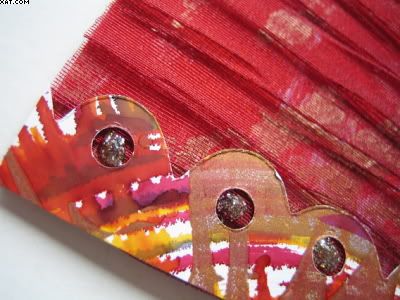
Next I took a piece of crimson rouched chiffon and applied this over the background with some glue dots and trimmed around the edge with scissors.  I cut another border from Sizzix TH alterations from a piece of spin 'n' splash card I had made ages ago with Alcohol inks and Mixables and applied this at the bottom with Glossy Accents.  I then stamped an owl several times from Red Castles Rango Zoo 2 plate in jet black Stazon and applied the gold crown on foam pads to one of the stamped images as shown.


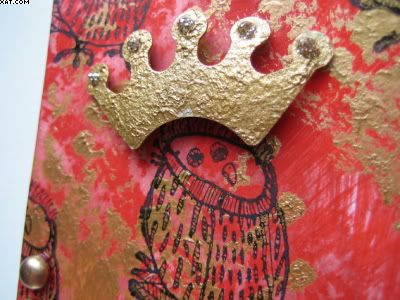
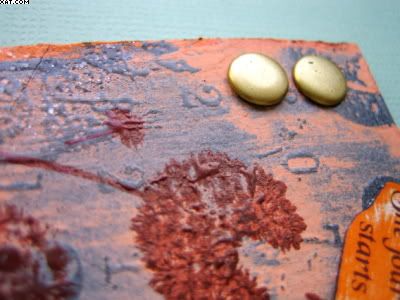
Some gold drops were added and a little platinum Stickles to embellish the crown and base decoration.


A red eyelet was added with the crop-a-dile and some gold chiffon ribbon added and fixed with a gold staple to finish.

Sid xx

Pin It

Monday, September 20, 2010

Header Competition entry

Over on the UK Stampers Forum, we have been running a 'Design a new Header Banner' Competition to feature on our new improved and popular Forum and Newsletter.

The competition closed last evening at 9pm but voting for the winners of the competition is now taking place over the next two weeks.  There are 12 entrants for the competition and members of the Forum are invited to vote for who they think deserves to win the prizes generously donated by Stamp Galaxy and The Artistic Stamper.

Why not join the forum and, as well as being able to vote for the winner,  share in our friendly community of crafters.  We have galleries, swaps and more to tempt you. To see the competition entries and to register to become a member (for free !), click HERE.

This is my entry:


Wonder who will win? ............. That could be up to you !!

Sid xx

Pin It

Sunday, September 19, 2010

The Spirit of Things Tag


This tag is another in the rolling recipe series over on UK Stampers Forum.  The recipe for this week is:

1.  Fabric
2.  Dots
3.  A Crown

I started with a tag blank and covered this with some printed diamond background paper  the edges of the tag were coloured with dark green chalk ink..  This was then stamped twice with a spirit stamp (Invoke Arts) in moss green Versafine ink. I then took a piece of spotty mirror fabric that I had had for ages and gathered the top edge with needle and thread.  This was then adhered with small glue dots to the bottom half of the tag and trimmed to fit.  Some purple sequins were added onto the material on small glue dots as shown.


Next I took a piece of green card and stamped an Invoke Arts image of a dressform woman in onyx black Versafine ink.  This was trimmed out and some ice Stickles added onto the bottom of the form.  Once dry a double layer of adhesive foam squares were added to the top half of the dressform and this was stuck in place over the material (hiding the gathered material).


Next a metal crown embellishment was adhered on foam pads on the head of the dressform woman.  I then cut a narrow strip of the material and stapled this at the top with gold staples to finish.


This tag is very 3D and I liked working with the material for a change too !

Sid xx

Pin It

Sunday, September 12, 2010

Two ATC's

These two ATC's were done to try out my new matte finish acrylic paints called 'Dylusions'.  They were created by Dyan Reaveley of 'Art from The Heart'. and there are presently 10 colours available with more to come.

I saw these demonstrated by Kate Crane at the Great Northern Papercrafts Extravaganza in Harrogate yesterday.  The show is still on today too.


The paints are really brilliant and although they dry with a matt finish they have a transparent quality.  When colours are mixed they do not 'muddy' either which is a great boon and they can be easily stamped on with various inks.


I have used Yellow, Blue and Purple on the first and Pink, Yellow and Purple on the second.  They were applied direct from the pots with a flat brush. Also used stamps, embossing powder (applied with Versamark), metallic pens and opaque pigment pen to embellish the backgrounds  I just love how bright they are !

Sid xx

Pin It

Thursday, September 09, 2010

'The Journey' ATC


This ATC uses an acrylic paint resist as a background and the stamped seedheads are releasing their little seeds into the wind on a journey to their destination.  That sounds awfully philosophical I know but I thought it was a good representation in this case.

The background ATC was cut from grey backing board from a pack of stamps.  This was then painted with a metallic granite acrylic paint from Inscribe.  Once dry the painted surface was stamped with Versamark ink with a numbers background stamp from PaperArtsy.  The stamped image was heat embossed with detail clear embossing powder using a heat tool.

A coat of  peaches 'n cream DecoArt acrylic paint was then applied over this and allowed to dry until tacky.  The peach paint was then roughly removed with a paper towel moistened with water to remove some of the paint revealing the background colour showing through the embossed image. Once a pleasing effect had been obtained this was allowed to dry thoroughly. 


The distressing is textured and raised and looks really good as hopefully captured in the pic above.

Next step was to stamp a couple of seedhead images from 'My Minds Eye' with the acrylic stamp in Coffee bean & pearlescent ivy Brilliance ink as shown.  These were dried with the heat gun as this ink is a pigment ink that dries rapidly on absorbent surfaces.  A blob of rock candy Distress Stickles was added to the bottom left of the card and spread with my finger before drying with the heat gun.  You can just see the sparkle on the close-up.

Two brass snaps were added using the crop-a-dile and a Chinese motto was inked with Impress tangerine ink, trimmed and stuck in place.  The ATC was finally edged in orange chalk ink.

Sid xx

Pin It

Wednesday, September 08, 2010

Buttony Heaven

Well it's that time of the week again - Wednesday & that can only mean one thing WOYWW No.66.  Julia over on the Stamping Ground Blog as asked us all to show a little of our workdesk or things related so here is mine.  I missed posting last week........work got in the way unfortunately. Do try to visit the blog it's so interesting !

Anyway here is a fab tray of buttons that I have accumulated, plenty of choice for most projects here.


This second pic shows a little collection of allsorts on one end of my desk.  And NO I don't wear hair lacquer before you ask just use it for setting chalks etc.  At the bottom left is a little container with polymer clay canes in........waiting to be sliced and used in jewellery.  I must get down and do some.


Hope you enjoy your mooch round everyones blogs, will hopefully have time to visit as many of your fab desks too.

Sid xx

Pin It

Saturday, September 04, 2010

A Form of Dress


This arch was inspired by a piece of Coredintions paper which was black with a pale pink core.  I cut my arch using a template and then tore one strip off the bottom of the card exposing the pale pink core colour.  This was attached to the arch with glue stick after colouring the bottom 2 inches of the base with Versamagic pink grapefruit chalk ink direct to paper.


Next I took a dressform stamp (Lost Coast Designs)  inked with Versamark and stamped onto the background, heat embossing with white opaque embossing powder. Next I took the same Versamagic ink and stamped several times with a swirl stamp as shown.  A piece of printed ruler paper was also coloured with pink Versamagic and applied as shown at the edges.  A piece of diamond chiffon ribbon was then attached with a pearl headed pin and a clear self adhesive plate stuck in place at the bottom right.


The dots were added using Appli-glue dimensional pearl paint in dusky rose and a pink flower button was applied and filled with Appli-glue. The whole piece edged with pink chalk ink to finish.

Obviously going through a pink phase at the moment.

Sid xx

Pin It
Related Posts Plugin for WordPress, Blogger...