>
Showing posts with label Hot Glue. Show all posts

Saturday, July 04, 2020

Steampunk......


Made this card as my entry into the That's Crafty July Challenge on Facebook whose theme is 'Everything Steampunk' .....

I used a 5 x 7 inch white card blank as the base. I cut a matt from white card and embossed this with a Sizzix embossing folder. I then wiped over the embossed design with a White Linen Distress Oxide ink pad highlighting the raised portions and whilst still wet applied Bronze embossing powder and heated to emboss. I added some brown watercolours to selected parts. This matt was then matted again onto black card to leave a fine border.

I then used a Steampunk background stamp (EcoGreen) to stamp in Versamark ink and heat embossed with black embossing powder.  This was trimmed out and some metallic silver pen and brown watercolours added to the image. I also stamped a train emblem plate (EcoGreen) in Archival Sepia ink and trimmed this out also.

I then added a strip of measuring tape ribbon at the base of the embossed plate and added the other plate on foam pads along with the emblem.

I then added some metal embellishments, a corner, a key, two square brads & the number 13 which was applied with hot glue.  The finished matt was added to the card front and two strips of numbers Washi tape added to finish the card.

Sid xx

Pin It

Tuesday, October 01, 2019

Buttons .....


 A set of Inchies made for a swap on UK Stampers Forum .....

I punched the bases using a 1 x 1 inch punch out of re-cycled packaging. I covered this with old book pages also punched out to fit. I then stamped over this in black Archival ink and added a coloured button tied through with gold twine with hot glue and a flower brad.

Each Inchie was edged in gold Krylon pen to finish.

Sid xx

Pin It

Friday, February 10, 2017

Follow My Heart ....


I have a lot of materials but have not really made many multimedia pieces in the past. This multimedia piece is on a piece of compressed wood measuring 6 x 6 inches.

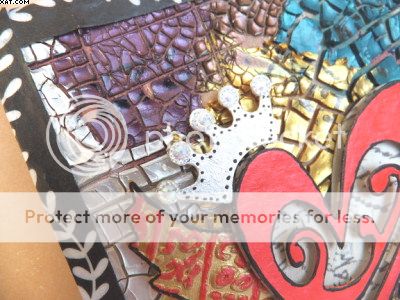
I started by spreading a fairly thick coat of Viva Decor Croco Crackling Colour (try saying that fast !!).  I used Bronze, Platinum, Gold & Turquoise.  I applied it in blocks which blended a little where they touched.  I must say they really did 'crackle' when they had dried (around 12 hours drying time). I quite like the way the raw wood shows through the cracks in places and I did originally think about gessoing the wood base first but decided against it.


I then took an old Tim Holtz design die from Sizzix called 'Heart Wings' and diecut the design out of kraft card.  I embossed the wings through an embossing folder and then painted them in gold acrylic paint.  Once dry I highlighted the embossing with some pink pearlescent acrylic paint.  The solid back of the heart I covered in Tim Holtz Tissue Tape whilst the swirly front of the heart I gave a couple of coats of the same pink pearlescent acrylic paint and when dry edging with a black Posca pen.  The crown was painted in silver acrylic paint and 5 self adhesive crystals were added after edging with dots in black Posca pen.


Before I attached the wings and heart I inked a rubber alphabet stamp in black Stazon and stamped randomly on the crackle finish.  I didn't use a block but applied directly with my fingers as the surface was so uneven.


The wings were applied with hot glue and I raised them on foam pads, followed by the heart back then the heart front again raised on foam pads.  The crown was also applied on foam pads.


I then stamped the sentiment on white card in black Versafine and applied as shown with more hot glue.  I edged the whole thing with Washi Tape.  I also added a hanger made from florists wire stuck in place at the back with hot glue to finish the piece. I have also entered my creation into The Artistic Stamper February Challenge whose theme is 'Hearts'.

I really enjoyed making it and it has got me thinking about more multimedia in future.  Hope you like it.

Sid xx

Pin It

Monday, April 16, 2012

Making Waves


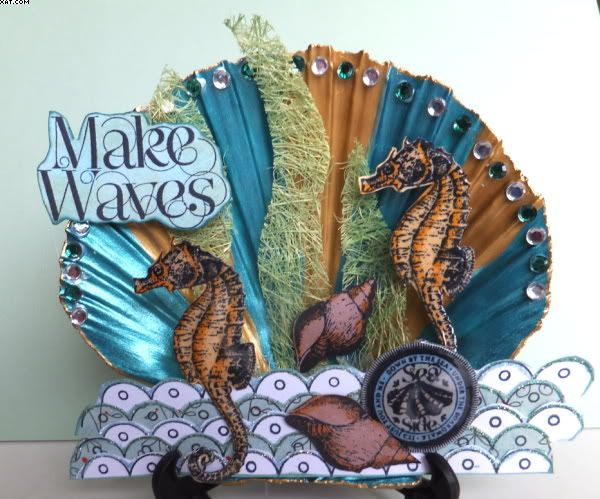
This has been in the making for a long, long time. The real scallop shell was decorated months ago and has sat around since then waiting for attention.  Because of the shells links with the sea I wanted to do some craft related to that environment so did this 3D scape.  All contained in its own shell home.

The shell was thoroughly washed and then painted with stripes in Viva precious metal colour in gold and turquoise.  It took a couple of coats to cover properly. The edges of the shell were then gone over with gold Krylon pen to neaten.  Some acrylic gems were adhered around the edge of the shell with more Glossy Accents and alternate gems coloured with the brush pen in green.


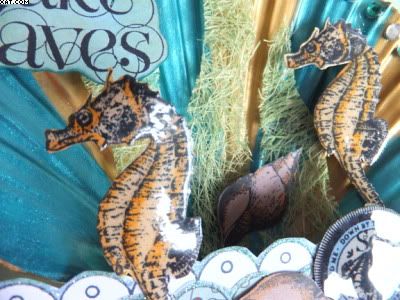
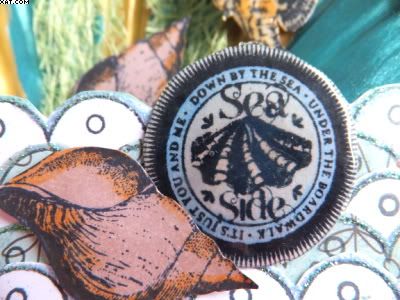
All stamped elements (apart from the waves) came from a plate of polymer stamps by Pink Paislee (Nantucket).  The shell, seahorse, word seal and words were all stamped on white card with Memento tuxedo black ink which were then coloured with Marvey alcohol brush pens before trimming out and edging with AI to cover white card edges.  A word seal and two seahorses were glazed with Glossy Accents.

The sea was made up from a border stamped multiple times on printed paper, trimmed and layered and edged with a Quickie glue pen and glittered with transparent blue water Art Glitter.


Some fused green sizal was cut into frond shapes before assembling and layering all elements as shown with hot melt glue to make a 3d seaside scene.

The shell has been supported for display using a plate holder.

It turned out just as I had envisaged it and it was great to use up that shell !!  You know what they say ......... 'Better Late Than Never'

It will also fit the challenge over on the Happy Daze Design Team blog this month which is 'April Showers' and the Simon Says Stamp & Show challenge which is 'Anything Goes'

Sid xx

Pin It
Related Posts Plugin for WordPress, Blogger...