>
Showing posts with label Metal Embellishment. Show all posts

Monday, September 14, 2020

Mission ......


Made a card using a really old wood mounted stamp from Crafty Individuals CI 073 ......

I made a background using Brushos in violet and yellow. I cut a square mat from the background and applied a piece of TH numbers tissue tape.

I next stamped the image twice in Versafine black ink, trimming one out around the men and the sentiment from the other. I coloured just the faces and hands in pink and the numbers in violet Distress Ink wash. Treating the numbers with Glossy Accents.

I then die-cut a number of triangles out of more of the background card and edged with vilet Distress ink wash.

The background was matted on deep violet card. the men applied as shown on foam pads and the triangles and sentiment as shown. I then added three metal studs and mounted the completed matt onto a 6 x 6 inch white card blank to finish......

Sid xx

Pin It

Sunday, August 23, 2020

Joker .....


Made a card mainly with AAll & Create stamps......

I used a white square card blank as the base. I then cut a white matt smaller than the blank and made a background using Distress Oxide inks in walnut stain, frayed burlap & vintage photo applied after spraying with water and layering (drying between layers). Once dry I selectively stamped part of the stamp in Versafine black ink.

I then coloured the background with Inktense pencils and a waterbrush adding yellows, reds and orange on the top bulb and birdcage. Some metallic gold was added too. I stamped a couple of screwhead stamps in yellow mustard seed Distress ink. The second bulb was stamped from the main stamp in Archival sepia ink. trimmed out and coloured with Inktense pencils and added on the background as shown.

I then took a mini 'Joker' playing card (inspiration for the colours used on the card). darkened with frayed burlap Distress stain and edged with brown Copic marker. this was then applied as shown on foam pads. I then used a white Posca pen to highlight elements of the background including the playing card. The words (TH) were added and edged with black Inktense pencil and two metal studs added.

I then matted the background twice on yellow and kraft cards to finish the card.....

Sid xx
 

Pin It

Friday, July 24, 2020

Travel.....


A multi-media card made recently .....

I started with a 5 x 7 inch white card blank..... cutting a smaller matt from white card which I brayered with a mixture of matte acrylic paints in green and blue. Once dry I stamped with a Travel stamp (AAll & Create) in Versafine black ink. I then brayered red & orange matt acrylic paint onto a die-cut circle of more white card and when dry stamped with the same stamp in more Versafine black ink which was heat embossed with clear embossing powder to add a gloss.

I then worked on the background with some triangle stamps and Distress Oxide in ks in green, blue and red as shown. The finished die-cut circle was stuck in place over the corresponding image on the background, and then edged with Inktense pencil and a waterbrush.

I next added some white paint lines with the edge of an old plastic card along with some black Posca pen highlights in the triangles. I then matted the design onto black card to leave a border and adhered to the card blank. The sentiment was stamped in Versafine black ink on white card, adhered to the background and again edged in Inktense pencil to make the words pop. Finally adding a couple of metal tag embellishments.

The design was inspired by Tracy Evans ......

Sid xx

Pin It

Saturday, July 18, 2020

Wings.....


This is a self-standing steampunk creation made as an entry into the That's Crafty Creatives Facebook Challenge for July ..... whose theme is 'Steampunk' ......

I started with a piece of printed background paper and applied a couple of strips of Washi tape at the base. I then stamped out a steam engine chimney and a pair of wings (Eco-Green) in Versafine black on white card. These were coloured with watercolours and silver metallic pen and trimmed out.

The gears (Tim Holtz) were die cut from white card, coloured with watercolours and gold metallic pen. I then matted the background onto brown craft card and black card. The chimney was applied on foam pads and the wings positioned as shown. The gears were were applied next on foam pads and centred with black adhesive gems. I then stamped a star (Tim Holtz) in Archival sepia and some numbers in turquoise Archival ink,  adding some blue Stickles glitter glue to the wings.

A few metal elements were added including the 'Family' sentiment.

I finished by dotting around the border with silver pen and added a die-cut stand (Tim Holtz) behind the piece.

Sid xx

Pin It

Saturday, July 04, 2020

Steampunk......


Made this card as my entry into the That's Crafty July Challenge on Facebook whose theme is 'Everything Steampunk' .....

I used a 5 x 7 inch white card blank as the base. I cut a matt from white card and embossed this with a Sizzix embossing folder. I then wiped over the embossed design with a White Linen Distress Oxide ink pad highlighting the raised portions and whilst still wet applied Bronze embossing powder and heated to emboss. I added some brown watercolours to selected parts. This matt was then matted again onto black card to leave a fine border.

I then used a Steampunk background stamp (EcoGreen) to stamp in Versamark ink and heat embossed with black embossing powder.  This was trimmed out and some metallic silver pen and brown watercolours added to the image. I also stamped a train emblem plate (EcoGreen) in Archival Sepia ink and trimmed this out also.

I then added a strip of measuring tape ribbon at the base of the embossed plate and added the other plate on foam pads along with the emblem.

I then added some metal embellishments, a corner, a key, two square brads & the number 13 which was applied with hot glue.  The finished matt was added to the card front and two strips of numbers Washi tape added to finish the card.

Sid xx

Pin It

Monday, June 15, 2020

Sunshine .....


Made a cute Oriental card .....

I started with a maroon 4 x 8 inch card blank. I then cut some oriental paper and matted this on black card as the base. I added a piece of black & white Washi tape as the ground for the little couple.

The stamps (Hero Arts) were stamped out on white card with Memento black ink and trimmed out.  They were coloured with Posca pens and watercolours and applied on the matts on foam pads. Some meatl coins were added at the base threaded through some maroon velvet ribbon and held in place with red-line tape.

The setiment was stamped on white card with Versafine black, trimmed and matted on red card before applying at the top on foam pads.

The mattes were then applied onto the card blank and three black sequins added with Glossy Accents to finish.

Sid xx

Pin It

Thursday, April 02, 2020

Grunge .....


A handmade Birthday card with a grungy collage style ....

I started with a 6 x 6 inch white cardblank. I then die-cut a frame in green card.

I set about making the collaged insert. I started with a piece of printed paper with letters in red, green & orange and die-cut a piece of this.  I selected a range of Lynne Perrella & Dyan Reaveley stamps and stamped using Memento inks in a random manner.

The three women were stamped again in black ink onto white card. The cheeks were coloured in red Posca pen. These were trimmed out ready to be layered over the original stamped image.

White acrylic paint was spattered over the  square and when dry some black Posca was added to highlight some letters.

The edges of the square were treaded with Versamark ink and heat embossed with gold embossing powder .... setting with the heat gun. The green frame was applied centrally on the card base on foam pads and the decorated square stuck in place within the frame.

I then layered the womens faces were layered on foam pads and two metal cogs added with Glossy Accents.

The 'Happy Birthday' (Happy Little Stampers) was stamped in Versafine black on white card and this was trimmed and layered over a piece of orange card which was also trimmed to leave a border. This was added on foam pads as shown to finish.

Sid xx

Pin It

Thursday, April 11, 2019

Collage .....


Made a rather bold coloured collaged Birthday Card ....

The base was made from bright fuschia Bazill cardstock cut to make a 5 x 7 inch card .....

First I added two strips of purple Washi tape as shown.

Then I took a green hexagonal wooden frame which I backed with coloured and stamped paper and stuck in place. Onto this I applied some green embossed die-cut leaves and a small square of coloured card.  I then added a glas heart cabochon and a gold metal tree embellishment. Two wooden laser cut birds were then added on foam pads.

The sentiment was stamped onto white card in black Versafine ink, trimmed, edged in fuschia chalk ink and applied on foam pads. Some small purple pearls were added to complete the card.

Sid xx

Pin It

Tuesday, March 19, 2019

Cracked people ....


Made a set of three ATC's in a theme of 'People' for a swap over on UK Stampers Forum ....

Idecided to do a distressed look & made the bases from re-cycled packaging and used Distress Inks, Distress Oxide Ink along with stamps and bronze metal embellishments.

The main images are old stickers and where the frames are applied with brads I have used Crackle Accents to produce a cracked glass effect.  They are finished with Distress Stickles.

If you would like to join in the swap click HERE to join the Forum.... it's free, friendly & fun !!

Sid xx

Pin It

Tuesday, June 26, 2018

June square ......


This 4 x 4 inch decorated square was made for a monthly swap over on UK Stampers Forum Facebook Group ..... this one is for June !!!

I used an embossed background treated with paints and metallic waxes on card from a recycled cereal box.  A stamped and coloured tag along with printed collage elements, fibres and metal florals have been complimented with buttons and glitter glue.

This one is going to a member in Germany ..... hope she likes it !

If you fancy joining in the Group click HERE to go there and join ..... it's free and fun .....

Sid xx

Pin It

Wednesday, May 30, 2018

Leaves & flowers ......


Here is a 4 x 4 inch decorated square made for a Monthly swap over on the UK Stampers Forum Facebook Group !

I have used recycled cereal packet as the base and some Brusho background & printed papers.  I have also applied a metal frame with a tree stamped and coloured within.  Some punched leaves, stamped flowers and Washi tape finish the square .....

If you fancy taking part in swaps why not join the Forum ? It's free & fun  .... click HERE to go to join .....

Sid xx

Pin It

Wednesday, March 23, 2016

One for the Guys


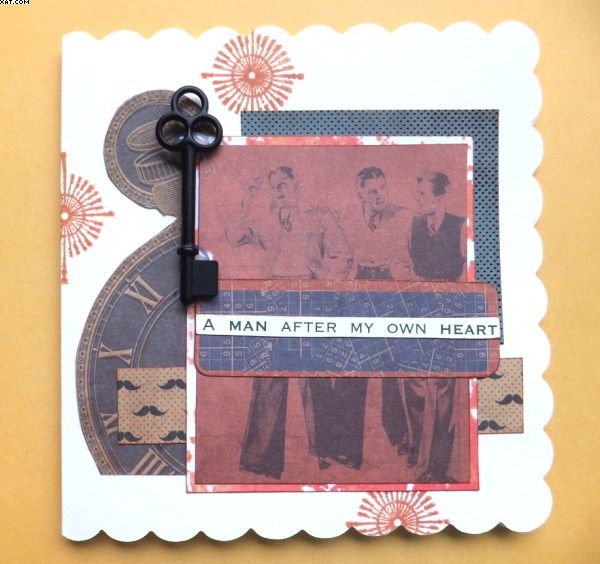
Thought that this card would be great for a man.  I used a cream 4 x 4 inch scalloped card base to start.  All papers used came from a 6 x 6 pad by Kaisercraft (Sears & Son)


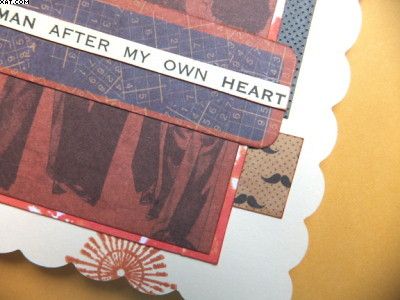
I first stamped the base card with a compass stamp in brown dye ink.  Papers were then selected, cut and trimmed out to make a collage of layers as shown. All stuck in place with acrylic glue.


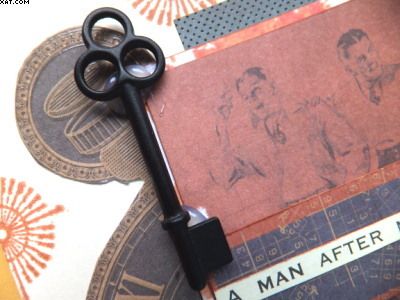
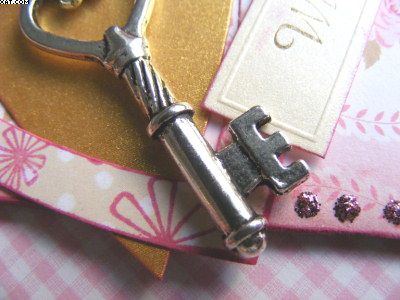
Final touches were to add the sentiment which was preprinted on cream card and to stick a metal key in place with hot glue.

Sid xx

Pin It

Saturday, January 24, 2015

Think Homely Pink ............


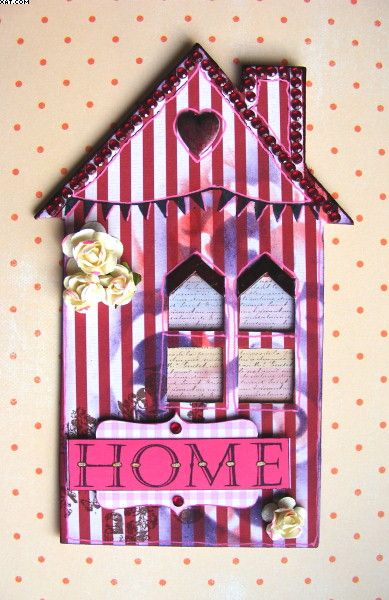
Here is a little hanging plaque I have crafted.

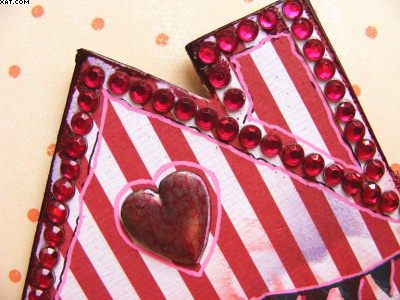
I started with a chipboard diecut of a house which I covered in stripey paper.  I then used a stamp and Memento bamboo ink and stamped a collage stamp.

I used a swirl mask and Distress inks in barn door and dusty concorde applied through the mask with cut'n'dry foam.


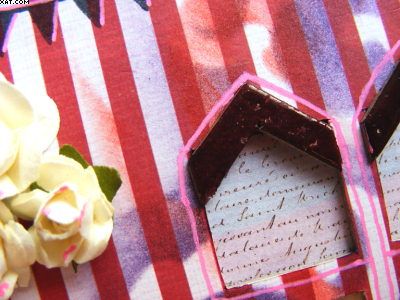
I then stamped some bunting across the roof area in Memento onyx black ink. I heat embossed the edge of the roof with magenta embossing powder as I did with two chipboard chevrons which became the window tops.


The wordplate was made from stamped letters on pink cardstock matted over a pink gingham diecut.  This was placed as shown on foam pads and embellished with a couple of red faux gems.  I then used the same gems and outlined the roof edge and chimney.  I stuck some printed paper behind the window apertures.


I coloured a metal heart with alcohol ink and placed on the roof, applied a few cream paper roses as shown and outlined lots of areas with a pink and gold Posca pens to finish.

This could also be displayed with a chipboard stand at the back.

Sid xx

Pin It

Sunday, February 02, 2014

Love Story


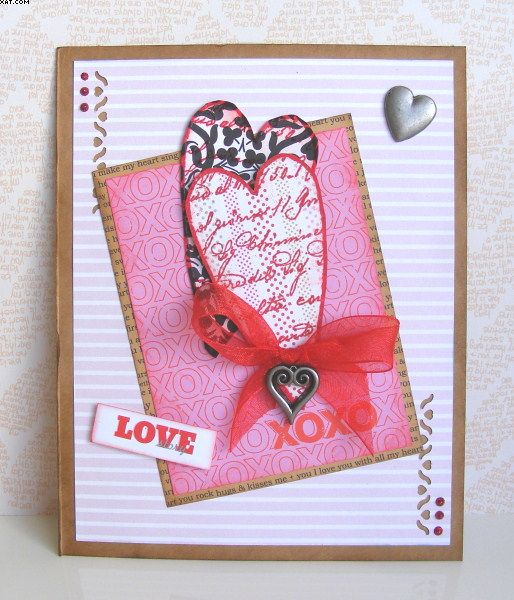
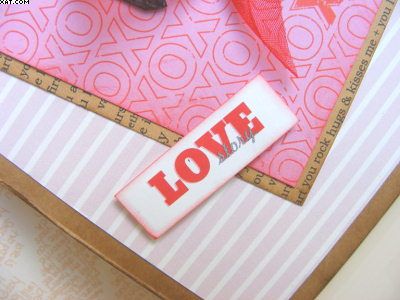
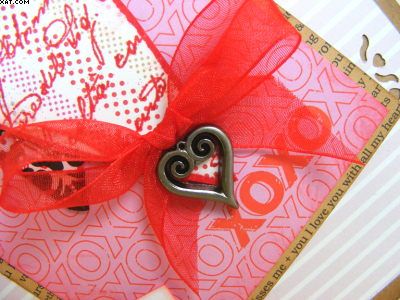
This Valentines card is made from a base of craft board on a card blank.  I have used printed papers with a love theme and layered a number of these on the card.

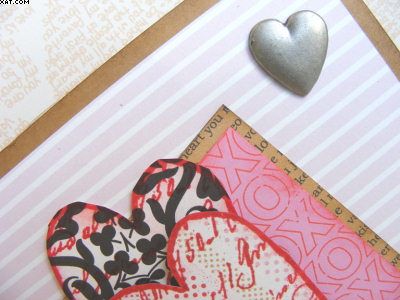
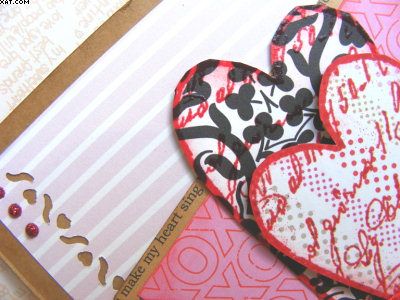
First layer is a pink horizontal stripe which I have punched through at two corners.


Next Layer is made from pink XO paper matted on some word paper.


Two hearts were stamped on more paper with Versamark and a stamp and these were heat embossed with some Ranger red gloss powder.  These were trimmed out and one applied over the other on foam pads.


I then made a bow from red organza ribbon and applied this as shown.  A metal heart embellishment was then placed beneath the bow whilst another plain metal heart was stuck in place top right.


Most edges were inked with Distress Inks to hide that 'white' edge effect.

Finishing touches were to add some red Stickles glitter glue as shown and to apply a printed sentiment with the words 'Love Story.

This meets the requirements for the City Crafter Challenge Blog No.196 where you have to have a Valentines card or use the word Story ...... I have done both here !

Sid xx

Pin It

Saturday, January 25, 2014

Key to Your Heart


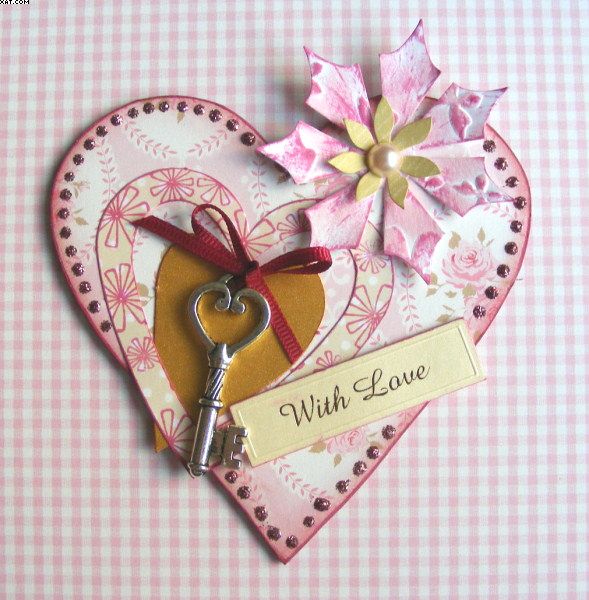
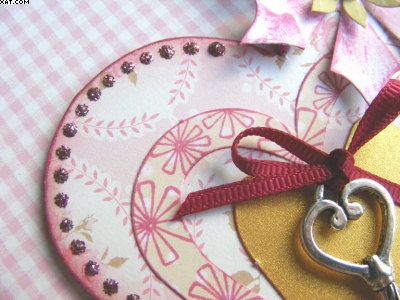
This little chipboard heart is the basis for this 'Key to Your Heart' creation.  I started by covering the heart in paper from the Tilda Kitchen Garden 12 x 12 inch pad.  Once adhered to the heart it was trimmed out, sanded and edged with lilac posies Memento ink.

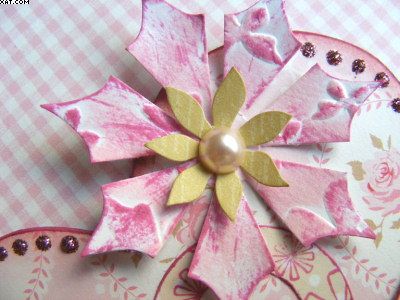
I then used some diecuts to build up the design, an open heart (stamped with more Memento ink - Paper Artsy), a gold heart  and two layered flowers.


More Memento ink was used to colour tint each piece before assembling as shown.  The metal key was tied through with some fine maroon grosgrain ribbon before sticking in place over the gold heart.


A pale pink pearl was added in the centre of the flower.


Finishing touches were to add a sentiment plate and edge exposed edges of the heart with pink Stickles glitter glue.

This piece will fit the bill for the City Crafter Challenge Blog challenge for this week which is the same as my blog post title too.

Sid xx

Pin It

Friday, August 16, 2013

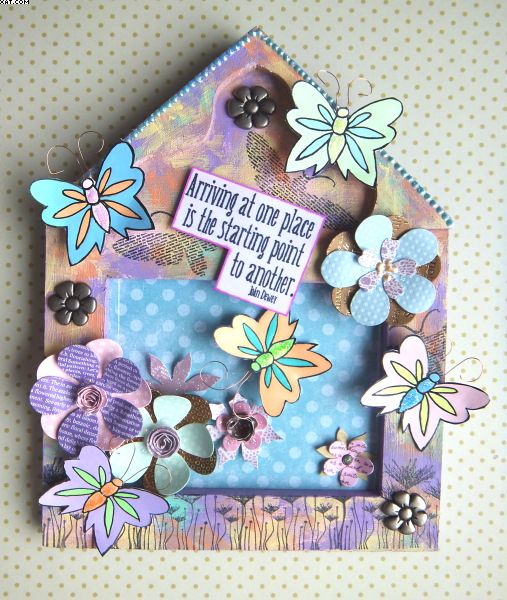
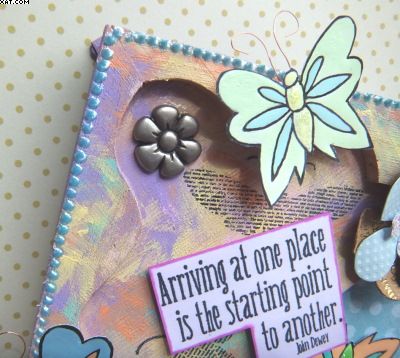
'The Arrival' Hanging Plaque


It's ages since I used my Sakura souffle pens so I dug them out and did a series of butterfly images using a dovecraft stamp.  These were stamped in Memento tuxedo black ink and then coloured using the souffle pens.  It was so long since I had used them that a couple of them had clogged and could not be resuscitated !  Any ideas on bringing them back to life?

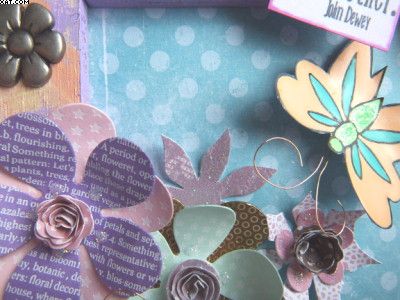
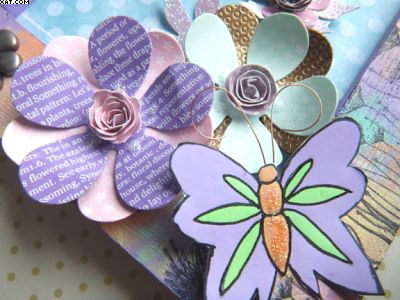
Once done I wondered what I would do with my little creations which eventually were trimmed out with scissors (cutting off the antennae and replacing with brass wire ones attaching with a blob of hot melt glue.

I then found the plain wood hanging frame and that's what gave me the idea for this piece.


Thinking about the souffle pen colours which are very chalky and opaque I then remembered my Jacquard Sherril's Sorbet paints which resemble the souffle colours and finish very well.  They can be used on fabric and heat set but here I just chose blueberry, mint, melon, grape, watermelon and lemon and applied these in blobs directly to the raw wood and blended roughly with a brush until the desired effect was obtained.


Once dry I lined the roof edge with blue dimensional pearls and once these were dry I then used stamps from PaperArtsy, and Docraft to stamp the base border and the wordy moths in more Memento tuxedo black ink.


I lined the inner frame back with some dotty printed paper from a 6 x 6 pad and put this in place with the original glass at the back.  I then used a load of die-cuts to make the flowery background all stuck with either Glossy Accents or hot melt glue.  Some Stickles glitter glue and dimensional pearls were used to embellish them.


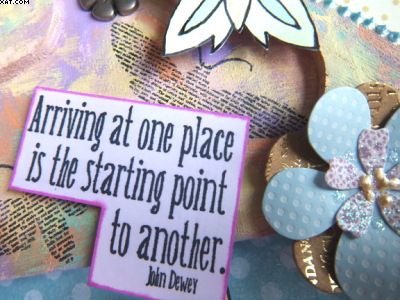
The butterflies were stuck in place with more hot melt glue and some metal flower embellishments were added as shown.


Not sure where the sentiment stamp came from but it was stamped on white card in Memento tuxedo black trimmed out and coloured with alcohol ink marker, edging with the same.  This was mounted in place on foam pads to raise it.

Sid xx

Pin It

Monday, December 24, 2012

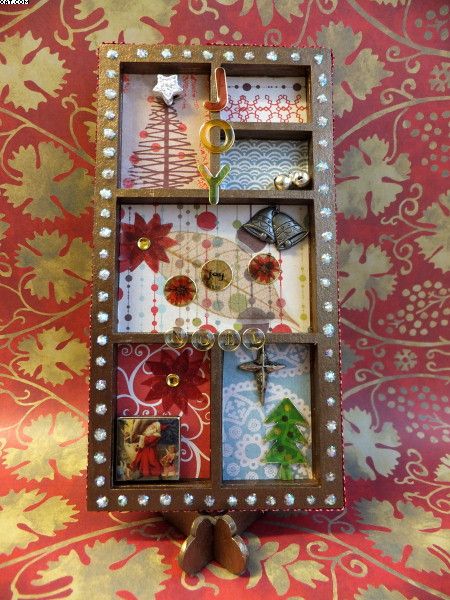
Festive Shadow Box


Here is wishing you all a very Merry Christmas and a happy and prosperous New Year in 2013 !!

It's been a long time since I posted on my blog and it has been sadly neglected.  The gap has been caused by major re-furbishments to my home which caused havoc.  I still can't find most of my craft stuff .......... it is all there but in a mish-mash of boxes etc.  I will get this sorted in the New Year and I very much need my craft fix again as I have really missed it.

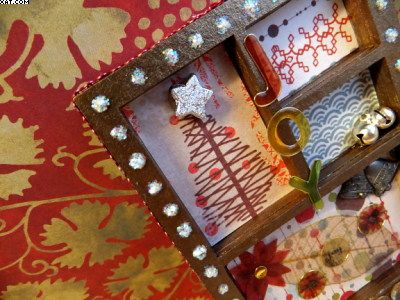
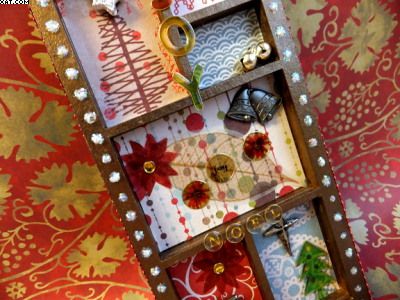
This little 6 x 3 inch shadow box and stand is made from chipboard and contains no stamping at all.


Papers used are from Prima (North Country 6 x 6 stack), trimmed and applied in the compartments as shown.  The box was given a couple of coats of bronze acrylic paint beforehand.


Various embellishmnets were added to give a bit of dimension, some stickers, a brad and metal charms.


Some maroon gingham ribbon was added around the box and some ice Stickles added around the front edges.


Sid xx

Pin It
Sunday, October 09, 2011

Winged Things !


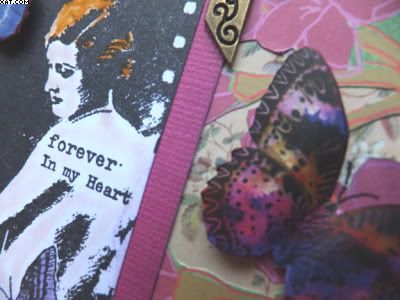
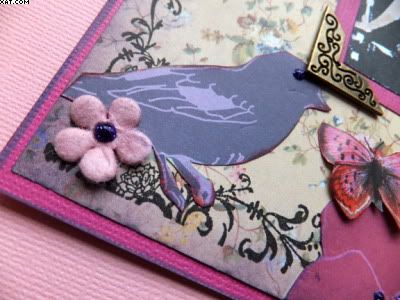
This is a 6 x 6 inch plate I have made in the theme of 'Winged Things' and is my entry into the Crafty Individuals October Challenge over on their blog.

I took a piece of 7 Gypsies floral paper as the background and stamped each corner with a corner stamp from Stampology in Versafine onyx black.  I then cut out some floral elements and a bird from some Dovecraft papers which I edged with dusty concord Distress ink.  These were stuck in place as shown.


Next I made the central element by stamping an old Crafty Individuals stamp onto white card with Versafine.  This was trimmed out, coloured with Marvey Le Plume pens and matted onto some textured purple card.  This was then stuck in place and edged on two corners with metal corners stuck with Glossy Accents.


The butterflies (Crafty Individuals printed 6 x 6 pad) were cut out and edged with maroon chalk ink before shaping and applying on foam pads to add dimension.  The whole sheet was then matted onto purple cardstock and edged in purple chalk ink.


Finishing touches were to add a few pink Prima flowers with Glossy accents and highlight flower stamens and the birds eye with purple Stickles Glitter glue.

Sid xx

Pin It
Thursday, September 15, 2011

All for You !!


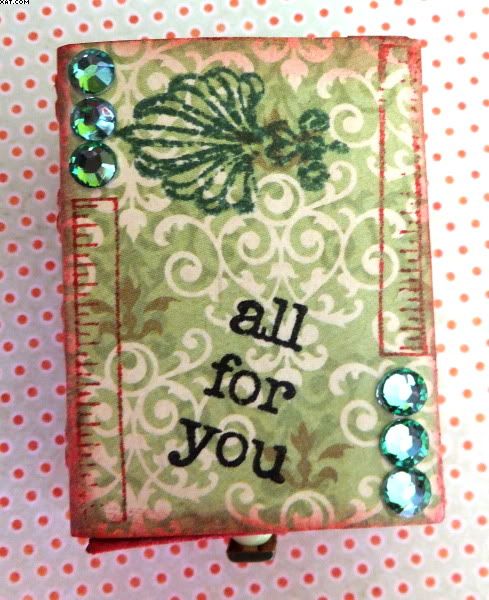
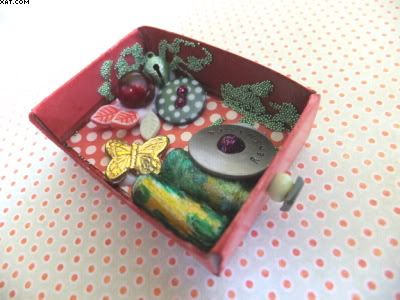
This little altered matchbox was done as part of a swap over on UK Stampers Forum.  The theme was freeform so I decided on a green and maroon colourway.  The contents of the box was decided upon 'on the hoof' and evolved as I looked at my stash of things to put in.


The box was first covered in a printed paper from Stella Rose - Mabel design adhered with tacky PVA glue.  Once applied I used stamps to add a mini ruler, a flourish and the words 'All for you' in fired brick, pine needles and Versafine onyz black.  All edges were finished with fired brick Distress Ink applied with cut'n'dry foam.  Some pale green flat backed gems were added to finish.

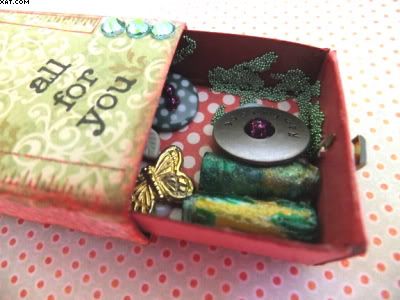
The inner matchbox tray was coloured on all sides with fired brick Distress Ink and the base of the tray lined with a spotty Mabel paper.


The handle on the front of the tray was made using a green square brad and a green seed bead used as a spacer.  The contents (homemade plastic beads, spotty button, red bead, leaves, gold metal butterfly, green jingle bell, pearl green micro beads and a metal washer with the word 'reminisce') were selected and stuck in place with Matte Medium and Glossy Accents.  Some maroon stickles were added to embellish.

Do hope the lady who receives it is pleased.

Sid xx

Pin It
Sunday, June 19, 2011

The Golden Flight


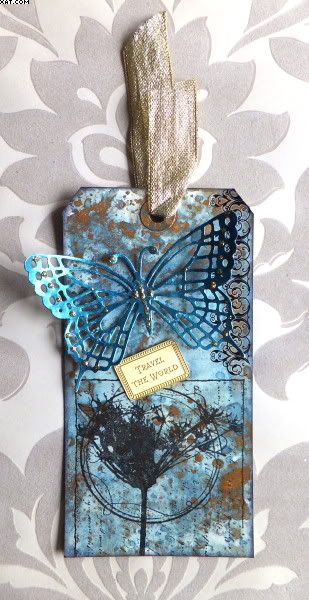
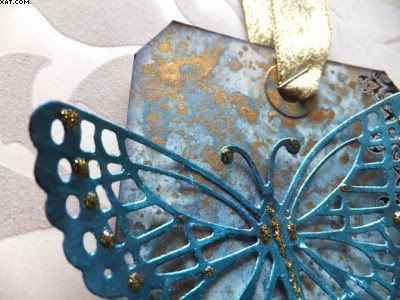
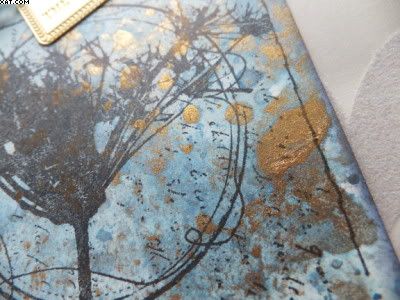
Here is a tag I made recently.  The background technique is a simple Distress ink on craft sheet - water spritz - rub tag onto the ink & water face down - dry process.  I used faded jeans Distress ink.  When dry I made a mica and water mix with gold Perfect Pearls in a mini mister and sprayed over the surface to add a blotchy gold shimmer. This was allowed to dry naturally.


The butterfly is a Marianne design diecut made from plain white heavy paper which was painted with turquoise Viva Precious Metal Colour.  Some gold Stickles was added to the butterfly to embellish.

I then stamped the seedhead (Paper Bag Studios) at the bottom of the tag in Versafine onyx black ink and added some rub-on black flourishes on to the top half of the right side of the tag.


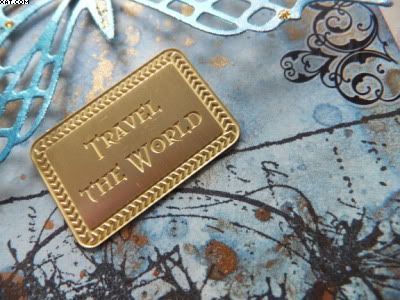
The engraved brass plate was added with glossy accents as shown and the tag edged with blue iris chalk ink.  The butterfly was then added with a glue dot.


Final touch was to add some metallic gold ribbon held in place with a staple.  Love the blingy effect on this tag.

Sid xx

Pin It
Related Posts Plugin for WordPress, Blogger...