>
Showing posts with label Gesso. Show all posts

Tuesday, July 07, 2020

Dream ......


We had some Spanish tinned octopus the other day and I liked the tin it came in so I made a little 3D decoration ....love up-cycling and am always happy to re-use waste items..... I would like to enter this into the 'Country View Challenges Blog' Challenge 'Do What Makes You Happy' .....

I cleaned it thoroughly and treated with a couple of coats of white Gesso. I then painted the inside walls with primrose yellow satin acrylic paint and covered the outside walls with some Washi tape.

I found a label stamp and stamped this with Versafine black ink on white card.... using the base of the can to draw around and trim out the image to fit the inside bottom of the can.  I then coloured this with watercolours and stuck in place within the can.

I then added a couple of butterflies and the 'Dream Big' sentiment in Versafine ink on yellow card adding on a card support to lift off the bottom of the tin after treating it with Glossy Accents.


I then added some printed flowers around the rim of the can attached on red-line tape and used some yellow Stickles glitter glue in the centres. I finished with some strings of small yellow adhesive gems.

Was going to add more but decided I wanted it to be uncluttered ....

Really pleased with the finished tin .... very different from it's original use !

Sid xx

Pin It

Tuesday, June 09, 2020

Florals......


Made these three ATC's for a virtual swap over on UK Stampers Forum ....... in the theme of 'Florals' ....

I used three pieces of re-cycled packaging as the base cut to 2.5 x 3.5 inches. I then cut three more pieces of white card and treated these with white gesso. I then applied a light and uneven coating of texture paste and when dry added red & orange matte acrylic paint with a large brush. Before this dried I wiped off some of the paints back to the white texture paste and dried with a heat tool. These were applied onto the re-cycled packaging bases.

I then stamped some checkerboard & numbers stamps (Dina Wakley) in red and coffee Archival inks. I then added some slivers of book paper.

The flower stamp (AAll & Create) was stamped onto white card and the images coloured with Prismacolour pencils, trimmed out and applied as shown. Each of the ATC's was spattered with yellow acrylic paint and some white paint applied on the edge of an old credit card.

Each ATC had some yellow Posca applied around the edges and three yellow dewdrops were added with Glossy Accents to finish.

Sid xx

Pin It

Monday, June 08, 2020

Refuse ......


Who wants to be ordinary ? .... not me ......

Made this card on a background of gessoed card with Gelatos and water using a 5 x 7 inch white cardbase .......

I sealed the surface with a gloss medium applied with a spatula and when dry I stamped this with a sketchy face stamp by Dina Wakley in Archival black ink. This was added to with a white Posca pen to add highlights.

I then edged the background with yellow Washi tape and mounted this on a dark pink card matt.

I then stamped the sentiment (Dina Wakley) in Versafine black ink, trimmed out and matted on more pink card and mounted this on foam pad as shown to finish !

I would like to enter this into the Stamplorations Theme & Photo prompt.... 

Sid xx

Pin It

Saturday, June 06, 2020

Calm .....


I made this card using a 5 x 7 inch white card blank ......

I used a background made with Gelatos & water on white gessoed card. I applied a design through a stencil over this with texture paste and when dry painted the raised areas with Cosmic Shimmer mica paints in a variety of colours in line with the background colours. Pity the mica sheen can't easily be seen in the photo !

I then stamped the Seahorse stamp (Visible Image) on white card with Archival black ink.  This was trimmed out and coloured with Ecoline brush markers in greens and blues with highlights from a white Posca marker before applying on foam pads as shown.

The background with seahorse was them matted on black card and applied to the card base. The sentiment stamps (Visible Image) were stamped in Versafine black ink. trimmed out and coloured with more brush marker before being placed on foam pads as shown.

Final touches were to add a few blue adhesive pearls onto the background .....

Sid xx

Pin It

Monday, May 11, 2020

Face ......


As we are having a 'Use Your Peel-Offs' Challenge on UK Stampers Forum I have made this card again making a background with them.....

I started with a 5 x 5 inch white card blank and cut a smaller matt out of white card. I layered a whole sheet of peel-offs onto this and gave it 3 coats of watered down white Gesso to hide the metallic finish of the peel-offs.

I then stamped a face (Cherry Pie) in Archival black ink onto the background and used some  watercolour brushpens  (Lyra Aquabrush) to colour the lips and eyes. I then chose two shades of pink Versamagic chalk ink and coloured the background and edges with these.

The base matt was layered on pink card and this mounted onto the card blank.  I chose a 'Hello' die and cut this twice in pink and black layering them slightly offset as shown on the panel to finish.

Sid xx

Pin It

Wednesday, April 08, 2020

Ladybird.....


Made a very bright Birthday card .....

I started with a 6 x 4 inch white card base. I then made a busy background with dye inks and stencils. I then applied white Gesso with a dotty stamp and dried this.

The background was matted onto a slightly larger piece of turquoise card. I then stamped a stem with leaves and a flower (PaperArtsy) in Memento inks and edged some of these with black Posca pen. I also stamped a few word in black Versafine ink. I applied some Stickles glitter glue onto the flower.

The ladybird (Tim Holtz) was stamped in black Memento ink and die-cut before colouring with Copic markes and glazing with Glossy Accents. It was applied as shown.

The finished matt was added to the cardblank and the words 'HappyBirthday' stamped at the bottom in Versafine black to finish.

Sid xx

Pin It

Monday, June 24, 2019

Beautiful .....


Made a mailart postcard for a swap over on UK Stampers Forum .....

I made a background from watercolour card treated with Brushos in Orange & Yellow, applied with a brush in layers with some spattering.  I have then applied leaf veins in white gesso though a stencil.

I used a set of retro flower stamps and Archival black ink as shown and the word 'Beautiful' in the same ink.

I have used black & gold pens to add a border and some highlighting.  The card was backed with a layer of re-cycled board for strength and sprayed with matte acrylic sealer to protect in the post !

Sid xx

Pin It

Wednesday, November 28, 2018

Retro Florals .....


Made a set of Retro Artist Trading Coins (for swapping) on MDF laser-cut bases ....

The based were edged in gold Krylon pen and three circles of green light card were di-cut to 2.5 inches diameter as the base.  I then applied white gesso with a bubble-wrap square. and stamped a leafy vine in Archival black ink.  The centres of the spots were coloured with coloured Posca pen with some white accents added on the vine.  The circles were added to the MDF bases at this stage.

The florals and leaves were stamped in Memento black ink and coloured with Copic markers before trimming out and glazing with a gloss acrylic.

They were stuck in place with the florals added on foam pads.  Some circles of silver and gold glitter card were punched and added as shown and the words printed, trimmed and applied also.

Each coin was then edged with wavy overlapping lines made with a fine Micron pen.

Sid xx

Pin It

Saturday, November 03, 2018

Coins... but not money .....


Here are a set of Artist Trading Coins entered in a Challenge over on the Country View Crafts Challenge Blog. I decided to use collage technique along with stamping, penwork & acrylic paints on these three coins.

I started with three die-cut circles cut to 2.5 inches diameter & made using card from upcycled cereal packaging. The card based were treated with white Gesso and brushed with Acrylic paints to form a background. I then collaged printed elements to form the main images and designs. Images were outlined in fine black Micron pen.

A lot of stamping with floral and swirls mini stamps was done in Archival black ink and these images highlighted with gold & silver pens.  I also used Posca markers to add some colour & white highlights. I then edged each coin with gold Krylon pen to finish.  May well mount the coins on laser-cut chipboard bases at a later date.

I love this messy, colourful, multi-layered style and find it very satisfying to create this way !

Sid xx

Pin It

Monday, October 15, 2018

Teabag Art .....


Wanted to try some Teabag decoration and I used round teabags this time ......

After drying the bag after use, I carefully slit an aperture in the bag and emptied the contents. I first gave a coat of thinned down white Gesso and then applied matt acrylic paint to make a background.  I then used a honeycomb stencil & stamps with Archival ink and used some pens to highlight sections.

Early days yet and did enjoy doing them although would like to try some with different materials going forward !

Sid xx

Pin It

Tuesday, August 08, 2017

Hope is Honey ......


This is a 6 x 6 inch multimedia plaque that I have crafted recently.

I started by trimming a piece of corrugated packaging to 6 x 6 inches.  I then tore old book pages and applied with glue to the surface of the corrugated square.  Once dry I brushed on white Gesso to obscure most of the printed words allowing this to dry completely.

Next I applied modelling paste through a honeycomb stencil and allowed this to dry.  I then coloured the whole background with Distress Oxide ink in fossilized amber & spiced marmalade with cut'n'dry foam.  I lightly spritzed the plate with water and dried thoroughly with the heat gun to set the ink.

I then used a Versamark pen and selectively applied the ink to some of the octagonals which I then heat embossed with a pearly orange embossing powder.  The edge of the plate was then covered in orange 'numbers' Washi tape.

The bees were stamped in Memento black trimmed out and coloured with a Copic marker.  I then cut some acetate, trimmed and applied over the wings of each bee before applying on foam pads.  The flowers and leaves were diecut from blue card & green Brusho watercolour background with the centres embellished with green clear cabochons.  They were applied as shown.

The words were computer generated and printed, trimmed out and edged with a white pen and stuck in place as shown.

Final touches were to add a few yellow faceted stones and a few circles of cream acrylic paint applied on a small lid.  The plate was then matted onto a piece of black card to set off the finished plate.

I have entered this one into the That's Crafty Challenge blog Challenge whose theme is 'Anything but a Card' & this months Creative Challenge over on the Artistic Stamper Creative Team Blog whose theme is 'Anything Goes'.

Quite a Summery plate and I like the way it turned out.

Sid xx

Pin It

Monday, October 31, 2011

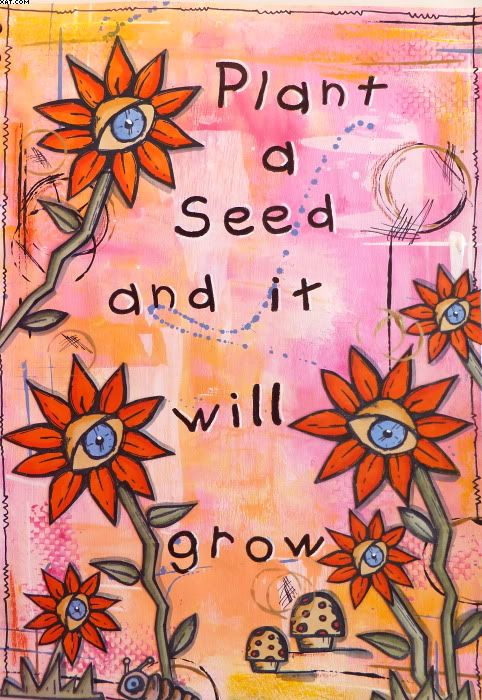
Plant a Seed


I have been saying for ages that I need to start journalling.  I need to be broken in gently with the handwritten stuff so I decided to go with stamped letters on this my first page.  The journal itself is a cheap A4 one bought from PaperChase and I have pre-coated the first half dozen pages with white gesso although the card itself is quite sturdy.

I recently bought a load of garden stamps in rubber from Lily at 'The Octopode Factory' and I have used stamped images of these as the main collaged images on the page.


Also must give thanks to Kate Crane whos' video has inspired me and helped me through some of the background techniques beautifully.  I really did end up with paint everywhere but enjoyed every moment until I had to clean up !!

I used a variety of acrylic paints in pink, yellow, orange, blue, white & black to colour the background.  I used an old credit card, my fingers and a brush to spatter to apply the paints.  I used a Tim Holtz background stamp to apply textural elements in the acrylic and some container lids to produce the circles.


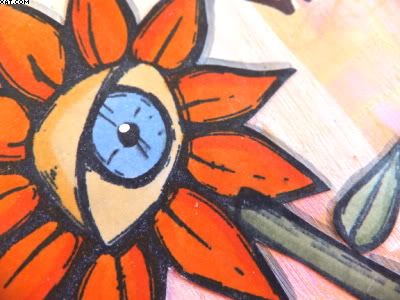
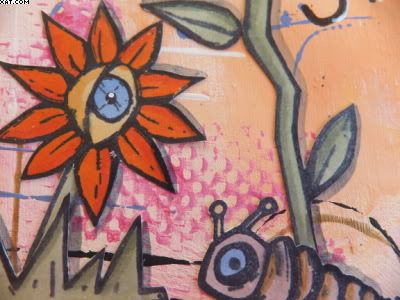
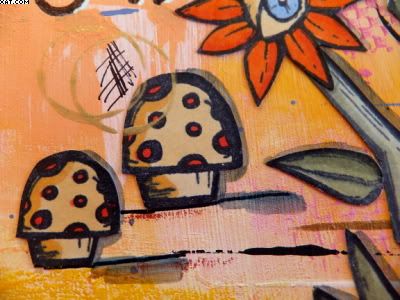
The  Octopode flowers (love the eyes), stems, leaves, mushrooms and caterpillar were stamped on thin card in Archival black ink and coloured with Marvey alcohol brush markers.  The elements were all then cut out and stuck in place with matt medium on the background.  I then went back in and added oil pastels, some edging with charcoal more paint circles and some doodling until happy.


Finally the letters were stamped in Archival black ink and shadowed with some white Posca pen. Definately difficult to know when to stop though................ but stop I did !

That's it, my first page........... but certainly not my last.

Sid xx

Pin It

Saturday, April 24, 2010

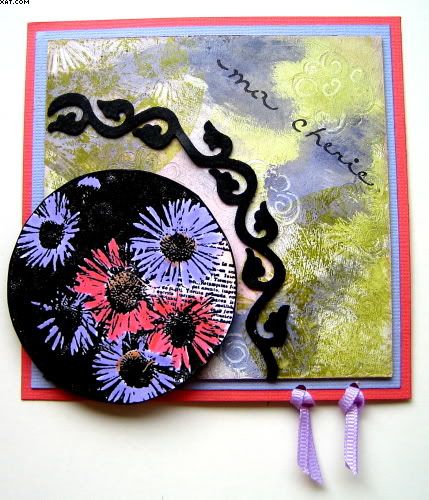
Ma Cherie !


I have been watching the RSS (Ready Steady Stamp) challenge website for a while and have never taken part.  I decided to join in this time and this is my entry.

This entry had to have at least three of the following ingredients:

*   The letter M
*   Purple, pink, green & black
*   Stamped flowers
*   Gesso on background
*   Rubber


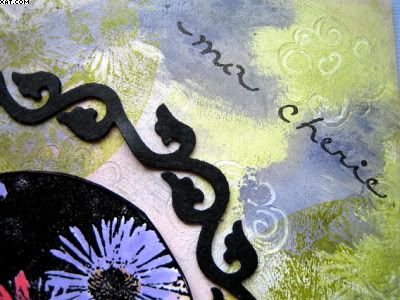
I managed to use all five of the ingredients.  I first made the background out of a piece of brown backing card and cut it to a 4 x 4 inch square.  I then applied Gesso roughly and stamped into this with a Klimt swirl stamp  (?).  Once dry I coloured the background with brushes and Adirondack dye ink in lettuce and eggplant.  I used Memento angel pink dye ink for the pink in the background.  Once happy with the overall effect I selected a flower stamp from Tuscan Rose and inked this with lettuce Adirondack ink and stamped on two corners of the background, providing a subtle image over the background.


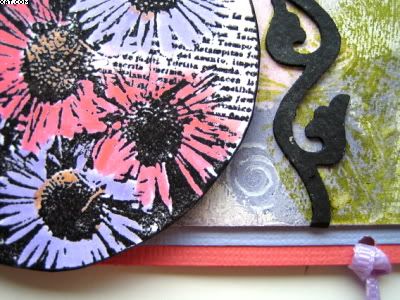
For the embellishment I again stamped the floral image onto white card but this time in Versafine onyz black and heat embossed with detail clear embossing powder before cutting out.  I hand coloured the daisies with Marvey Le Plume II pens in appropriate colours as shown.  This was later adhered on foam pads to raise the image a bit. I then mounted the background plate on two card mats, one in lavender and one in french pink.


The black vine embellishment was made out of die-cut bike tyre rubber by a crafting friend of mine Lorraine and was given to me as a RAK some while ago.  I knew I would get the opportunity to use it sometime and this was just that opportunity !  It was adhered carefully as shown with Glossy Accents.  The beauty of using rubber in this way is that it's flexible and can be easily curved as desired.

The 'ma cherie' was stamped directly using more Versafine ink and a polymer stamp from Sizzix.

Finishing touches were added by punching 2 holes at the bottom and knotting through two pieces of thin lilac grosgrain ribbon.

Sid xx

Pin It

Thursday, April 30, 2009

'K' is for King Tag

Not posted for a while, so busy with our College Ofsted inspection..........anyway glad to say we achieved a Grade 1 'Outstanding' across the College, which is a superb result. All the hard work has paid off !

This tag was done belatedly as part of a n ongoing challenge over on UK Stampers. The tag theme was the letter K for King and this had to be included on the finished tag.

A bit quirky but I was pleased with the overall effect. To make it I used:

  • Glossy magazine cover with picture of a chef in his whites (cut to tag size)
  • Gesso
  • Stamps (All PaperArtsy - Text (MN44), Crown (Egg & Nog SIEN8), Fence & Eiffel Tower (Wrought Iron 3 USW13) except the field of sky (Judikins)
  • Adirondak Inkpads (Butterscotch, Espresso & Wild Plum)
  • Embossing Powder (Gold)
  • Versamark Inkpad
  • Waterbrush
  • Chipboard K
  • Self adhesive letters
  • Crop-o-dile
  • Glossy Accents
  • Brad (Ochre)
  • Gold elastic cord

The glossy image was cut out to tag size and rubbed down slightly with fine glasspaper to roughen. The gesso was added in a thick textured coat and the chefs face wiped clear of gesso. This was allowed to dry thoroughly. The stamps were all inked with the Adirondaks and stamped as shown and dried with the heat gun. The waterbrush was then used to spread and highlight the inks as shown. The field of sky stamp was applied after inking with Espresso as shown.

The crown stamp was inked with Versamark and heat embossed with gold EP. The crown was cut out and coloured with Espresso and the waterbrush. The chipboard K was coloured with gold pigment ink and applied as shown with glossy accents. The other self adhesive letters were applied to spell the word King.

A hole was cut in the tag and an eyelet applied with the crop-o-dile. The final flourish was to add a length of gold elastic cord as shown.

Hope you like it :-)

Pin It
Related Posts Plugin for WordPress, Blogger...