>

Tuesday, June 30, 2009

'Bling' ATC's

These ATC's have been done for a monthly swap over on UK Stampers Forum. This months is 'Bling' and I have decided to do a blend of blingy finishes instead of stamping.

I used Bedazzles, flatbacked gems and cabochons, Stewart Gill byzantia, Viva gold paint, Stickles, violet twinkle EP and Sakura white opaque pen to decorate with little swirls. The only stamp used was a swirl. The base was made from white card and coloured using a Tim Holtz stencil and homemade mica spray made with spiced marmalade distress reinker and cosmic shimmer iridescent pigment in cinquefoil red. This was mixed and applied with a mini-mister.

The ATC's were edged with dark brown chalk ink.

Hope you like them :-)

Pin It

Monday, June 29, 2009

'Q' is for Queen Tag

Here is my design for the next tag in the UK Stampers Forum Sunday Challenge. This tag was made from a piece of orange cardstock which was stamped all over with latte Adirondack Ink and a Letters background stamp by Invoke Arts (funky ATC backgrounds plate).

The Queen photo-real stamp (Artchix Studio - Divas plate) was stamped onto a piece of the same card with onyx black Versafine ink. Whilst still tacky it was then heat embossed with clear embossing powder before trimming to leave a narrow border. This was set aside. Next a piece of old dictionary page with the queen definition was torn out and edged with a Ranger antique linen Distress inkpad direct to the edges. This was then adhered with gluestick. A border stamp from PaperArtsy was then inked with Veramark and this was stamped and heat embossed with pirate gold EP.

The edges of the queen image and the tag itself were then edged with Adirondack wild plum ink applied with cut'n'dry foam as shown. The letter 'Q' (Making Memories Foam Alpha) was stamped with wild plum as shown and this was also heat embossed with clear EP. The rest of the alphas were magnetic stamps again by MM and were stamped in Versafine onyx black.

The queen plate was then attached with a square brad and foam pads for depth. Gold Ranger stickles were used to decorate the 'Q' and parts of the embossed border stamp. An eyelet was applied with the crop-a-dile and a piece of magenta ribbon was added to finish.


Detail of 'Queen' plate

Hope you like it :-)

Pin It

Sunday, June 28, 2009

Altered Cutlery ?


Well this is it ! My weirdest creation yet. I have called it 'The Tree of Life'. It's made from a black plastic fork obtained with a salad from Subway last week. It is part of a swap run by Hazel on UK Stampers Forum in the altered art section.

I made the tree itself using a stamp from PaperArtsy which was heat embossed with violet pearl EP on a background made with Adirondack wild plum and red pepper inks applied with a piece of cut'n'dry foam. Once embossed the tree was cut out and left to one side. In the meantime I made three shrink plastic embellishements which were stamped in purple Stazon ink on white shrink plastic sheet. The bird stamp was also PaperArtsy. The bodies were coloured with pink chalk ink before cutting out and shrinking. A metal leaf was attached with a square silver brad and a hole punched with the cropodile on the bottom right of the tree. An eyelet was applied. The mini tag was coloured and written upon and threaded with a metal tree embellishment with the ball chain as shown. The three birds were applied with mini glue dots as shown


Detail of tree


Detail of Tag


Next was to cover the handle of the fork. I took a long strip of mediumweight black craftwire and threaded it with alternating gold and blue glass beades with silvered centres until I had a length of threaded wire long enough to spiral around the handle to hide it completely. One end of the wire was wrapped around the middle two prongs of the fork and the beads pushed down to the top of the handle. I then commenced wrapping the beaded wire round and round the handle to the base where the last coil was made to trap 3 pieces of coloured velvet ribbon before securing the wire into the last coil.


Handle base and ribbon detail

I used big sticky dots to attach the tree to the front of the fork prongs, hence the reason that the tree is curved slightly (following the contour of the prongs). The whole thing was wrapped in white tissue secured with three pieces of the same ribbon.

This was certainly a challenge for me ! Hope whoever gets it in the swap is happy with it :-)

Pin It

Friday, June 26, 2009

'Froggy' ATC


I have not entered TMTA (Think Monday Think ATC) for a long time and I noticed that this weeks theme is for Frogs. I remembered I had a frog stamp from Kodomo and decided to use it to make my entry.

The background was sprayed with Moonglow Glitz Spitz in various shades of pink and red and allowed to dry before trimming to size. The stamp was inked in Versamark and heat embossed with opalescent green embossing powder. The foliage was stamped with a leaf stamp from Crafty Individuals in eden green Stazon. The edges were stamped with a diamond stamp in Brilliance galaxy gold. The word 'frog' was stamped with PaperArtsy alphas and Versamark and heat embossed with peach EP. A paper flower was painted with Viva metallic paint in gold (simply fantastic coverage and shine) and applied with glossy accents, the centre of which was embellished with Ranger gold Stickles. Final touch was to edge the card with Krylon gold pen.

Pin It

Thursday, June 25, 2009

Non-paper Background ATC's


These three ATC's are for another swap with my dear friend Diane across the pond. The challenge this time was to produce three ATC's using backgrounds which were not paper or card.

I ended up using (from left to right) laser plastic, plastic foam & grungeboard decorated with various stamps, alcohol inks, inkjet transparencies, brads, eyelets, inks, embossing powder & paint.

They are on their way now - Hope she likes them !

Pin It

Tuesday, June 23, 2009

Brown CJ

Here is another of my CJ entries for our latest CJ on UK Stampers Forum. This one had an arrow stamp and a colourway of Browns. We just had to use the stamp and complete one side of a page within the Journal.

I first painted the background with a thick coat of bronze metallic paint applied with a fan brush in a rough manner to give some texture and light reflecting properties to the paint. Once dry a rubber stamp of a heart (Invoke Arts - Textured Hearts from Once Upon A Stamp) was inked with Versamark and stamped randomly over the painted background and this was then heat embossed with detail gold embossing powder.

Next, the stamp was inked with black Stazon and stamped onto some printed background paper, cut out and set aside. The arrow stamp was inked with Versamark on white coarse card and heat embossed with the detail gold EP. This caused bubbles to disrupt the surface which I liked. This was trimmed out and edged in gold ink. The main patterned heart was slit with a craft knife and the arrow threaded through the slit to give the 'arrow through the heart' effect. This was applied as shown with 1 mm foam pads to add a little dimension.

To finish, a Making Memories aluminium word 'Cherish' was treated with Ranger alcohol inks in juniper, sandal & pink sherbet applied with an applicator and felt. The colours were chosen to compliment the background colours in the printed paper. Basically, that was it ........ I thought there was enough going on and any more would have spoiled it. Sometimes I don't know when to stop !!


This shot shows some of the texture achieved with the paint and the EP. Hope the CJ'er likes what I have done.

Pin It

Monday, June 22, 2009

'P' is for Party Tag


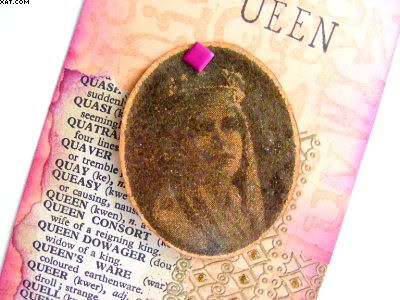
Another tag in the Alphabet series. This time it's 'P' for Party and rather than go for the usual party hats, clowns, baloons etc. I thought more Political and went for the Green Party - eco friendly so I though that green plants and flowers fitted the bill.

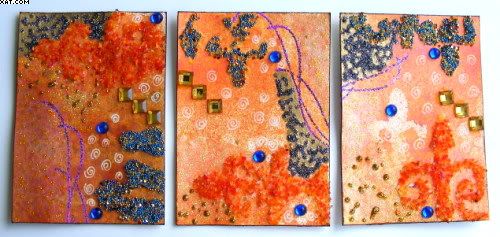
The tag was cut from oatmeal mottled card and was coloured with the wonderfully vibrant Nick Bantock inks from Ranger in chartreuse leaf and sapmoss green, applied with cut'n'dry foam and a swirling motion to achieve the shaded areas.

The stamps used on the body of the tag are a selection from PaperArtsy and Crafty Individuals. I wanted to achieve a relatively densely layered effect so I just overstamped many times using NB sapmoss green, Brilliance pearlescent ivy & starlight black inks. Some flower were stamped also and coloured with a waterbrush and Adirondack stream and cranberry inks as shown.

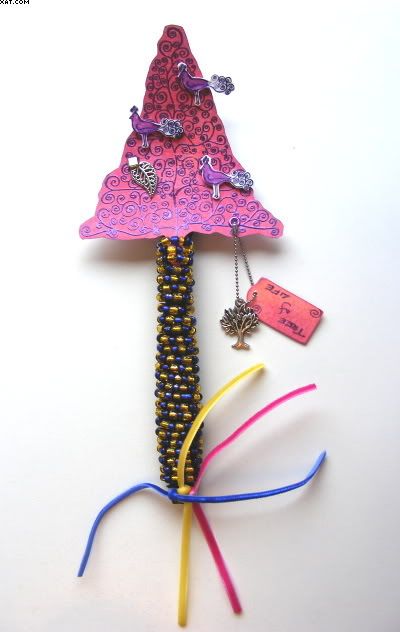
The main letter P was made from chipboard which was rubbed over with Versamark and triple heat embossed with dark green embossing powder. At the last layer the leaf stamp was inked with Brilliance sunflower yellow ink and whilst the EP was still molten the inked stamp was stamped into the EP on the letter and left for a few moments until the EP had set. Full instructions on triple heat embossing are available as a class on my blog by clicking HERE.

All the letters are K&Co and I trimmed them and edged with green chalk ink. These were stuck in place along with the main chipboard letter as shown. To finish a green eyelet was applied with the cropadile and a small piece of dry natural twig applied as a hanger. The tag was finished with an edging of green chalk ink.

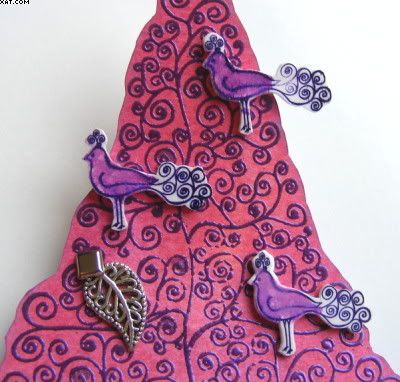
This shot shows more detail of the letter P embellishment. :-)

Pin It

Saturday, June 20, 2009

'Ornament' ATC

Here is an ATC I have done to try out my new Adirondack 'Lights' Alcohol Inks which were bought from The Artistic Stamper. First I cut a piece of Glossy card to ATC size. I then applied alcohol inks with the applicator in lake mist and cool peri, pouncing and turning the applicator until sufficient colour was transferred. I then coloured a printed journalling tag from 3djean similarly but with more colour. I edged the tag with wisteria chalk ink.

The ATC background was then masked with an Idea-ology swirl mini mask (Regal), and french blue and wisteria chalk ink was applied direct over the masked area and the ATC edged with french blue chalk ink. The tag was glued in place as shown. I then cut three short lengths of mauve metallic cord and stuck them onto a piece of double sided tape adhering as shown and trimming to fit neatly. A small stamp was inked with hydrangea Stazon and stamped as shown. The word 'ORNAMENT' was trimmed from a pre-printed piece of vellum and adhered with two small blobs of glossy accents at the ends to finish the ATC.

Just adore the colours of the new alcohol inks the hues are so pastel and give a very light and subtle feeling to the background.

Hope you like it :-)

Pin It

Thursday, June 18, 2009

Summer Twinchies


Here are a set of Twinchies I have made for another monthly swap on UK Stampers Forum. The June theme was 'Summer' so I thought what is more Summery than flowers and foliage?

I chose pale blue card as the background and a single outline stamp from Rubber Stampede (All Over Floral) inked with black Stazon. Quite a big stamp this so I stamped several times and then cut out the twinchies on a rotary trimmer before hand colouring.

I used a waterbrush and Adirondack inkpads where I transferred some of the ink from the pad onto a non-stick craft sheet and used this as a palette with the brush. Colours used were: butterscotch, bottle, meadow, pesto, eggplant & cranberry. The stamens of the flowers and parts of the butterfly wings were gilded with a fine brush and Viva gold precious metal colour. The butterflies were additionally coloured with lilac Tiara Gelly Roll pen. The twinchies were then finally edged with Krylon Gold.

Just liked the simplicity of these.....they also have a slightly Oriental look about them don't you think !

Pin It

Monday, June 15, 2009

Summer Inchies


These are a set of 9 'Summer' inchies done for a monthly swap I run on UK Stampers Forum.

Very simple to do this set but I thought the colours were quite Summery. I first coloured the background with cut'n'dry foam and Whispers dye inkpads in green and yellow and overstamped with Adirondack lettuce ink and a PaperArtsy squiggle stamp. These were then punched out using my trusty 1 inch square punch. Each was then stamped with a small sun stamp in Versamark from a set of mini wooden stamps and heat embossed with orange sorbet EP (Ranger). The centres of the suns were embellished with a gold brad and each inchie edged with tangerine chalk ink.

There we have it. Hope you like them :-)

Pin It
Related Posts Plugin for WordPress, Blogger...