Thursday, April 12, 2012
An Umbrella In The Rainforest Isn't Much Use !
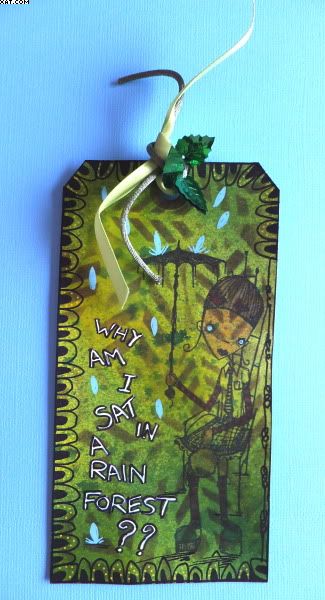
This tag was done as my entry into the Stampotique Designers Challenge which this time is entitled 'Oodles of Doodles'. The base is a plain manilla tag which I have sprayed with Summer Inks by Sticky Fingers in yellow & green, building up layers until happy with the colour.
The leaves on the background were applied through a stencil with vintage sepia Distress Ink applied with Cut'n'dry foam. The Stamptique stamp is one by Jill Penney & Daniel Torrente called Relaxin' and it was this that inspired me to write the caption 'Why am I sat in a Rain Forest??' I just love the image.
I decided to stamp the image in Memento tuxedo black directly onto the coloured tag and then use some Marvey alcohol ink brush pens to selectively colour some of the image. Think the effect is a bit reminiscent of the 'Predator' films where the creature appears to be part of the foliage. I then set to work with Posca pens in black, white, blue and yellow and doodled to my hearts content so all other edging and the words along with some raindrops were added freehand.
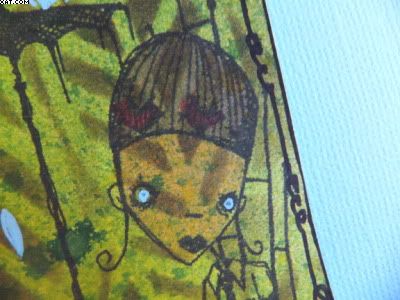
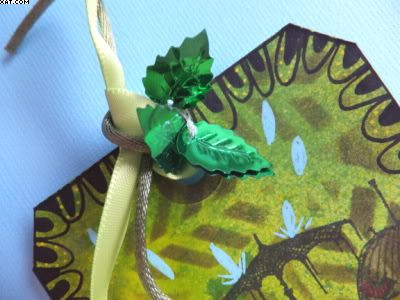
Finishing touches added some lime green satin ribbon, some moss green cord and a small length of iridescent cord threaded with a few green foiled leaves through the tag top.
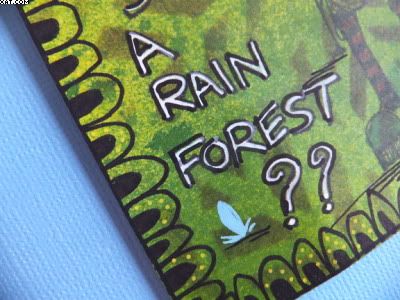
So don't expect a brolly to work well in the rainforest !! (not that I've ever been there, of course).
Sid xx Pin It
Monday, September 14, 2009
'S' is for Spooky Tag
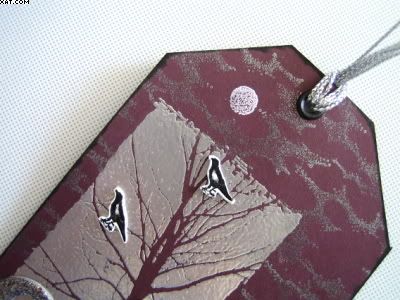
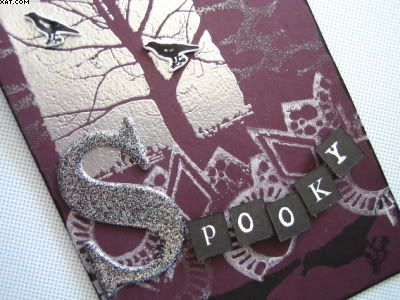
Here is my tag for this weeks challenge over on UK Stampers Forum. This weeks theme was 'S' is for Spooky. Wanted to create a dark and bleak effect on this one.
I began with a dark brown card trimmed to size. I first used a stamp of a bare tree (PaperArtsy) and inked the stamp with Versamark ink and heat embossed with detail silver embossing powder. I then used a cloud stamp (A Stamp in the Hand) and inked this with Brilliance moonlight black ink and stamped the cloud background. The moon (A Stamp in the Hand) was stamped in Brilliance moonlight white in a gap in the clouds.
The chipboard letter S was coated in Versamark and heat embossed twice with Marcasite embossing powder. The tag was then assembled by sticking the shrunk birds on the tree as shown with Glossy Accents. The chipboard letter S was stuck in place followed by some K&Co black letters (mounted on foam pads) to spell out 'Spooky'. The whole tag was edged with Brilliance graphite black. A black eyelet was applied with the crop'a'dile and 4 short lengths of silver metallic cord were tied through the hole.
Saturday, June 20, 2009
'Ornament' ATC
Here is an ATC I have done to try out my new Adirondack 'Lights' Alcohol Inks which were bought from The Artistic Stamper. First I cut a piece of Glossy card to ATC size. I then applied alcohol inks with the applicator in lake mist and cool peri, pouncing and turning the applicator until sufficient colour was transferred. I then coloured a printed journalling tag from 3djean similarly but with more colour. I edged the tag with wisteria chalk ink.
The ATC background was then masked with an Idea-ology swirl mini mask (Regal), and french blue and wisteria chalk ink was applied direct over the masked area and the ATC edged with french blue chalk ink. The tag was glued in place as shown. I then cut three short lengths of mauve metallic cord and stuck them onto a piece of double sided tape adhering as shown and trimming to fit neatly. A small stamp was inked with hydrangea Stazon and stamped as shown. The word 'ORNAMENT' was trimmed from a pre-printed piece of vellum and adhered with two small blobs of glossy accents at the ends to finish the ATC.
Just adore the colours of the new alcohol inks the hues are so pastel and give a very light and subtle feeling to the background.
Hope you like it :-)
Friday, April 17, 2009
Stampbord Brooch
The Brooch & Bag
This brooch was made for a swap I ran on UK Stampers Forum. Each person playing had to make a brooch using Stampbord as a base. This is my creation for which I also made a little bag to contain it.
I used:
- Round Stampbord
- Rubber Stamp (Agapanthus Bloom - Stampendous, Field of sky - Judikins)
- Distress Inks (Spiced Marmalade & Dried Marigold
- Versamark Inkpad
- Clear UTEE
- Versafine Inkpad (Onyx Black)
- Piece of Faux Dichroic Glass (made earlier)
- Lumiere paint (Bronze)
- Gold Elastic Cord
- Brooch Back
- Gold iridescent paper (for bag)
- Decorative scissors
- Glossy accents
The Stampbord was first coloured using a piece of Cut'n'Dry foam with the distress inks and graduating from dark on the outside to light on the inside. The field of sky stamp was inked with the darker of the the two inks and stamped around the outer edges of the front of the piece. This was dried with the heatgun and overstamped centrally with the Agapanthus stamp using onyx black Versafine ink. This was again dried with the heat gun.
The front of the brooch was then inked with Versamark ink and the clear UTEE applied and heated until a smooth thick layer was achieved. Then whilst still molten the piece of Faux Dichroic Glass was embedded into the hot UTEE taking care to place it centrally. The whole piece was allowed to cool completely.
The back and sides were painted with two coats of bronze Lumiere paint and allowed to dry. A piece of the gold elastic cord (round cross section), was cut carefully to size and adhered around the edge with glossy accents. The brooch back was adhered with superglue.
The bag was made from the paper which had been randomly stamped with the same Agapanthus stamp before cutting and making into a bag with double sided tape. The top edge was trimmed with scallop pattern decorative scissors.
For anyone interested in making Faux Dichroic glass why not look at my classes which can be found in the 'Crafty Classes' section of the blog.
Hope you like it :-)
Pin ItWednesday, October 01, 2008
Halloween Invite
I was asked by a friend to do 20 Halloween party invites for the forthcoming celebrations on 31st October. One of the cards is featured above.
I took some maroon cardstock and made the card blanks to a size of 5in x 5in. I then took some orange whitecore card and cut this into smaller squares to be matted onto the fronts of the cards. I then used one of my new cuttlebug embossing folders (Cobweb) to emboss these. Once embossed a Whispers black dye inkpad was lightly rubbed over the embossed surface to accentuate the web design I then sprayed lightly with Sticky Fingers silver shake-n-spray to give the webs a bit of glitz. When dry the matts were adhered to the front of the cards and a 2 inch piece of silver cord was cut and stuck onto the web with one end at the centre of the web.
I searched high and low for some spiders to adorn the webs and finally found some in a £1 shop. I adhered a spider with a glue dot at the other end of the thread.
Some plaques were made with the same card and these were stamped with a 'You Are Invited' stamp from See D's celebrations set. The plaques were then applied on foam pads to add relief.
The card inserts were printed on the inkjet printer and applied inside the cards. Maroon envelopes finish the project.
Hope you like them :)