>
Showing posts with label Fibres. Show all posts

Saturday, April 07, 2018

Be positive .......


Made this tag as part of a monthly swap over on the UK Stampers Forum Facebook Group ......

I made the tag from white card and used various stamps and masking in its making.  The background is achieved with sponged Distress Inks and I have used Impress dye inks for the stamping.  The flowers are punched and stamped and decorated with red gems......

If you fancy being part of the swap (there are others too), click HERE to join the group ......

Sid xx

Pin It

Sunday, May 30, 2010

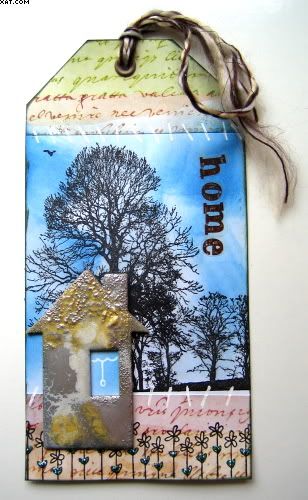
Home Tag


As you probably know I have been taking part in the Weekly Rolling Recipe Tag Challenge run over on UK Stampers Forum.  This weeks tag (No.19) had to possess the following features:

1. Trees
2. Houses
3. Heat Embossing

So here is mine.  I started with a white card trimmed to size and stamped the trees (Crafty Individuals) with Versafine onyx black ink.  I then adhered and trimmed two pieces of 7 gypsies printed paper, top & bottom. The blue in the sky was added with Memento ink and cut'n'dry foam in summer sky and danube blue.  A daisy border stamp (Inca Stamps) was stamped along the bottom in Versafine onyx black ink.


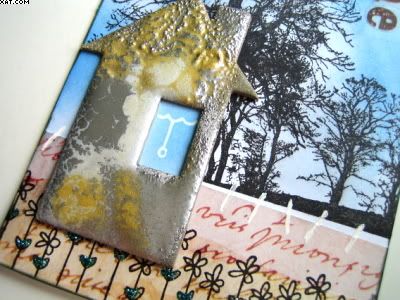
Next the house was cut from chipboard and coated in Versamark ink before sprinkling on silver, silver pearl and enchanted gold Heat It Up embossing powders.  This was heated with the heat gun until melted and one or two more pinches of the powders added as needed to get the desired effect.  I wanted the roof to be textured.  The window hole was backed with blue paper and a blind drawn on in white pigment pen.
.


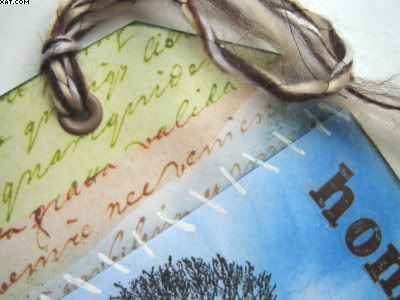
The joins between the paper and the trees were covered in stitches drawn in with a white pigment pen and I then applied aqua Stickles to the leaves on the daisies in the border and stuck the house in place with Glossy Accents.  The word 'HOME' was then applied with printed vellum stickers.


The whole tag was edged with dark green chalk ink and a beige eyelet applied with the crop'a'dile and tied through with beige/brown fibres to finish.

Sid xx

Pin It

Monday, May 10, 2010

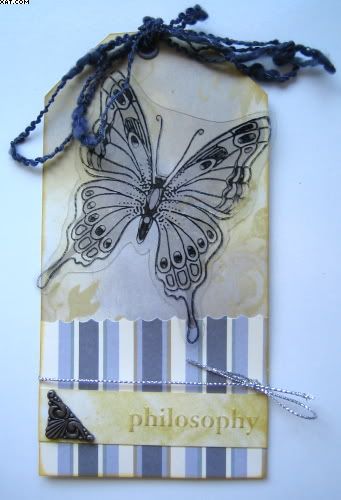
Butterfly Philosophy Tag


Here is Tag No.16 in the series of Rolling Recipe Tags hosted on UK Stampers forum by the lovely Efemera.  This week we had to include the following:

1. Stripes
2. Stamped Butterfly
3. Acetate

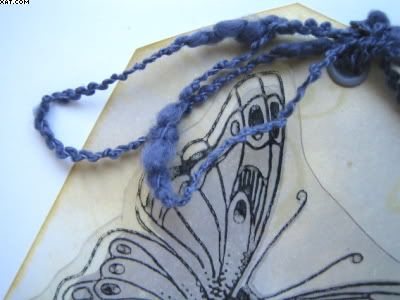
I started with white card, cut to shape.  The top section of the background was coloured with Distress ink in scattered straw and pumice stone applied with cut'n'dry foam.  I used a clear stamp from Li'l Davis Designs and inked this with more scattered straw Distress and stamped onto the background 2 or 3 times. I then chose some stripy paper and cut it at an angle with scallop decorative scissors and applied in lower half of the tag with glue stick.


I used pumice stone Distress ink to ink a solid butterfly background stamp (Elusive Images) and stamped this in the centre to act as a background for the acetate overlay which was stamped with another Elusive Images detail butterfly stamp in black Stazon and trimmed to size. This was adhered over the solid background in 4 places with Glossy Accents.


I then embossed the word 'philosophy' onto a strip of card and coloured again with scattered straw Distress ink, applying as shown.  I added a metal corner embellishment on the left.


Finishing touches were made by applying a piece of silver braid, tied in a bow. A grey eyelet applied with the crop-a-dile and a length of grey decorative fibre tied through the eyelet.

I wanted to keep this one very simple and the colours of grey, straw and black seemed to do the trick.

Sid xx

Pin It

Sunday, April 11, 2010

Rolling Recipe Tag 12

Trying to play catch up with these tags, I left off at Tag 6 and so have another 5 to do to complete the set. This is Tag 12.

This weeks challenge was to make a tag with the following:

  1. Gems
  2. A stamped image of a face
  3. Eggs

I cut the basic tag from white cardstock and adhered a torn page from an old book at the bottom. I then applied pumice stone Distress Ink to the top of the tag and around the lower edges with cut'n'dry foam. I then stamped onto the background with a music stamp (?) in crushed olive Distress Ink.


I then used a leaf stamp from Paper Artsy and stamped this repeatedly in pumice stone & crushed olive Distress ink as shown. The main image of a face is also from Paper Artsy and this was stamped on white card in Versamark and heat embossed with detail black embossing powder before colouring in with distress inks and a waterbrush. This was trimmed out and applied with glue stick.

The eggs (Paper Artsy) were stamped on white card in onyx black Versafine and coloured in similar colours of distress ink as before. These were trimmed out and applied on a single large glue dot.

The scalloped edge was made using a Martha Stewart punch, white card and more crushed olive Distress Ink and was applied with glue stick at the bottom of the tag. I adhered 3 peridot flat backed gems to this strip. The word stamp (Paper Artsy) was stamped directly in onyx black Versafine as shown.

Finally a cream eyelet was applied with the crop-a-dile and some fibres tied through the hole. Now to start to catch up on the rest.

Love those new colours of Distress Inks by Tim Holtz & Ranger!

Sid xx

Pin It

Monday, July 20, 2009

'F' is for Face Tag


This is my 'F' is for Face Tag completed as a challenge over on UK Stampers Forum. The background was a grungy pale map and this was overstamped with a diamond stamp from Cherry Pie in vintage sepia Versafine. A few fine swirls were added with an unknown stamp inked with Adirondack oregano ink. The main image (Cherry Pie) was stamped on oyster card with onyx black Versafine ink and carefully cut out. The alphas were from PaperArtsy and were stamped on oyster card with black Versafine and coloured with ochre Marvey le Plume II pen. The tag and the alpha plate were then edged with dark brown Chalk ink.

The hole and eyelet were cut and applied with the Crop-a-dile and some mustard fibres added and knotted several times.

Pin It

Sunday, June 14, 2009

'D' is for Diamonds Tag

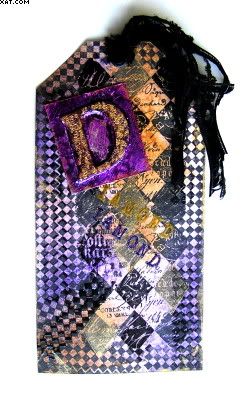
Here is yet another tag in the series..........I suppose we will cover all the alphabet eventually but enjoying the challenge immensely ! This weeks challenge is 'D' for Diamonds. I chose the shape rather than the gemstone and used a variety of stamps. The little diamond is from a Non-Sequitur plate (No.9 Cranes) that I have had for at least 5 years ! This is the first time it has been used. The other stamp is a PaperArtsy stamp (Letters Plate 5). Both stamps were inked in black Stazon and applied as shown in a somewhat random manner. When the Stazon was dry the Tag (made from white card), was coloured using cut'n'dry foam and Distress Inks in dusty concorde, tattered rose and vintage photo. A little clear single diamond stamp was then used with galaxy gold Brilliance ink to highlight certain of the diamonds from the PaperArtsy stamp at random.

Following this the Non-seq stamp and the little diamond were reinked with Versamark and overstamped randomly followed by heat embossing with clear EP to highlight and darken. The edges of the tag were inked direct from the galaxy gold pad to add a distressed edge look.

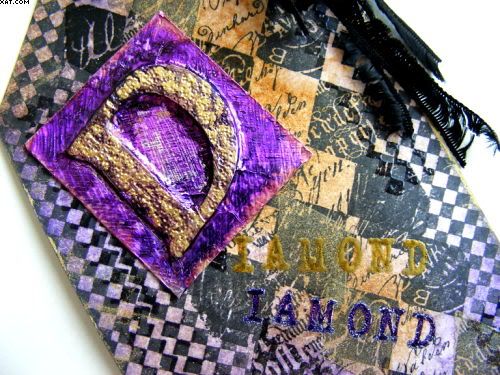
The 'D' was made by adhering a chipboard D to a piece of card and covering with self-adhesive aluminium tape which was carefully burnished over the D with a ball embossing tool. The aluminium covered piece was then inked with Alcohol Inks in wild plum, eggplant and pitch black finishing with a little gold mixative to highlight the top-most surface. Some texture was added with the embossing tool by stippling and hatching the aluminium prior to inking.

Before applying the D embellishment the 'iamond' word was stamped with Versamark and Making Memories magnetic Alphas which were heat embossed with gold and eggplant EP as shown. The hole in the tag was cut and a black eyelet applied using the Cropadile and some black fibres tied throught the eyelet. Finally the embellishment was added with mini glue dots.


This shot shows the embellishment and more of the detail. Hope you like it :-)

Pin It

Tuesday, June 09, 2009

'W' is for Wings Tag

Really enjoyed doing this tag. The challenge ( UK Stampers Sunday Challenge) was to make a tag in the theme of 'W' is for Wings. The cardstock was plain white and I used Adirondack inkpads and cut'n'dry foam to apply bottle, lettuce, meadow & oregano inks to make a background. These were set with a heat gun. Next I took a swirl stamp (Wendy Rhodes - swirly doodles collection plate) and inked with pesto ink and stamped 4 times as shown. This was again dried with the heat gun. I then took an angel stamp (Paper Artsy - Urban Snapshots Nature 1 plate), inked with Brilliance pearlescent rust ink and stamped bottom right. I used another rubber stamp background from Tanda Stamps (Altered Polka Dot) and inked in Brilliance pearlescent lime applying two uneven areas of dots bottom left and top right - not very noticeable in pic. Next the butterfly blank was stamped in Memories black India Ink onto the big swirl.

I made the two butterflies from Crafty Notions Fusible Films, which were layered and ironed (dry iron) over a butterfly stamp after inking the stamp with white and black inks. The butterflies wings were trimmed off and applied in position with glossy accents only at the wing bases. The words were stamped in Brilliance pearlescent purple ink and the tag finished with a green eyelet and some fibres in green and rust. The tag was finally edged in brown chalk ink.

Hope you like it :-)

Pin It

Thursday, April 02, 2009

Altered Playing Card


Here is an altered playing card.......err well 3 really, that I have done as a swap run by Hazel over on UK Stampers Forum.


I have entitled my piece 'You're A Diamond in Disguise' because I suppose that is just what it is the main playing card is the Ace of Diamonds. The main piece consists of two cards sandwiched together with foam pads and the third card is used as a tag with details on it. The back card is a Joker and the card tag is the 4 of Diamonds.


This is what I used:
  • 3 ordinary playing cards (Joker, Ace & 4 of Diamonds)

  • Stazon Inkpads (Eden Green, Imperial Purple)

  • Whispers Dye inkpad (Crimson)

  • Versamark Inkpad
  • Lumiere Paint (Purple Halo Gold)

  • Embossing Powder (Moonglow - Midnight Teal Obsidian, Midnight Ruby Obsidian & Holly Berry Red/Gold)

  • Stamps (Diamond, Stone - Texture Cube, Crown & Fleur de lys - Paper Artsy, Tag - Crafty Individuals)

  • Wire coil (Red)

  • Mountboard
  • Krylon Pen (Gold)

  • Gelly Roll Pen (Stardust Purple)

  • Eyelet (Red)

  • Decorative Fibres

  • Foam Pads

  • Glossy Accents

  • Square PunchMetallic

  • Spray (copper - Sticky Fingers)

The Ace of Diamonds card was taken and a hole punched with a square punched twice from opposite sides to produce an oblong window in the centre of the card. The crimson Whispers inkpad was applied straight to the card to ink in a random square effect and this was dried with a heat gun. The Tag stamp was inked with the Imperial Purple Stazon and stamped over the card as show leaving an edge left and bottom. The stone texture stamp was inked with Eden Green Stazon and this was applied to these edges. The Crown and Fleur de Lys stamps were stamped as shown with Versamark and heat embossed with the Moonglow powders. All edges were inked in Purple Stazon.


Next the Joker was taken and stamped randomly with the stone texture stamp and Eden Green Stazon. The card was allowed to dry and then sprayed with the Copper spray and dried with the heat gun to give a metallic effect. The edges were again edged with Purple Stazon.


The other side of the Joker card was giver two coats of Lumiere Purple Halo Gold Paint. When dry the diamond stamp was inked with Versafine and this was stamped centrally (to show through the window in the top card) and heat embossed with The Holly Berry Moonglow EP and finished by assembling one card over the other with six 3mm foam pads.


Next the diamond stamp was stamped twice with Versafine on the mountboard and heat embossed with the Holly Berry Moonglow EP. These two diamonds were trimmed out to make the dangly embellishment.


A length of the red wire spring was taken and the two halves of the diamond stuck together back to back with Glossy accents after trapping the wire between the two. A small nick was cut into the top left hand corner of the top card and the wire passed through this nick to allow the embellishment to dangle on the front of the card. The remaining wire was laid against the foam pads inside the card sandwich and passed round all four sides before finishing at the same left hand corner nick. Two small sticky pads were then used to adhere a square flat backed gem over the edge at this top corner to attach and seal the wire to the card. The diamond embellishment was edged with Krylon Gold pen.


I then took the Four of Diamonds and again added ink to card directly with the Stazon Purple card on both sides. I puched a hole with the crop-o-dile and applied a red eyelet as shown through which some decorative fibres were added. I hand wrote in Gelly Roll stardust pen (horrible writing !!!) the details of the swap and the title on the front of this card to act as a tag.

Pin It

Sunday, January 25, 2009

Baby Boy Tag-in-a-Sleeve


My partners boss is about to go off on maternity leave to have her second child. She already knows that she will be having a boy so I decided to do a little Tag-in-a-Sleeve in advance of the big day ! I don't usually 'do' cute but hey-ho what the heck. Most of the materials are ready made also.

In my effort to be a bit greener, the sleeve was made from a cut down kitchen foil tube as described in an article in the February edition of Craft Stamper Magazine by Jo Capper-Sandon. She describes how to use what would be waste items in your craft projects.

I needed:

  • Cardboard tube from kitchen roll
  • Card Tag
  • Decorative printed papers in various blue designs
  • DCWV clear quote stickers 'boy'
  • Flourish Stamp (Ilusive Images)
  • Colorbox Chalk Ink (Blue Iris)
  • Stazon (Ultramarine)
  • Adhesive Gems (Blue)
  • PVA Glue
  • Ribbons & Fibres (Blue)
  • Cropadile or hole punch

The roll middle was first cut to the desired length and then flattened to form an open ended sleeve. PVA glue was applied to the inside 1/4 inch of one end of the tube and this was clipped together with a strong crocodile clip until perfectly dry.

Meanwhile I prepared the tag. I chose one of the blue papers and adhered this with PVA glue to one side of the tag and repeated this for the other side. I trimmed the edges around the base tag and re-punched the hole in the top of the tag with the crop-a-dile (easy work!).

Once completely dry I used the small flourish rubber stamp and stamped in Stazon on both sides of the tag as shown. I then applied a few selected clear quote stickers (trimmed to fit) to both sides of the tag in a pleasing arrangement. Burnishing the stickers with the handle of a pair of scissors to ensure no air bubbles were present under them. A blue self adhesive gem was applied to each side of the tag for a little dimension.

I then edged the tag with the blue iris chalk ink pad directly. The fibre and 3mm ribbons were chosen and applied in a simple slip knot through the hole in the tag as seen.

Once the glue on the sleeve had dried I covered the sleeve with decorative paper and ensured that all edges were folded in and well stuck down. I applied more chosen clear quote stickers and again edged the whole sleeve with the chalk ink. The tag was finally slipped into the sleeve to finish.

I think she will like it and I enjoyed making it too. Hope this is of interest :-)

Pin It

Sunday, January 11, 2009

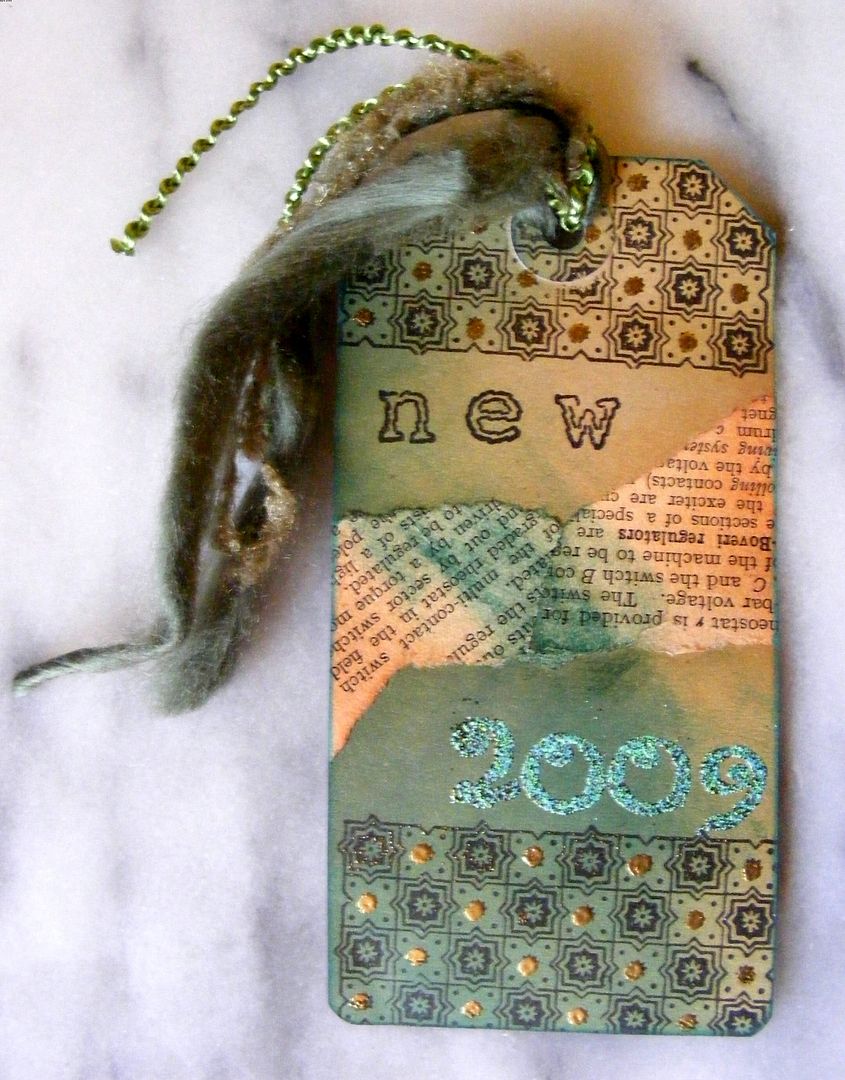
Old & New Tags

My 'Old' Tag

My 'New' Tag


It seems like ages since the New Year began, what with work and all that goes with it !!.......... however.........

Here are a couple of tags done for the UK Stampers Sunday Challenge. This weeks challenge was to do two tags using the same stamp on each, but using any other stamps also in the theme of old and new.

I used for the 'old' tag:
  • Distress Inks (Spiced Marmalade, Aged Mahogony)
  • Old book Paper
  • Gold and Claret EP's
  • Distress EP (Worn Lipstick)
  • Stamps (Dovecraft 'Laura Ashley' background & Paper Artsy Alphas)
  • Assorted Fibres & Ribbon
  • Manilla Tag
  • Versafine Ink (Onyx Black)
  • Versamark Ink
  • Versamark Pen

The tag was covered at the bottom with two pieces of torn book paper then the distress ink was applied and blended with cut 'n' dry foam. The main stamp was stamped twice with the versafine. Some versamark ink was smeared over the bottom left corner and Distress EP added before heat embossing with a heat gun. The 2008 was stamped with versamark and heat embossed with Claret EP. The 'old' was applied with versafine ink also. The versamark pen was used to dot the stamped image and go around the word and gold EP was then applied and heat embossed. Finally some fibres were added to complete.

I used for the 'new' tag:

  • Distress Inks (Pine Needles, Shabby Shutters & Spiced Marmalade)
  • Old book paper
  • Gold & Verdigris EP's
  • Stamps (Dovecraft 'Laura Ashley' background and Paper Artsy Alphas)
  • Assorted Fibres
  • Manilla Tag
  • Versafine Ink (onyx black)
  • Versamark Ink
  • Versamark pen

The tag was coloured with Distress inks using cut'n'dry foam. two pieces of torn old book paper were added centrally and inked. The background was stamped top and bottom this time. The tag was then finished as the other but using verdigris EP for the year.

Hope you like them :-)

Pin It

Saturday, May 31, 2008

Double Altered Slide Mailer


Here is a slide mailer I have recently done as a swap on UK Stampers Forum

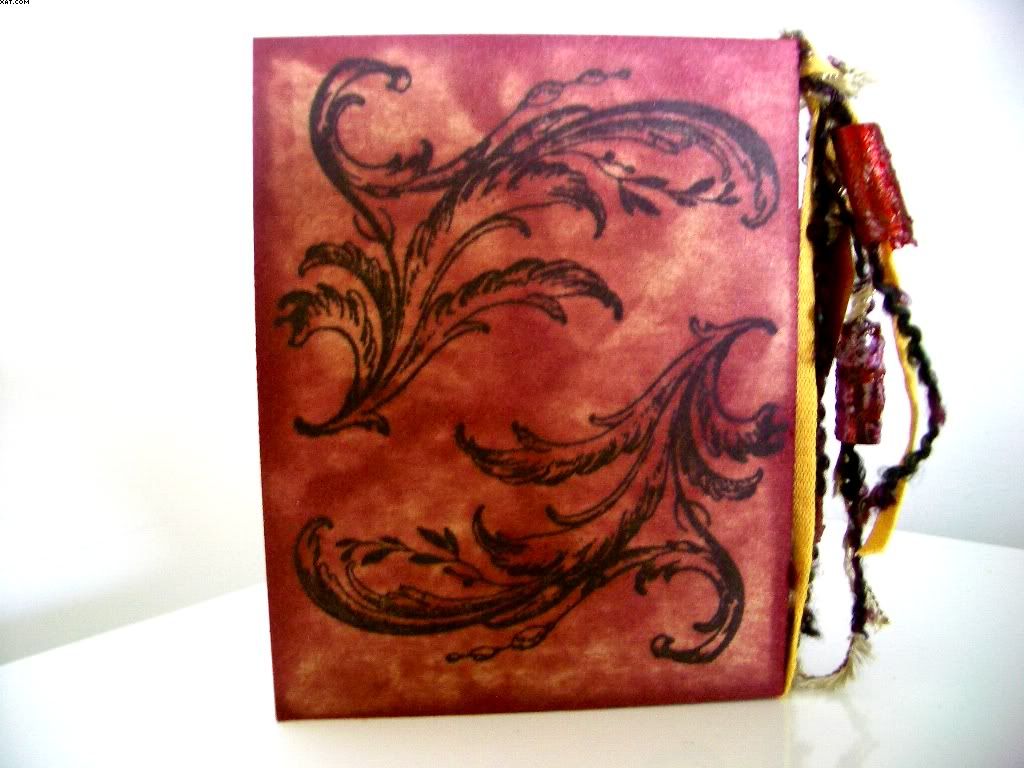
I have used a number of stamps to complete the project, a couple of flourishes, a 4 face stamp, a pensive lady, eyes stamps and a couple of sentiments ( follow your heart & discover). All have been stamped in black stazon except the discover sentiment which is in sepia Versafine ink. The background colour was made by direct to paper technique using a dark brown Whispers dye inkpad. Some hand colouring was done to enhance the black outline stamped images. The slides were done by backing them with the stamped eyes images given a spray with iridescent pink spray before attaching to the back of the slide with adhesive metal tape which was scraped with a piercing tool to provide texture.
Finally, the fibres were added and a tag with my details. Some of the fibres were embellished with hand made plastic beads.
Hope you like it !!

Pin It
Related Posts Plugin for WordPress, Blogger...