>
Showing posts with label Brilliance. Show all posts

Sunday, May 29, 2011

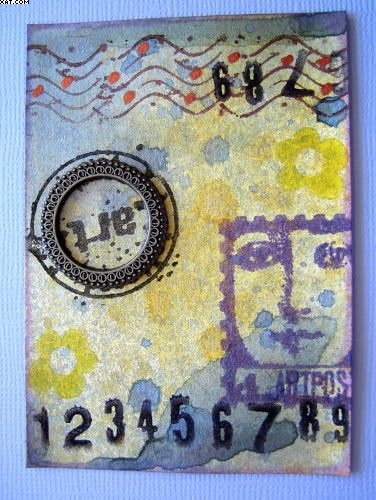
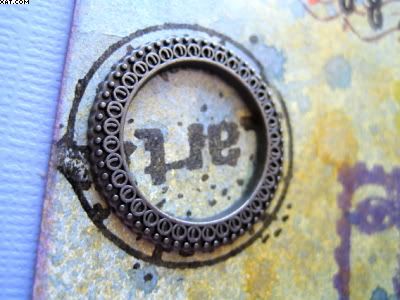
Vintage ATC's


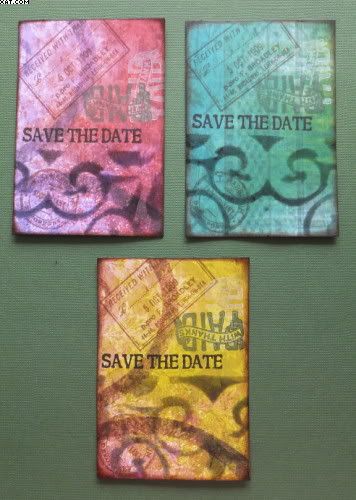
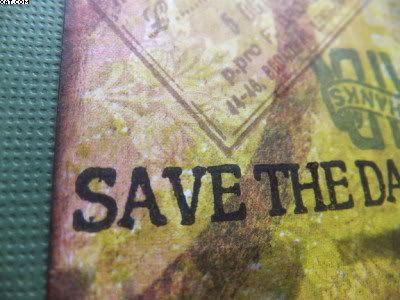
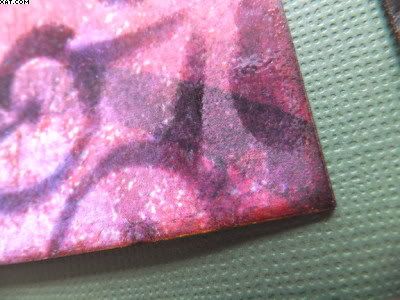
These ATC's are for a swap over on UK Stampers Forum.  The theme this time is 'A Vintage Affair'.  The backing was cut from plain card and then covered with some printed papers in three colourways.  I then used a swirl Glimmer Screen and coloured through it with a stencil brush and black soot Distress Ink.  The inked portions were then heat embossed with detail clear embossing powder.


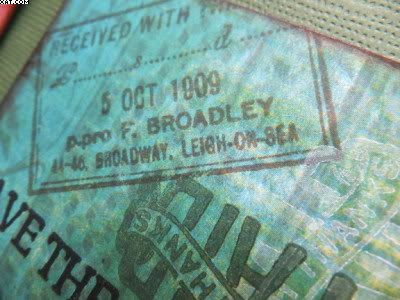
Next I used a selection of  stamps from a new plate by Toodles & Binks called Very Vintage Set one - Gone Postal.  The set was compiled by Katy Fox of Craft Stamper.  Inks used were Archival Black, Versafine and Brilliance in a selection of colours.  Each ATC was edged with dark brown chalk ink to finish.

Sid xx

Pin It

Sunday, May 01, 2011

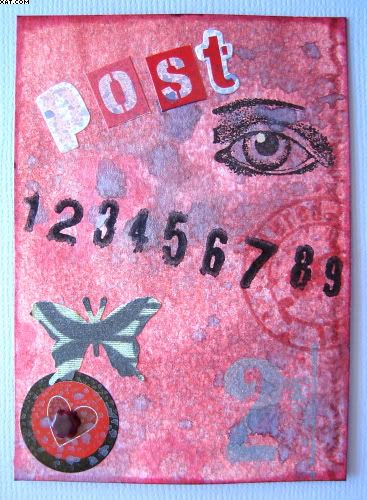
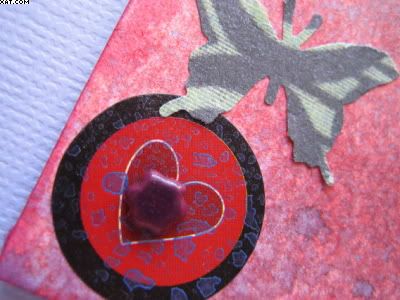
Mailart ATC's


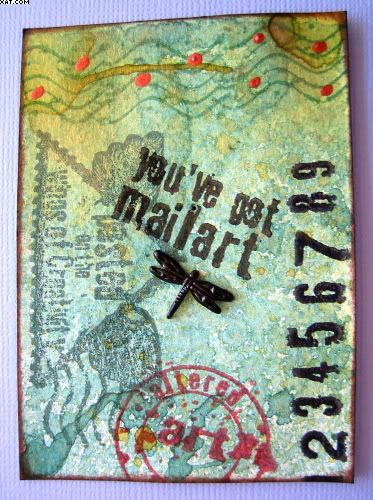
Here are three ATC's done as part of a swap over on UK Stampers Forum.  The theme this time was 'It's In The Mail'


I used spray mica inks for all the backgrounds in different colourways.  Some were homemade using distress re-inkers and mica powders whilst others were Glimmer Mists. All were applied in layers, dried between coats until I was happy. with the effect.


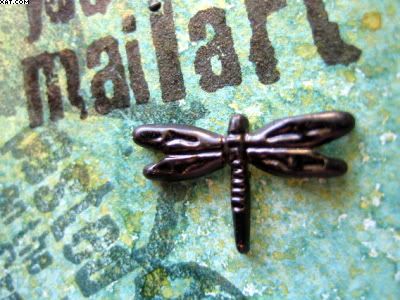
Most of the rubber stamps used were from Invoke Arts and I also used a variety of inks including Stazon, Brilliance, Versamark, Archival & Versamagic.  Each ATC was embellished with a brad or metal frame, stickers and punched paper.  They were all edged in Chalk inks to finish.

Sid xx

Pin It

Sunday, January 09, 2011

Mini Journal Page


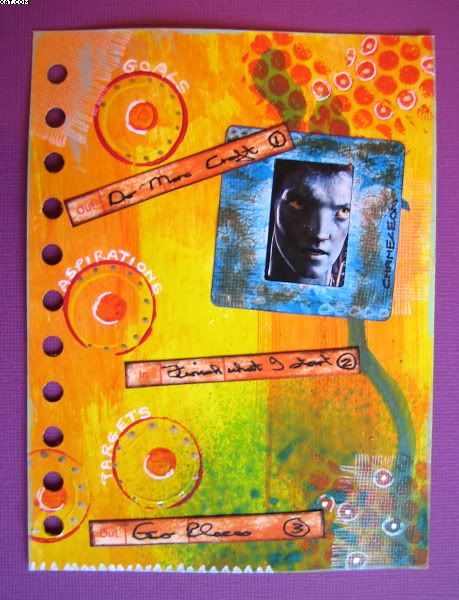
This is my first piece of crafting for this year !  Simply have had no time with other things getting in the way.  I am taking part in a weekly mini journal challenge being run over on UK Stampers Forum by Efemera.  We are to do one postcard sized page at 6 x 4 ins each week on a theme.  This weeks theme required:

1. A Photo
2. A handmade background
3. 3 things you want to achieve this year

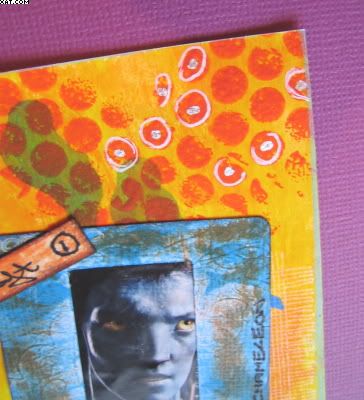
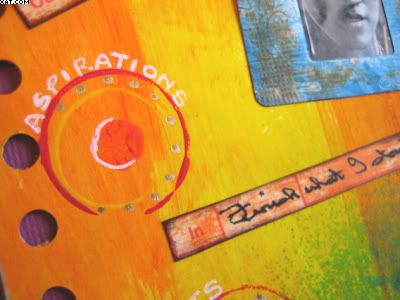
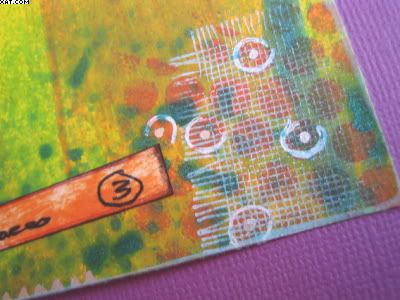
I cut my card and allowed an extra 1/2 inch on the left so that I could punch holes with the Cinch.  I then used a selection of Dylusion paints in Yellow, Orange & Pink from Dyan Reaveley to colour the background. For the circles I used lids of various sizes dipped in the paint and applied direct.  Some paint was applied with a sponge through some sequin waste too.


I stamped with a frayed linen stamp with Brilliance moonlight white and sprayed with some Teal Glitz Spritz mica spray. White opaque pen and silver and gold pens were used to decorate as shown.


I then diecut a slide mount with the sizzix and used a pic of Avatar behind the mount aperture.  The mount was coloured with blue and orange Memento inks applied direct with the word 'Chameleon' written on.


The journalling was done on a cut up clocking-in card, coloured with orange Memento and written on with fine black rollerball pen.  I chose to 1 - Do More Craft, 2 - Finish what I start & 3 - Go places !  I have also written around the circles Goals, Aspirations & Targets.

Let's hope I can keep up with this challenge in line with my second goal.

Sid xx

Pin It

Thursday, August 26, 2010

Flower Power Tag


This weeks tag for a challenge on UK Stampers Forum  is quite a complex affair but I loved doing it!  The backgrounds were all made using different materials and techniques such as mica sprays, stencilling through sequin waste with Distress Inks, tearing etc.

The ingredients this week are:

1.  Dots
2.  Using something Tim Holtz
3.  Transport

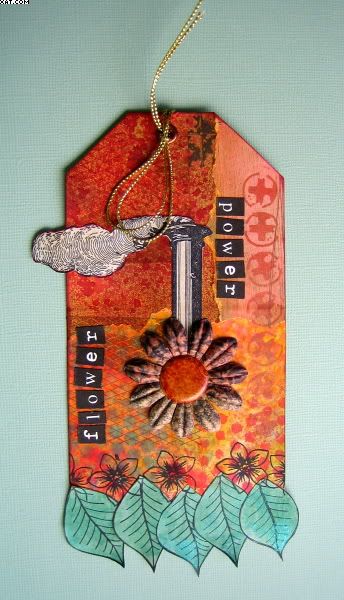
I started with white card and cut it to size.  I then applied 3 pieces of homemade background papers which had been torn at the edges and inked with spiced marmalade Distress Ink.  These were stuck on with a glue stick.


I then used a couple of stamps from Ecogreen from their Steampunk plate.  The first is of a cross-head screw and this was inked with Brilliance cosmic copper and stamped down the right hand side.  I then inked the netting stamp with Versafine vintage sepia and stamped a couple of times down the left hand side.

At the same time I took the chimney stamp and inked this with onyx black Versafine, stamping onto white card.  This was coloured with frayed burlap Distress Ink before trimming out to be applied later.

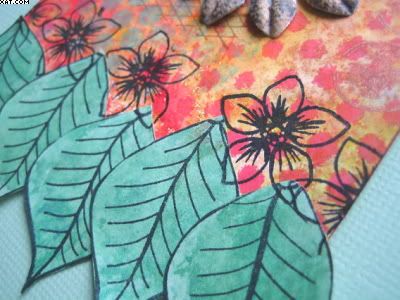
Next some PaperArtsy poinsettias were stamped with jet black Stazon and sprayed with green mica spray and when dry trimmed out (cutting each bract out to form a 'leaf').  These were adhered with glue pen along the bottom of the tag as shown.  Next a Hero Arts flower stamp was selectively inked with black Stazon and stamped above the leaves.


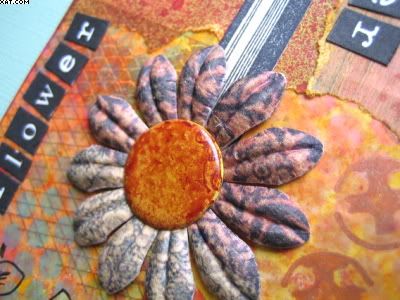
I then selected a Hero Arts printed paper flower and a large lime green brad, re-coloured with some terracotta alcohol ink applied with felt pad on an applicator.  The stamped and coloured chimney and smoke was applied with glue pen and the flower and brad applied below the stack through the tag.


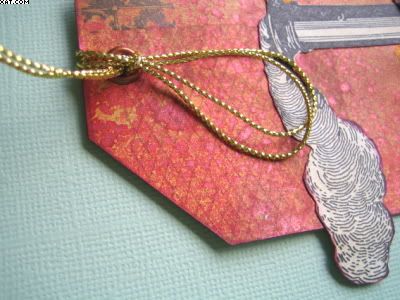
The printed letters were selected, trimmed and applied to spell out 'Flower Power' with glue pen (easier to position adhesive using a pen). The tag was edged with maroon chalk ink and  a copper eyelet was applied with the crop-a-dile and a piece of gold metallic braid applied in a knot to finish.

I know that the 'Transport' part of the ingredients has been very loosely interpreted but I had the feeling that the flower with a chimney represented power to move, hence the title of the tag.  You probably think I am loopy (I probably am actually :-)).  Enjoy !

Sid xx

Pin It

Sunday, May 09, 2010

Bee Line ATC


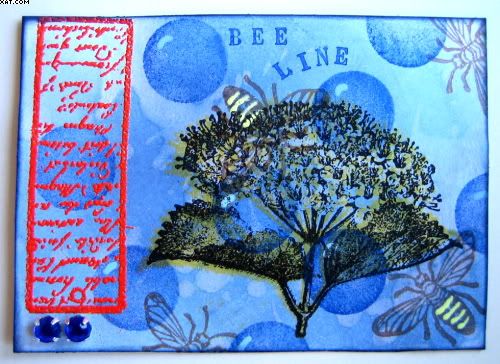
Back to my beloved  blues on this buzzy ATC.  The background was made by applying Distress inks in chipped sapphire, tumbled glass & stormy sky with a piece of cut'n'dry foam onto white card.  This was then spattered with drops of water to mix and spread the background and was dried with a heat gun.

Next I used a solid circle foam stamp and Brilliance mediterranean blue ink and stamped several times over the background.  The bee was stamped with vintage sepia Versafine and the obdominal stripes coloured with yellow Souffle pen.  The hydrangea was inked first with dandelion Memento ink and then overstamped with onyx black Versafine.  The word plate was inked with Versamark and heat embossed with Blond Moments fresh satsuma iridescent embossing powder.  Some little reflections were added to the circles with blue Souffle pen (to give the impression of bubbles).  All stamps were from a clear set by Artemio (Belgium).

Two blue gems were adhered with glossy accents and the whole thing edged with iris blue Colorbox chalk ink.

Sid xx

Pin It
Friday, July 31, 2009

Egyptian ATC's


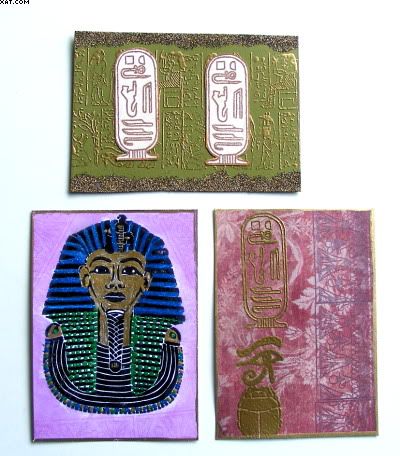
Here are three ATC's I made to swap with my friend Diane in the USA. I have used stamps from Tanda and Judikins along with printed papers Versamark, Brilliance, Chalk, Versafine & Stazon Inks. Embossing powders and Viva metallic paints were also used including Krylon gold pen.
Hope she likes them ! :-)

Pin It

Monday, July 20, 2009

'Blue Moon'

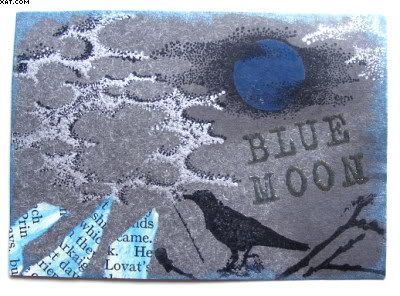
Here is my entry for the TMTA challenge this week. The theme is 'Moon' so I decided to go a little 'Blue'. Background is grey & silver mottled card. Stamps are by PaperArtsy and A Stamp In The Hand inked with black Stazon & starlite silver, pearlescent sky blue Brilliance. The alphas are Making Memories magnetic heat embossed with Versamark and Moon Glow madonna robe blue gold EP. The moon is coloured with Marvey le Plume II pen.

Hope you like it :-)

Pin It

Thursday, July 02, 2009

'Face' ATC


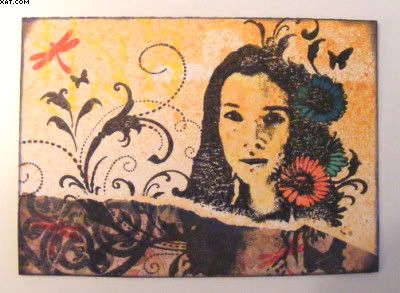
This ATC has been made as my entry into the TMTA 'Look into a face' theme for this week. The main stamp is from Cherry Pie and is stamped in black Stazon over a spray background and torn backing paper. A small dragonfly has been stamped in rocket red Brilliance ink and a script stamp was inked in sunflower yellow Brilliance and stamped at the top (not easily noticeable in this pic). The flowers were coloured using a waterbrush and red pepper /stream Adirondack dye inks. Finished with edging of iris chalk ink.

Pin It

Sunday, June 14, 2009

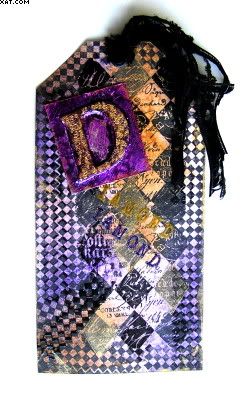
'D' is for Diamonds Tag

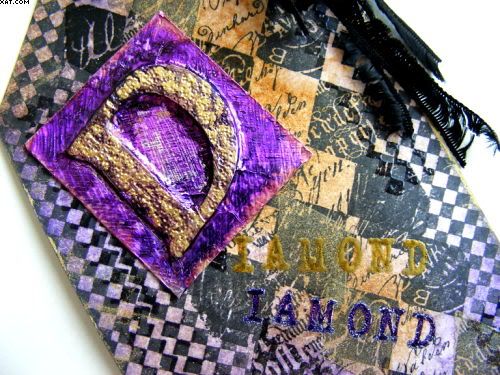
Here is yet another tag in the series..........I suppose we will cover all the alphabet eventually but enjoying the challenge immensely ! This weeks challenge is 'D' for Diamonds. I chose the shape rather than the gemstone and used a variety of stamps. The little diamond is from a Non-Sequitur plate (No.9 Cranes) that I have had for at least 5 years ! This is the first time it has been used. The other stamp is a PaperArtsy stamp (Letters Plate 5). Both stamps were inked in black Stazon and applied as shown in a somewhat random manner. When the Stazon was dry the Tag (made from white card), was coloured using cut'n'dry foam and Distress Inks in dusty concorde, tattered rose and vintage photo. A little clear single diamond stamp was then used with galaxy gold Brilliance ink to highlight certain of the diamonds from the PaperArtsy stamp at random.

Following this the Non-seq stamp and the little diamond were reinked with Versamark and overstamped randomly followed by heat embossing with clear EP to highlight and darken. The edges of the tag were inked direct from the galaxy gold pad to add a distressed edge look.

The 'D' was made by adhering a chipboard D to a piece of card and covering with self-adhesive aluminium tape which was carefully burnished over the D with a ball embossing tool. The aluminium covered piece was then inked with Alcohol Inks in wild plum, eggplant and pitch black finishing with a little gold mixative to highlight the top-most surface. Some texture was added with the embossing tool by stippling and hatching the aluminium prior to inking.

Before applying the D embellishment the 'iamond' word was stamped with Versamark and Making Memories magnetic Alphas which were heat embossed with gold and eggplant EP as shown. The hole in the tag was cut and a black eyelet applied using the Cropadile and some black fibres tied throught the eyelet. Finally the embellishment was added with mini glue dots.


This shot shows the embellishment and more of the detail. Hope you like it :-)

Pin It

Thursday, June 11, 2009

Stampbord Fridge Magnet

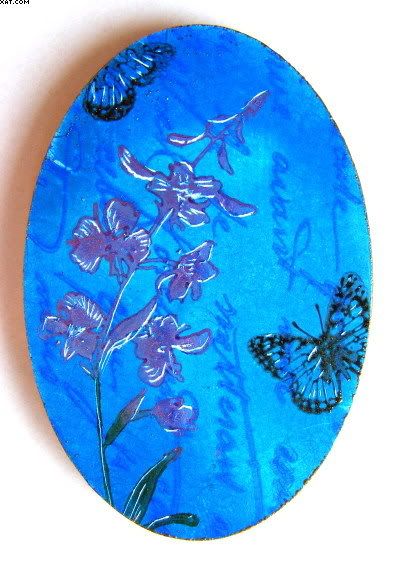
Here is my fridge magnet piece made out of Stampbord. The swap was organised by a member of UK Stampers Forum. I already had a selection of oval pieces and this one is relatively small (2.5 x 1.5 inches).

The background was coloured with Nick Bantock inks from Ranger ( Prussian Blue & Deep Turquoise) applied with a piece of cut'n'dry foam and set with the heat gun. The text stamp (Paper Artsy) was inked with Prussian blue and stamped onto the background. The wildflower stamp and the butterfly stamp were both from Crafty Individuals (wildflower plate). The flower was inked with Brilliance pearlescent ivy ink on its stem and pearlescent lilac on the flower. The butterfly was inked with Memories India Ink. When dry the stampbord was scratched through to reveal the white base as shown on the flower and the butterflies. The edge of the stampbord was coated with Versamark and gold Embossing Powder added and heated until melted to finish.

That's it, fairly straightforward, but I am pleased with the result.
Hope the receiver likes it :-)

Pin It

Tuesday, June 09, 2009

'W' is for Wings Tag

Really enjoyed doing this tag. The challenge ( UK Stampers Sunday Challenge) was to make a tag in the theme of 'W' is for Wings. The cardstock was plain white and I used Adirondack inkpads and cut'n'dry foam to apply bottle, lettuce, meadow & oregano inks to make a background. These were set with a heat gun. Next I took a swirl stamp (Wendy Rhodes - swirly doodles collection plate) and inked with pesto ink and stamped 4 times as shown. This was again dried with the heat gun. I then took an angel stamp (Paper Artsy - Urban Snapshots Nature 1 plate), inked with Brilliance pearlescent rust ink and stamped bottom right. I used another rubber stamp background from Tanda Stamps (Altered Polka Dot) and inked in Brilliance pearlescent lime applying two uneven areas of dots bottom left and top right - not very noticeable in pic. Next the butterfly blank was stamped in Memories black India Ink onto the big swirl.

I made the two butterflies from Crafty Notions Fusible Films, which were layered and ironed (dry iron) over a butterfly stamp after inking the stamp with white and black inks. The butterflies wings were trimmed off and applied in position with glossy accents only at the wing bases. The words were stamped in Brilliance pearlescent purple ink and the tag finished with a green eyelet and some fibres in green and rust. The tag was finally edged in brown chalk ink.

Hope you like it :-)

Pin It

Sunday, June 07, 2009

Another Blue CJ


Right & Left Pages

Here are my two pages as my entry into one of our CJ'ers works of art. This one has a rubber stamp of an angel which has to be used in your entry and, apart from the colour 'Blue', you could do anything.

I wanted to keep a celestial theme so took two pieces of pale blue card and sprayed these with Moonglow mica sprays in various pale blues and silvers over a glimmer screen of a scroll until the desired effect was achieved. These were allowed to dry. I then rubber stamped clouds and the moon ( A stamp in the Hand) in Brilliance moonlight white across the skyscape I had previously sprayed. Very subtle effect, but if you look closely you will see these ! The main stamp of the angel was stamped in Brilliance mediterranean blue on the same blue card and cut out and given a light coat of Lumiere hi-lite blue paint. Before applying the cut out I selectively stamped just the wings in the same ink down the left hand side of the page as a border. The angel was adhered, leaving the wings free to curl and the finishing touches applied with gold calligraphy ink and a nib pen.

I liked the words I used, I had written them down in my little sayings book ages ago and they have never been used before. They were computer generated and printed onto a piece of ordinary copier paper. This was trimmed, edged with pale blue chalk ink and again given a coat of the Lumiere hi-lite blue paint. The edges were curled and the whole lot sprayed with hair lacquer to stiffen. This was applied as shown along with a couple of flourishes in the blue Brilliance ink. The page again has a border of wings.


The Sign-in Tag

To finish I decorated the supplied sign-in tag and applied a small piece of velvet ribbon in light blue.
Hope the recipient likes it :-)

Pin It

Saturday, January 24, 2009

'Colours' CJ Entry


Here is my entry into Efemera's 'Grey' CJ as part of the UK Stampers Forum second CJ. Her CJ consists of tags held together by a single metal ring fastener. Her specific rubber stamp, to be used on each persons entry, is a pair of rather pointy boots (I assume from a Knight's suit of armour).

God, did I mull over what I was going to do on this one but finally had an image of a 'Buy One Get One Free' sale offer. Well they are not exactly elegant , are they? Maybe a Knight may think so though! Possibly the height of fashion for him !

Anyway here's how I made it:

Materials:

  • Printed background paper (Papermania - fine spots & architecture))
  • Versamark Ink Pad
  • Detail Silver Embossing Powder
  • Matt Silver metallic card
  • Grey card
  • Magnetic Alphas (Making Memories)
  • Stazon Ink Pad (Jet Black)
  • Pointy Boots rubber stamp
  • Flourish Rubber Stamp (Ilusive Images)
  • Brilliance Ink Pad (Moonlight White)
  • Foam Pads
  • PVA Glue
  • Glossy accents

The plain card tag was first covered with the architecture printed background paper using PVA glue applied with a brush. This was randomly stamped towards the edges with the flourish stamp using moonlight white Brilliance ink and this was heat set with a heat gun.

Next, the pointy boots stamp was stamped twice on the matt silver card in Versamark Ink and this was heat embossed with detail silver Embossing Powder. When cool the stamped and embossed images were carefully cut out and these were matted on the fine spots backing paper and again cut out with a 1/8th inch border.

Next the words were stamped with the magnetic alphas in black Stazon ink on the grey card and this was trimmed. The trimmed stamped words were matted on more of the matt silver card and again trimmed allowing a small border. They were edged with black stazon before applying with Glossy Accents as shown. Finally the adhesive foam pads were applied to the back of the cut-out boots and they were applied as shown.

It is now on its way to Hazel who is the next in posting line. Hope you don't have as much trouble deciding what to do as I did. That's it folks.

Hope you like it :-)

Pin It

Sunday, October 26, 2008

Sunday Challenge No 12


The UK Stampers Sunday Challenge set by Efemera this week is:

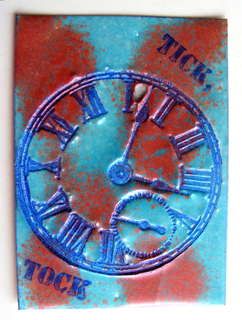
'The clock's ticking.................British summer time ends next Sunday 26th and the clocks go back 1 hour so get your skates on and create 2 ATCs with time as your theme, use the same stamp for both but a different technique for each!'

I used a clock stamp and the words Tick, Tock on my two cards.

The first one demonstrates a soot stamp-off technique. I first coated the card with a couple of coats of batchelor button blue Starburst Stain and allowed to dry. Then I lit a candle and held the coated surface (moving continuously) close to the flame, depositing soot over the surface and covering up the colour. I then used the stamps without any ink to remove the soot, leaving the coloured surface below to show through. I then sprayed the card with cheap hair lacquer to seal the soot onto the surface.

The second uses triple heat embossing and two colours of pearlised Deep Image Crystals UTEE from Once Upon A Stamp. The stamps were inked up with Brilliance mediterranean blue to act as a release.

Hope you like them :-)

Pin It

Wednesday, October 15, 2008

'DARK'

This months theme for the UK Art Raffle is 'Dark', to be interpreted any way we liked. This art has also been entered into the 'Goth Style' Wednesday Stamper challenge for this week.

I wanted to do a dark atmospheric number so I started with a yellow card as the base and applied Adirondack dye inks with cut'n'dry foam to obtain a murky overall background. I used bottle, denim, egglant and slate to get the effect I wanted, using small pieces of foam and picking up the ink after first applying ink to a non-stick craft sheet.

I had acquired, many moons ago (pun), a laser cut sheet of tree silhouettes and I cut one of these out and sprayed with Moon Glow Glitz Spritz in desert moon wild iris, allowing to dry naturally before edging with silver Krylon to reflect the moons silvery glow. This was set aside. I then stamped the base with a foliage stamp (anon) in Brilliance pearlescent lime.

The devils face was a stamp I have never used before and came from a grab bag from Third Coast rubber stamps in the USA. I stamped this several times in Versafine onyx black to go behind the tree. The stars in the sky were stamped with a dotty stamp (anon) with Brilliance mediterranean blue and the moon was applied top right with silver Krylon and a circle stencil. The bird was stamped onto black/silver card with black ink and cut out before edging wings, beak and tail with silver Krylon. The word 'DARK' was stamped with magnetic stamps from Making Memories and onyx black Versafine.

The tree was applied over the devils faces with glue stick and the bird applied with silicone glue as shown. The scene was matted onto black and green carstock to finish.

Don't think 'I' would like to walk past that tree on a night like that !!! Hope whoever is the lucky winner this month is not put off by my rather macabre art.

Hope you like it :-)

Pin It

Monday, September 15, 2008

My heart.............ATC

This ATC was done as my first entry to the Think Monday, Think ATC challenge. The subject this week is Handwriting.

I cut the ATC from white board and adhered a piece of printed background paper to it with handwriting printed on a cream background from K & Co Lifes Journey. I then chose a rubber stamp with the words 'My Heart Is Like A Singing Bird' and stamped with Versamark ink and heat embossed with Stampendous twighlight embossing powder and a heat gun.

I cut out a medallion from the same paper and dabbed this with moonglow delphinium turquoise Starburst Stain, again drying with the heat gun. The ATC was sprayed with moonglow desert moon endless sky Glitz Spritz and allowed to dry and edged roughly with some more starburst stain. I used a calligraphy swirl stamp (anon) and stamped twice with Brilliance meditteranean blue ink.

The medallion had a small fabric flower applied centrally and this was secured with a pewter coloured square brad before attaching as shown with foam pads to give depth.

I would have used some of my own handwriting..........but it is really bad, so I opted for a stamp instead.

Hope you like it :)

Pin It

Friday, September 05, 2008

A Charming Collaboration


This is a little gift made for a friend of mine who has been very sick for quite a long time. The collected charms from contributors will be suspended from a charm bracelet to hopefully make her feel better and help her recover more quickly.

I used a 4 x 4 inch piece of card (to go into a little book with a photo of the charm) from fairly light, white card. I used acrylic paints in pale gold, light green and mid-blue which I drizzled from the bottle onto the surface and roughly spread horizontally across the card with a dry brush to cover the surface. This was allowed to dry naturally in a fairly thick coat. I then stamped with a swirl stamp and Brilliance mediterranean blue ink. I finished off with my own (horrendous) handwriting and a blue brush pen with a sentiment that I had collected for just this type of gift.

The charm was made using sanded clear shrink plastic and a stamp by Zettiology (37-197-F)which was stamped first in Stazon ultramarine ink. Once dry this was cut to size and marvy le plume II pens in ochre and purple were applied direct and allowed to dry. A hole was punched with the Crop-a-Dile in the top left corner before shrinking and flattening with a heat gun.

Once cool the charm had a silver jump ring applied to enable it to hang from the bracelet.

Hope it does her a world of good :)

Pin It

Saturday, August 16, 2008

Sunday Challenge No 2

Here are my two offerings for the UK Stampers Sunday Challenge No 2


The challenge was to make two tags one in colour and one in black & White using the same stamp/s.

For the coloured tag I have covered a cricut made tag with some Japanese Washi Paper I bought on my visit to Japan recently. I cut the hole through with the Crop-o-dile. I then applied three layered colours of Brilliance ink (pearlescent crimson, pearlescent ivy and rocket red gold) from top to bottom to the oriental stamp (Inkadinkado 93191) and stamped centrally over the Washi paper. I applied a metallic pink eyelet with the crop-o-dile, edging the tag with pink chalk ink. I chose three pastel brads in lemon, mauve and pink and applied through the centres of some of the printed flowers and finished the tag with some 3mm organza and satin ribbon in pink, tied through the hole in the tag.

The black & white tag was made with the cricut and the same Inkadinkado stamp applied centrally after inking with Versafine onyx black ink. I then used a second stamp of Chinese calligraphy (Judikins artifacts cube 67181) to fill in the top and bottom of the tag. I used Brilliance starlite black ink on this. I then stamped another image of the Inkadinkado stamp in black and cut out the chrysanths and the chop image which I decoupaged over the original images with foam pads. I applied a black eyelet to the hole in the tag, edged the tag with black Stazon ink and knotted some plain black and white satin ribbon through the hole.

Hope you like them, and wonder what the next challenge will be?

Pin It
Related Posts Plugin for WordPress, Blogger...