>

Wednesday, December 30, 2009

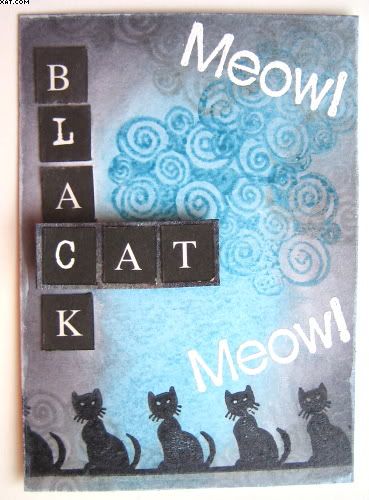
Lucky Black Cat ATC

A little diversion ! Saw the TMTA Lucky Signs challenge for this week and couldn't resist doing a lucky black cat card as my entry.

I used a white card as the base and cut this to size on the rotary trimmer. I then stamped a cat border stamp (Third Coast Designs) in black stazon at the bottom of the ATC. I then coloured the rest of the card with black soot & broken china Distress inks with cut'n'dry foam. Another swirl stamp (?) was used and stamped with dove grey Stazon and broken china Distress inks as shown.


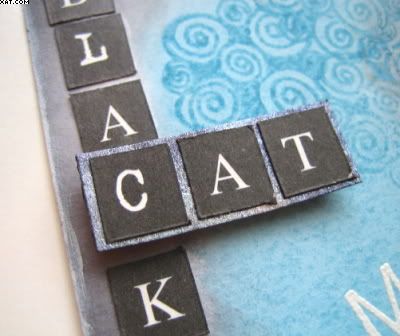
The words were made from printed K & Co alphas and the word 'CAT' adhered onto a piece of mica sprayed card and stuck in place on foam pads in crossword style.

The 'Meow!' was also from Third Coast Designs and was stamped as shown with Versamark and heat embossed with seafoam white EP.

The ATC was finished by edging with Brilliance moonlight white ink and allowing to dry.

Sid xx
Pin It

Tuesday, December 29, 2009

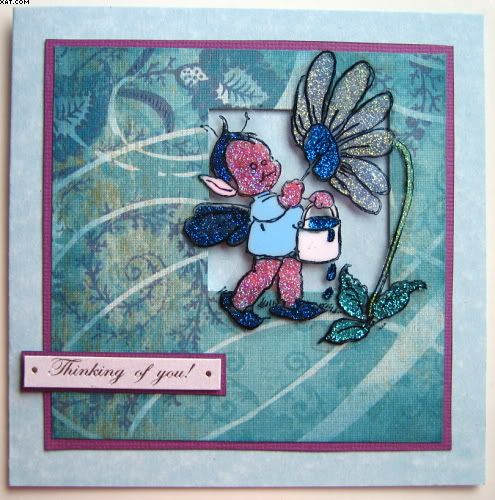
Kind Thoughts Card


Christmas has now passed and the New Year is just around the corner so I decided a change was as good as a rest. One of my friends has not been too good over the break and I wanted to do a card to cheer her up.

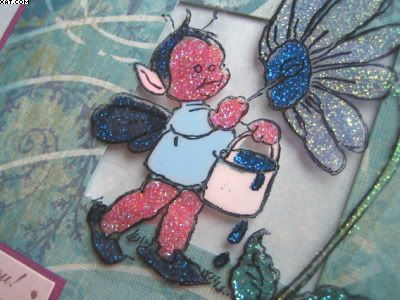
I used a stamp called 'Natures Little Helper' from The Artistic Stamper which I won from the very kind Jennie. I used acetate, glitter and souffle pens to colour in the image (attributed to Mabel Lucie Attwell).

I took a mottled pale blue cardstock and trimmed/scored to make a 4 x 4 inch square card as the base.


I took a piece of acetate and stamped the image with black Stazon. I then used dries clear art glue and applied a number of colours of ultrafine glitters on the reverse of the acetate, allowing them to dry between colours. The body, ear and paint tin were coloured with Sakura Souffle pens and allowed to dry. I then trimmed out the image to leave around a 1/4 inch border.

Next I took a piece of K&Co printed cardstock trimmed as shown and cut an aperture top right with a large square punch. This was rubbed over with broken china Distress ink applied with cut'n'dry foam. This was then matted over some dark plum coloured card and the same aperture cut again with the punch.

The matt was applied centrally with DS tape, the acetate applied over the aperture with glue applied behind the glitter and the card finished off with a 'Thinking of you' sentiment mounted on foam tape and matted onto the same dark plum card.

Hope she likes it !

Sid xx

Pin It

Friday, December 25, 2009

Merry Christmas Everyone


A very Merry Christmas to everyone of my crafting friends and all of those who follow my blog. Hope you have a fantastic time.

Cheers !!!

Sid xx

Pin It

Thursday, December 24, 2009

Xmas ATC

This ATC was done as my entry for the open theme for Wednesday Stamper this week. I used a printed clocking-in card as the background which I coloured with Distress inks in shabby shutters and fired brick applied with cut'n'dry foam.

The background cone stamp is from PaperArtsy and was stamped as shown in vintage sepia Versafine ink. The white highlights were then added with a white pigment pen.

The plate was also coloured with the same Distress inks and stamped with black Stazon with a 'Dec 25' PaperArtsy stamp. The plate was trimmed and matted onto gold paper and trimmed again. Some white was added as before and the plate applied with foam pads as shown. The whole ATC was then edged with gold Krylon pen to finish.

Very simple but I liked the almost faded look on this one.

Sid xx

Pin It

Wednesday, December 23, 2009

CJ No. 3 - Chicken Licken


I am taking part in another Circle Journal being run by Efemera over on UK Stampers Forum. Instead of colours as a theme we are just choosing a stamp which everyone has to use as the journal makes its journey round the circle.

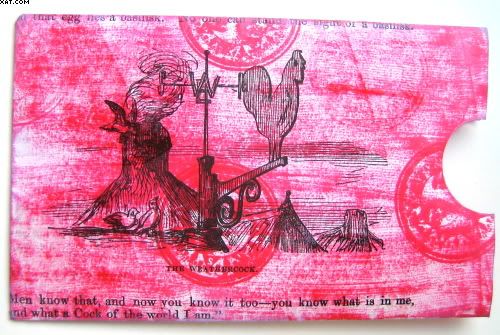
Just completed my entry in Chicken Lickens CJ (Tasha) which she has entitled 'Just One Heart'. Her journal pages are loose at the moment and she intends using a Bind It All to bind them on their return. She has made 12 little sleeves out of bookpaper and inside are 12 tags that slide into the sleeves.

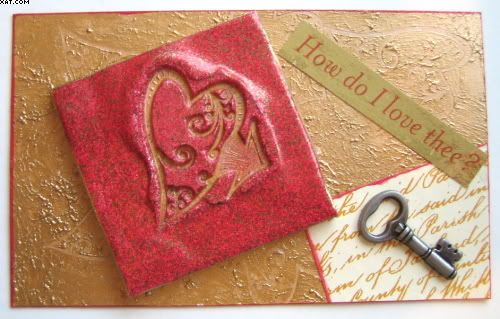
Her chosen stamp is a swirly heart with an arrow. My intended theme was to use a lot of red and gold on my entry.


I decorated the sleeve with some Impress red ink applied directly from the pad. I then used a little circular face stamp and randomly stamped this in Versamark and heat embossed with clear embossing powder. I then inked the stamp with the Impress red and stamped again......... its the same on both sides !

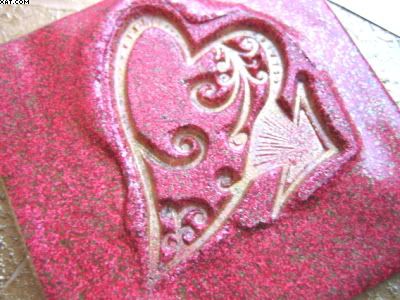
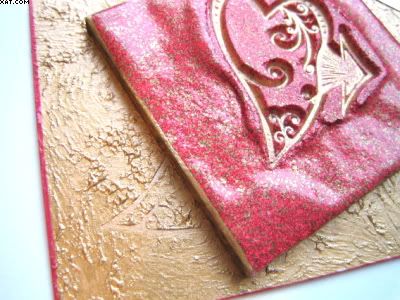
Next I took a 2inch square of stampbord and using Versamark and chinese gold embossing powder, triple heat embossed. I had already inked the heart stamp with gold pigment ink. Once the heat gun was turned off I applied the stamp to the molten EP and allowed to cool before removing the stamp. The effect obtained is shown above. I then edged the square with Krylon gold pen and put it aside.


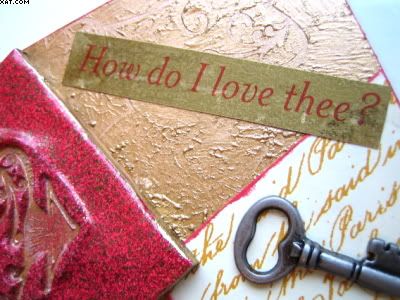
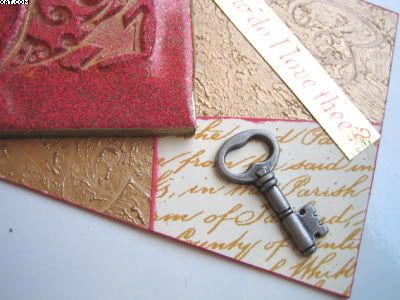
Next came the background. I used a Ranger gold dabber and dabbed on a thick coat of the gold paint and then stamped into it several times with the same heart stamp, leaving an impression (you can just see these). This background was allowed to dry completely. I then used a piece of text printed paper and applied it as shown after edging it with red Versmagic ink.


A metal key was stuck in place with glossy accents as was the Stampboard. I used a clear sticker with the words 'How do I love thee' and applied this to some gold metallic paper, trimmed it and again stuck in place with glossy accents. All edges were finished in the red Versamagic ink and the insert backed with plain red textured card (for my name and sign-in details).


Do hope she likes my entry. I certainly enjoyed making it.

Sid xx

Pin It

Tuesday, December 22, 2009

12 Days of............Day 9


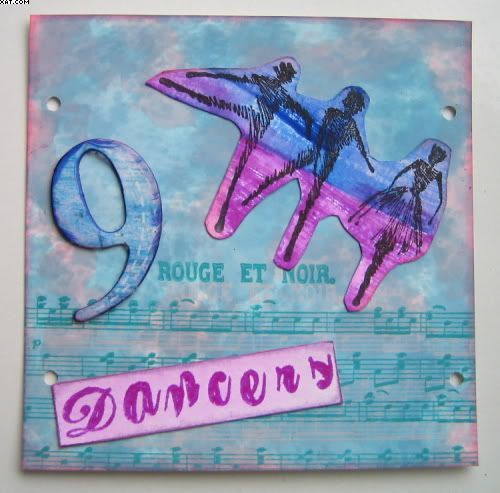
I have now got to Day 9 of 12. My plate this time is supposed to represent 'Nine Ladies Dancing'.

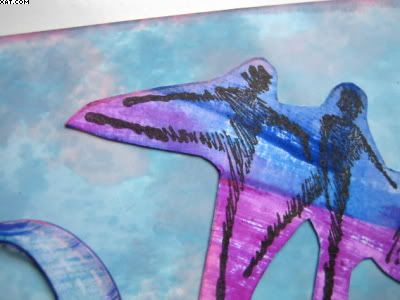
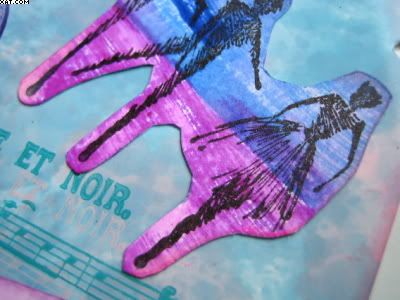
I started with a piece of white glossy cardstock, cut to 4 x 4 inches. I then used Ranger alcohol inks and an applicator in aqua, pink sherbet & cloudy blue to make a cloudy sky-type background. Once happy I stamped a stamp called 'Tiptoe' by Stamp-It in Versafine onyx black onto a piece of white textured cardstock. I swiped this with Impress peony purple and hydrangea inkpads and rubbed in with a waterbrush. The coloured image was cut out.

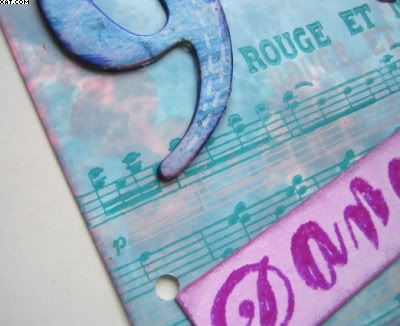
I then took a music stamp (?) and stamped this twice at the bottom of the card in Versamagic turquoise gem & pixie dust inks, slightly offset. The word was made up from Sizzix clear alphas and stamped on a white card in Impress peony purple and whilst still wet heat embossed with clear embossing powder. The background was coloured with more ink applied with a waterbrush. This plate was edged in purple ink also.


The chipboard number 9 was stamped and coloured with alcohol ink and Impress ink. All embellishments were then stuck in place with glue stick.

The outside edge of the card was inked in more of the pink chalk ink to finish.

I like the misty colours of this one, and it is quite different from the rest in the series.

Sid xx

Pin It

Monday, December 21, 2009

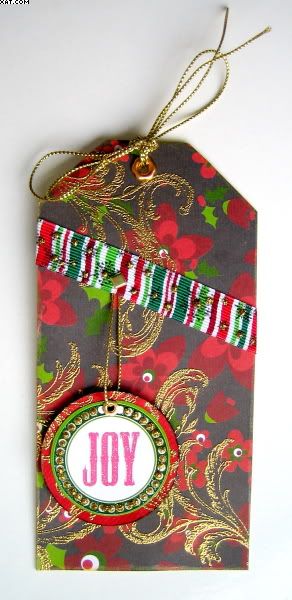
Joy of Christmas Tag

Festive colours again in this Xmas Tag of Joy. I always loved, and still do love the traditional colours of Christmas, so here again is another of my tags.

I cut the base from white card and applied a piece of printed background paper in those colours. I then stamped with a Versamark pad and a flourish stamp (?) and heat embossed with gold embossing powder.


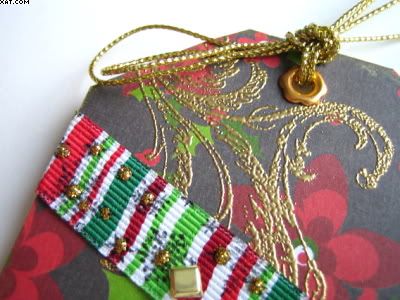
Next I chose a stripey grosgrain ribbon and overstamped this with snowflakes in black Stazon using a background stamp from Crafty Individuals. I applied double sided tape to the ribbon and applied it as shown. I used some Stickles glitter glue in gold to embellish the centres of the snowflakes.


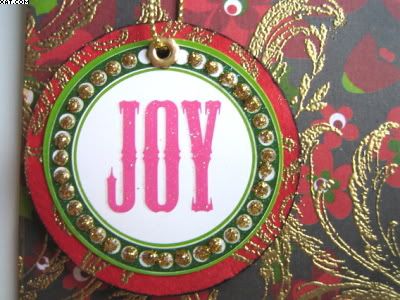
Next I made a round tag from a self adhesive sticker matted on a larger piece of red mulberry paper which had been heat embossed in gold using the same flourish stamp. This was edged in black stazon to give definition. A gold eyelet was applied with the crop-a-dile and a piece of woven gold braid threaded through and secured at the top under the ribbon. Foam pads were used to tension the braid and adhere the embellishment. A square brad was used through the ribbon. This joy circle was also decorated with gold Stickles.


A large gold eyelet was applied with the crop-a-dile at the top of the tag and some more of the gold braid tied through it. A Brilliance galaxy gold pad was used to edge the whole tag to finish.

Lovely rich colour again on this one.

Sid xx

Pin It

Sunday, December 20, 2009

Christmas Baubles


'And now for something completely different!'

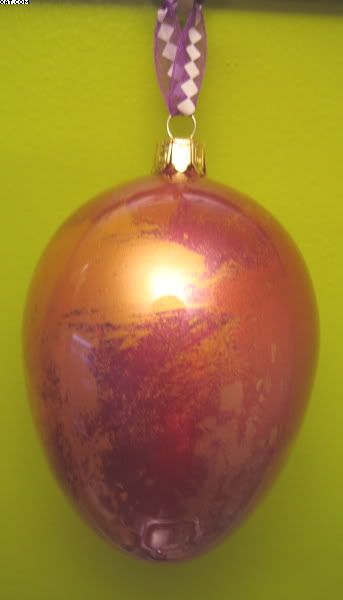
Ages ago I bought four clear glass Christmas Baubles and had never done anything with them. I dug them out and decided to decorate them, sort of inside-out. So here are two of the four that I have finished today.

To decorate them I used various Luminarte Primary Elements polished pigments & Simple solution and some fine glitters too. The company also make the Twinkling H2O's and were due to close but have been resurrected because of popular demand and support. I actually used No2 simple solution and this worked just fine.

I am sure that you would be fine using any mica pigments, glitters and some watered down 'dries clear' PVA adhesive though !


The method is simple: Remove the stopper from the glass bauble and pour in the simple solution and rotate the bauble to coat the whole of the inside with a thin film of the solution. Place upside down in a suitable round support (glass jar) and allow excess simple solution to drain. Once drained select your mica powders and glitters and, whilst holding the bauble, spoon in small amounts of them on the end of a suitable spatula. It's best to use sparing amounts of the mica and glitter. The bauble is shaken and rotated after adding each mica or glitter to disperse. This way you can see what effect you are creating. Once happy with the effect leave the bauble to dry for a few hours. I added little ribbons to mine.

The effects can be startlingly beautiful and the world is your oyster regarding the colourway you go for ! Have fun if you do try it.

Sid xx

Pin It

Saturday, December 19, 2009

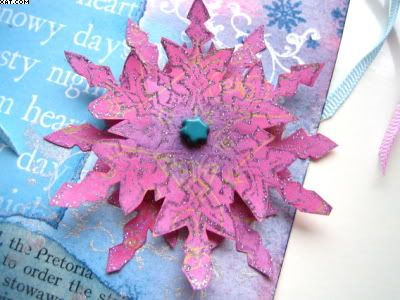
Snowflake Tag


What's wrong with me? I seem to have gone blue and pink mad at the moment. These are not my colours really but somehow today I just had to use them !! As I sit here the snow is falling down and has left a lovely white coating over everything............. very appropriate for the tag subject matter. This is also my entry for the free theme over on LTDO challenge blog this week.

I took a piece of white base card and cut it to size. Then I adhered a piece of old torn bookpaper to the bottom of the tag and inked this with a blend of faded denim and worn lipstick Distress ink applied with cut'n'dry foam. I then coloured the top of the tag similarly. I used a PaperArtsy stamp of mini snowflakes and stamped with the faded denim ink directly over the top and bottom of the tag.

I next added a torn piece of Christmas sentiment paper, first coloured it with Distress ink and applied with glue stick to the left edge of the tag. Overstamping with the snowflake stamp again.

The remaining background area was stamped with another Christmas flourish stamp from PaperArtsy and Brilliance starlight silver a few times running into the words of both the torn side piece and the bookpage.

The main snowflake stamp (?) was inked with black pigment ink and stamped twice on pink printed background paper with Versamark and this was heat embossed with stardust embossing powder which is clear and sparkly. The snowflakes were cut out and rubbed over with the same Distress inks before a blue brad added to the centre of the first snowflake. This was then stuck over the second image with two foam pads and the double snowflake embellishment stuck onto the tag as shown.


Two lengths of blue and pink narrow grosgrain ribbon were cut and tied in a multiple knot and adhered at the top of the tag with a glue dot. The whole of the tag was edged with more worn lipstick Distress ink to finish.

Sid xx

Pin It

Friday, December 18, 2009

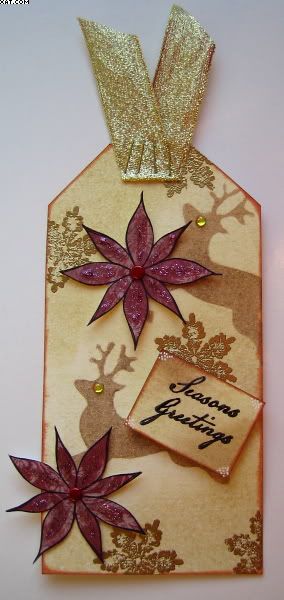
Reindeer Tag


Just got a little time to spare this afternoon so decided to make another Xmas tag. I had a reindeer stencil and thought I would use this as a base design along with golden snowflakes. I used muted neutral colours to keep the whole tag soft but rich looking.

The white base card was cut to size. I then used scattered straw Distress ink and cut'n'dry foam to colour the background. I used a couple of coats and applied the second coat more heavily around the edges of the tag. I dried in between layers with a heat gun.

I then applied the reindeer stencil and used brushed corduroy Distress ink to colour the reindeer a nice brown. The card was then spritzed lightly with water in a mini mister and allowed to dry naturally. This provided a slight speckling over the applied inks.


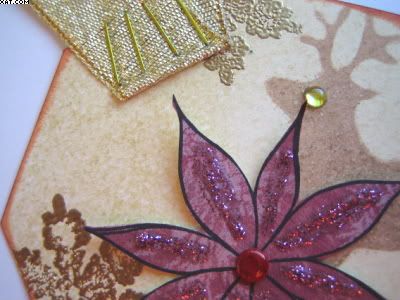
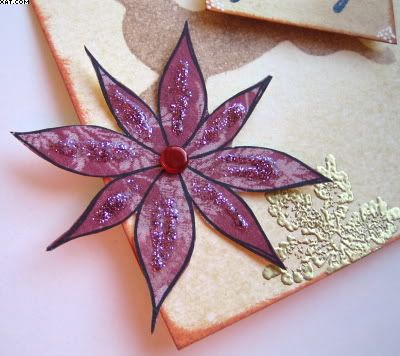
When totally dry I rubbed over the inked surface with an anti-static bag and stamped a snowflake stamp (?) inked with Versamark in and stamped randomly over the tag. This was then heat embossed with gold embossing powder. Next a poinsettia stamp from PaperArtsy was inked with black Stazon and stamped twice on printed dark pink background paper. The images were cut out and applied as shown with a dark pink brad. These were enhanced with pink Stickles glitter glue.


Finally the word plate was stamped in black Stazon and coloured with the same two Distress inks. Before applying this with foam pads it was edged with burnt sienna Chalk Ink along with the outside edge of the tag. I added a couple of yellow flat-backed mirror cabouchons as reindeer eyes with glossy accents and added a few spots of white with a pigment pen to the corners of the plate.

Finally a piece of gold woven ribbon was trimmed, folded over and applied with 4 gold staples. I thought the rosy colour of the poinsettia just offset the neutral tones of the background nicely.

Sid xx

Pin It
Related Posts Plugin for WordPress, Blogger...