>
Showing posts with label Glass Glitter. Show all posts

Monday, August 13, 2018

August sun .....


With the scorching sunny weather we have had this August I decided to make a bright & sunny collaged August 4 x 4 inch decorated square for a swap on UK Stampers Forum Facebook Group ....

I used a piece of waste cereal packet as the base cut to 4 x 4 inches.  I then used a stencil and some bronze crackle paste applied with a palette knife.  Once dry I coloured the white space with watercolour brush pens in orange and yellow.

The clouds were stamped in Memento black ink and diecut before colouring with Alcohol ink marker and were embellished around the edges with glossy accents and blue glass glitter. The large cloud was stamped with the month 'August' in Archival black. The sun was stamped in Memento orange ink, trimmed out and embellished with orange peel Stickles glitter glue.  The central 'Sun' is a sticker.

The fantasy flowers were stamped in colours in Memento Ink, trimmed out and embellished with more Stickles glitter glue.  A couple of strips of green Washi tape were applied at the base of the square and all elements were attached by glue and foam pads as shown.  The square was finished by edging with Krylon gold pen.

Being sent to Hannah for the Swap & hope she likes it !

If you fancy joining in swaps, why not join UK Stampers Forum ? Click HERE to go there .... it's free & fun !

Sid xx

Pin It

Tuesday, October 10, 2017

Stags House .....


Here is a little house made as a standing Christmas decoration ....

I used a die and diecut the house parts from heavy card.  The roof was made from a strip of corrugated board.  The walls were covered in decorative papers before assembly.


The deer was stamped in black archival ink onto Kraft card and diecut.  This was mounted on the front of the house on a foam pad.  The star at the top was diecut and heat embossed in kaleidascope embossing powder.  The decoration was made from twigs, greenery and white cones tied together with natural twine.  A little bow of red gingham ribbon was then added with hot glue and the whole thing attached with hot glue.


The roof was daubed with white acrylic paint before distressing to remove some of the top layer of corrugated.  Finally very coarse glass glitter was adhered on hot glue on the roof and at the base to finish the house .....

Sid xx

Pin It

Monday, April 03, 2017

Sparkle & Shine ......


This set of Inchies was made for a Swap over at UK Stampers Forum, whose theme this Month is 'Sparkle & Shine'

I have used embossed glitter card as the base, stamping with Versamark & heat embossing with metallic EP's, collaged elements, glass chips, gems and I dug out my trusty old Gold Krylon Pen to do the edging.  Might say it took a while to get it primed but it still did the trick !  They have been mounted onto mountboard to give them some rigidity.

If you fancy making some Inchies and joining in the Swap visit us by clicking HERE, where you can join the Forum and join in this and other Swaps that are running this Month.

Sid xx

Pin It

Saturday, July 10, 2010

Greens & Oranges


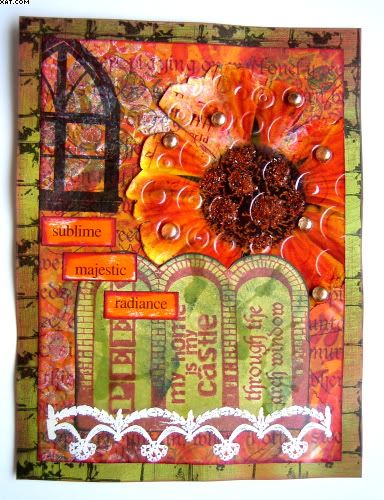
This piece was done as an experiment using two base colours along with collage, stamping and embossing.  I didn't plan what I did, just used elements that fitted the colourway and completed the whole thing in one session.

I started with a piece of printed paper from Graphicus and then used Brilliance inks in pearlescent icy and moonlight white applied to a piece of bubblewrap and used as a stamp.  I then made up a strong spray with shabby shutters distress reinker in a mini mister and sprayed this so it ran down the page before drying with a heat gun. I stamped the arch (top left) using a Paperartsy stamp in onyx black versafine ink over some of the bubblewrap stamping.


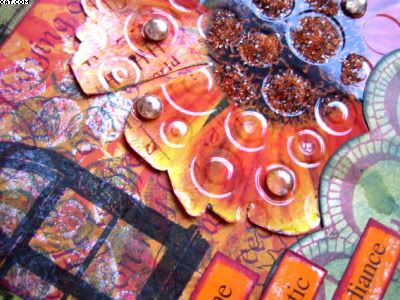
Next I pinched a glossy orange flower image from a Crafty Individuals postcard and trimmed it out edging the cut areas with orange chalk ink.  This was put through the Big Shot using a Cuttlebug circles embossing folder to provide some texture.  The flower was then loosely stuck in place with some of the petals lifted.

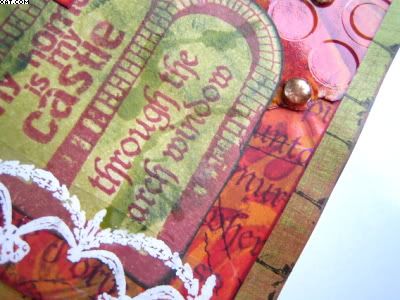
Next I stamped another Paperartsy arch in rhubarb stalk Memento ink and coloured this with shabby shutters Distress ink applied with cut'n'dry foam and then sprayed with the same colour.  This was dried with a heat gun, trimmed out and stuck in place over the flower as shown.


The white bottom border was made by stamping onto heat resistant acetate with a border stamp and Versamark ink and heat embossing with white embossing powder.  This was trimmed and applied with Glossy Accents at the base.

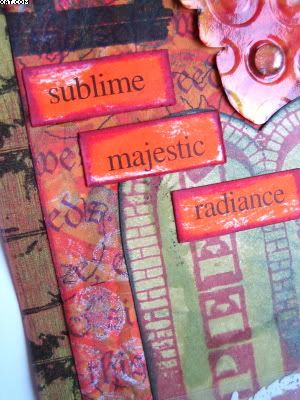
The centre of the flower was then decorated with orange glass glitter held in place with Glossy Accents and some gold Dew Drops (3d Jean) also applied with Glossy Accents.  The words were printed, trimmed out and coloured with tangerine Impress dye ink and edged with maroon chalk ink before sticking in place.


The whole plate was then edged in maroon chalk ink and matted onto a piece of Basic Grey backing paper which had been stamped with onyx black Versafine ink with a square lattice stamp from My Minds Eye.  The mat was also edged with maroon chalk ink to finish.

I wondered whether it was a bit too fussy when I finished it but when I came back to it next day it looked ok.  I think you get visual overload when working on a project from start to finish in one go !

Sid xx

Pin It
Related Posts Plugin for WordPress, Blogger...