>
Showing posts with label Fantasy Paper. Show all posts

Sunday, June 13, 2010

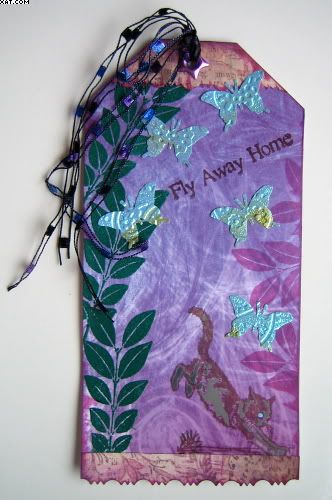
Fly Away Home Tag


Here is this weeks tag for the Rolling Recipe Challenge over on UK Stampers Forum. This weeks ingredients were:


1. Stamped image of an animal
2. Heat embossing
3. Something shiny

I cut the base tag from white card and covered this with some printed background paper. I then stamped a pouncing cat stamp (Elusive Images) with vintage sepia Versafine ink and filled in some of the detail with Souffle pens in blue and grey.
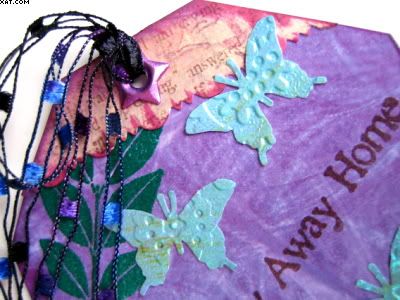


Next I inked a leaf stamp (Elusive Images) with Versamark in and stamped several times down the left hand side of the tag, heat embossing this with topiary green embossing powder.  The same stamp was inked with Memento lilac posies and stamped down the right hand side.
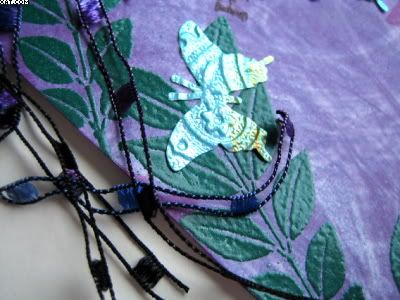


I then took some more coordinating printed paper and cut this with a pair of decorative scissors and edged with the same Memento ink before applying top and bottom of the tag with glue stick. 
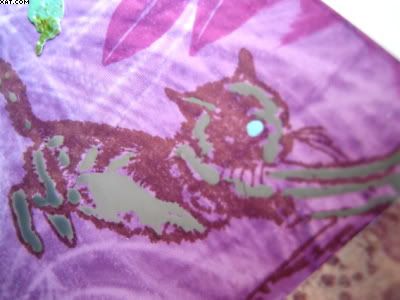


I then used a Martha Stewart punch and punched out some butterflies from fantasy paper, putting these through an embossing folder (Paisley) before sticking in place as shown.  The words were stamped in vintage sepia and also heat embossed with clear embossing powder.  Finishing touches were to apply an eyelet with the crop-a-dile and thread some decorative fibres through the hole, edging the whole tag with lilac chalk ink.

I wanted it to look like the little chap had missed pouncing on the butterflies and that they were flying away home to safety.

Sid xx

Pin It

Thursday, May 27, 2010

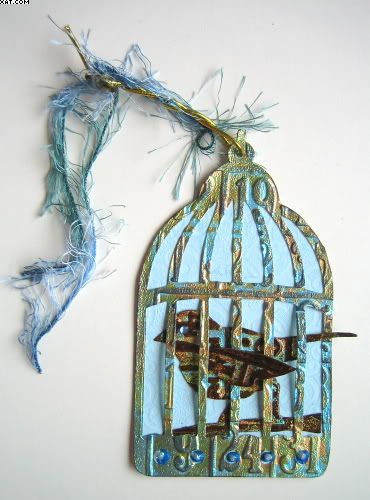
Caged Bird Tag


I used two more Sizzix products in this piece. I was recently given the Tim Holtz 'Alterations' Sizzix Caged Bird die and  I also used the 'Bingo' embossing folder.


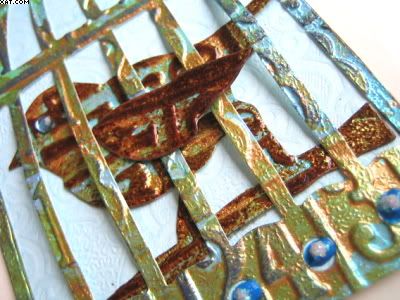
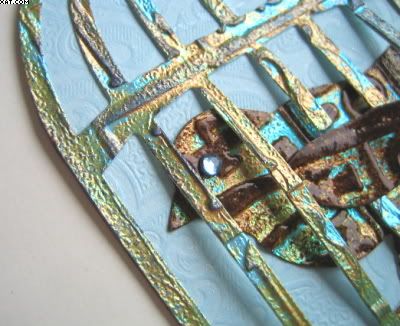
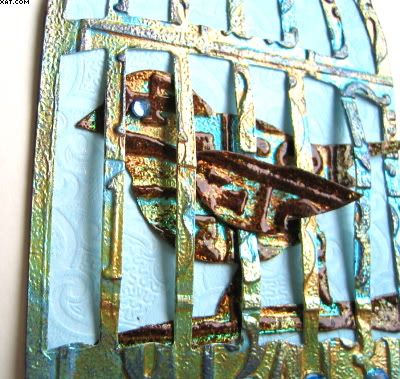
I took some more of the metallic fantasy paper I have had for such a long time and put this through the Big Shot using the embossing folder.  The numbers from the die were really popping on the metallic paper.  I then randomly dabbed over it with some gold Ranger paint dabber and rubbed off a lot with a dry paper towel.  I dried with a heat gun to set the paint.


Once dry the embossed and painted paper was put through the Big Shot again using the Caged Bird die which does such a fab job of making the cage, bird body and wing.  I next took the bird and wing and dabbed over the raised portions with a dark brown chalk pad and whilst still wet dusted over with detail clear embossing powder and heat set this carefully.  This enhanced the brown chalk ink a lot.  I next took a piece of duck-egg blue embossed card and attached the cage carefully with Glossy Accents without sticking down the central bars. This was then trimmed out around the outside of the cage.  The bird body was glued in place by sliding between the bars and the wing attached last over the bars.


I embellished the holes at the bottom of the cage with some blue dimensional paint and a blob of Stickles glitter glue and applied a self adhesive gem for an eye for the bird.  The hole at the top of the cage was threaded with gold elasticated cord wrapped around with blue eyelash fibres as the hanger.

I was originally going to put this onto another background but decided it looked good to me as it was.  Very shiny and blingy.......as I love this finish !

Sid xx 

Pin It

Monday, May 04, 2009

'Bling' Inchies

These are my 9 Inchies done for a swap. I used fantasy paper in various shades which I punched out in two sizes after stamping with a leaf stamp with Stazon Ink in Fuschia, Eden Green, Imperial Purple and Royal Blue. The centres were embellished with square acrylic gems and Stickles glitter glue. They were edged with mustard ink and backed with card to strengthen.

They are on their way to the swappers as I post this.

Hope you like them :-)

Pin It
Related Posts Plugin for WordPress, Blogger...