Just to post a pic of my entry for the November Canvas Swap organised by Trish Latimer on the talkcrafts forum It was the usual last minute dash to complete on time but I just made it.
I had the usual inspirational hiatus, but looked out of the window and saw the leaves turning their shades of red, orange and gold signifying that Autumn was with us. So I used Autumn as the theme for my artwork. This is the first canvas that I have done and found it a bit of a challenge. Now I seem to have a plethora of ideas to do more !! It's 5 x 7 inch canvas by the way.
There should be 27 participants so hopefully lots of variety and things to learn.
Monday, October 30, 2006
Sunday, October 29, 2006
Mini Stampbord Book
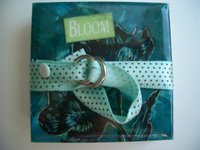
In my endeavours to use different media types. I thought I would have a go at using the fabulous Stampbord as a base for a project. I bought a sample pack of the Stampbord and the largest pieces in it were 2 x 2 inch squares. So I decided to use two of these as the back and the front of a mini book with concertina pages. I had first to decorate the squares and used Ranger Distress Inks, Stazon, a flower stamp, a word card stamped with the word 'Bloom' and UTEE (Ultra Thick Embossing Enamel).
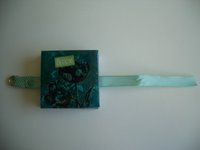
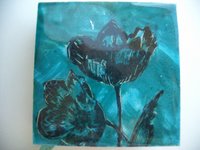
The technique was as follows: Using distress inkpads in Broken China & Pine Needles I applied ink direct to the stampbord surfaces in a random pattern to my liking and then dried thoroughly with a heat gun. I then used black Stazon and a tulip stamp from Joanna Sheens Victorian Flowers plate to stamp both pieces of stampbord. I then used a piercing tool to scrape away the outline of the tulips back to the white stampbord surface. This gave more depth to the images.
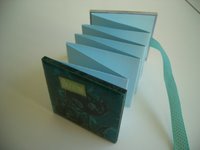
When happy I then applied three coats of UTEE to build up a good layer and on the final coat applied the bloom card so it was completely embedded in the molten UTEE. This was to be the front of the mini book. I then used light blue card and cut it into 3 strips of 1.75 x 7 inch. These I folded in half and then in half again and then stuck them together in a concertina fashion. I then took a 7 inch length of contrasting ribbon and applied this with glue to the inside of the back piece of stampbord of set to the right. I held two small metal rings in place on the short end of ribbon by folding over the end and securing with a blue brad. This ribbon will then become the fastener to hold the book together when closed.
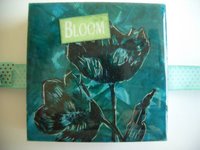
Finally the concertina folded card was glued to the inside of the front stampbord piece and over the ribbon on the back stampbord piece. At this stage I have not decorated the pages............but will use some mini images and inks to complete. I liked it so will do some more in different themes now.
Latest set of 5 ATC's
Tuesday, October 24, 2006
My entry into 'Good Old Days' CJ (UKSTAMPERS)
I am early again (by a week) !! must have had a sudden urge to meet & beat targets. I completed my entry into this CJ after wondering for a long time what exactly I should do. I plumped for a Divas theme and two colourways, one blue and one green. I used stamps from the Divas plate from www.artchixstudio.com .
I used versafine inks, Appli glue (coloured), Beadazzles, gold stars & ribbons to embellish. Also used a fan stamp and heat embossed with enchanted gold EP. All on background crackle paper.
Wednesday, October 18, 2006
My entry in 'Wild West' CJ (UKSTAMPERS)
Well here we are again, my entry in the 'Wild West' CJ was finally completed on Monday. This time I could not boast being on time and was, in fact, a week late in sending it to the next recipient.
Here are the shots of both pages and also of the full spread. I used a variety of materials including some faux suede material in tan. On the left hand page I used background paper in terra cotta with tan stars as my base and applied the suede material in a fringe. I then used some brown gingham ribbon and held it in place with gold star brads. Above the fringe I applied a colour image of cowboys and indians and mod podged it in place (applying mod podge to the whole of the area above the fringe. I then bound a number of coloured feathers together with gold wire and applied the feather plume with a brown gingham ribbon knotted bow.
The right hand page had two sewn strips of the suede material applied top and bottom above which more gingham ribbon and brads was applied. I prepared a stampbord square which had been stippled with ink and embellished with a silhouette of a lone cowboy rider applied again with mod podge, and glued in place. The words 'lone, lone on the range' were stamped and applied in strips either side of the stampbord. Three ribbons tied in knots down the right hand side of the page completed the entry.
Saturday, October 07, 2006
Heart Box
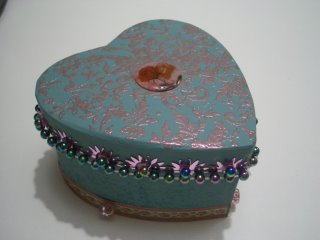
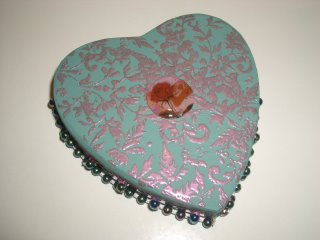
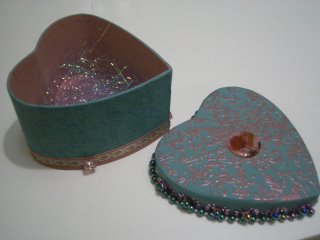
This is one of my attempts at decorating a plain heart box.
First I used acrylic paint to prepare the surface (Colonial Green for the outside and French Mauve for the inside and base - both DecoArt Americana collection). I then used a fine leaf design stamp and stamped the top of the lid with Versamark and heat embossed with Pink Pearls EP (ensuring that the inside surface of the lid was well supported to afford a flat surface for the stamp before embossing).
Next I applied a string of blue/green metallic beads to the lid edge with a hot glue gun at small intervals. I cut pink flower sequins in half and applied the halves to the lid edge behing the beads. I cut extra beads from the string and applied these with pink 'pearly doodles' around the lid edge.
When dry I applied an acrylic rose motif to the centre of the top of the lid. I used Adirondack 'bottle' ink and a natural sponge to stipple an all-over pattern on the sides of the base of the box, drying with a heat gun.
I applied a printed satin ribbon to the bottom of the box side and used the hot glue gun to apply silver and pink flower beads at intervals. Finally filled the inside of the box with Stewart Gill Glitterati Filaments (Astral Blue).
Latest ATC set
I have just completed this set of three ATC's, to be sent to another male swap friend in Australia. The theme is 'Chinese'. I have used similar materials in each case to keep the theme intact.
In all I used EP chinese gold, stamping with Adirondack (espresso), Stazon (blazing red), Acrylic paints (lime green, pink, fern & orange), gold backing paper, vellum, stamps from www.tandastamps.co.uk 'Far East Plate 3', fly image and Japanese lady with parasol, vellum, square bronze brads, peel-off clear squares & decorative fibres.
The weather has been dreadful today here in Manchester today so I stayed in and crafted to my hearts content. Should have seen the state of the kitchen at 6pm !!! more craft stuff about 3 inches deep on every surface.........so had a ready meal, (after clearing the space in front of the microwave).
C'est la vie !!!